EN 14869-2:2011
(Main)Structural adhesives - Determination of shear behaviour of structural bonds - Part 2: Thick adherends shear test (ISO 11003-2:2001, modified)
Structural adhesives - Determination of shear behaviour of structural bonds - Part 2: Thick adherends shear test (ISO 11003-2:2001, modified)
This European Standard specifies a test method for determining the shear behaviour of an adhesive in a single lap joint bonded assembly when subjected to a tensile force.
The test is performed on specimens consisting of thick, rigid adherends, with a short length of overlap, in order to obtain the most uniform distribution of shear stresses possible and to minimize other stress states which initiate failure.
This test method may be used to determine:
- the shear-stress against shear-strain curve to failure of the adhesive;
- the shear modulus of the adhesive;
- other adhesive properties that can be derived from the stress/strain curve such as the maximum shear stress and shear strain;
- the effect of temperature, environment, test speed, etc. on these properties.
Strukturklebstoffe - Bestimmung des Scherverhaltens struktureller Klebungen - Teil 2: Scherprüfung für dicke Fügeteile (ISO 11003-2:2001, modifiziert)
Diese Europäische Norm legt ein Prüfverfahren zur Bestimmung des Scherverhaltens eines Klebstoffes in einer einfach überlappten Klebverbindung fest, die einer Zugkraft ausgesetzt wird.
Um eine möglichst gleichmäßige Schubspannungsverteilung zu erhalten und weitere Spannungszustände, die zu einem Versagen führen, zu minimieren, wird die Prüfung mit Proben durchgeführt, die aus dicken, starren Fügeteilen mit kurzer Überlappungslänge bestehen.
Dieses Prüfverfahren lässt sich anwenden zur Bestimmung:
- der Kurve aus Schubspannung und -dehnung bis zum Versagen des Klebstoffes;
- des Schubmoduls des Klebstoffes;
- weiterer Klebstoffeigenschaften, die aus der Spannungs-Dehnungs-Kurve abgeleitet werden können, wie zum Beispiel die maximale Schubspannung und Schubdehnung;
- der Wirkung von Temperatur, Umgebung, Prüfgeschwindigkeit usw. auf diese Eigenschaften.
Adhésifs structuraux - Détermination du comportement en cisaillement d'adhésifs structuraux - Partie 2 : Méthode d'essai en traction sur éprouvette épaisse (ISO 11003-2:2001, modifié)
La présente Norme européenne spécifie une méthode d'essai pour la détermination du comportement en
cisaillement d'un adhésif dans un assemblage collé à recouvrement simple lorsque celui-ci est soumis à un
effort de traction.
L'essai est effectué sur des éprouvettes constituées de supports épais et rigides, la longueur de recouvrement
étant faible, afin d'obtenir une répartition des contraintes de cisaillement la plus uniforme possible et de limiter
d'autres états de contraintes qui initient la rupture.
Cette méthode d’essai peut être utilisée pour déterminer :
⎯ la courbe de résistance au cisaillement en fonction de la déformation jusqu’à la rupture ;
⎯ le module d’élasticité en cisaillement de l'adhésif ;
⎯ toutes autres caractéristiques susceptibles d'être dérivées de la courbe contrainte/déformation, telles que
la contrainte de cisaillement et la résistance au cisaillement maximales ;
⎯ l'effet de la température, de l'environnement, de la vitesse d'essai, etc., sur ces caractéristiques.
Konstrukcijska lepila - Določanje strižnih lastnosti konstrukcijskih spojev - 2. del: Strižno preskušanje debelih lepljencev (ISO 11003-2:2001, spremenjen)
Ta evropski standard določa preskusno metodo za določanje strižnih lastnosti lepila v enojnem prekrivnem spoju pri izpostavitvi natezni sili.
Preskus se izvaja na vzorcih, sestavljenih iz debelih, togih lepljencev s kratko dolžino prekrivanja, da se pridobi čim enotnejša porazdelitev strižnih napetosti in zmanjšajo druga stresna stanja, ki sprožijo okvaro.
Ta preskusna metoda se lahko uporablja za določanje:
- krivulje strižne napetosti glede na strižno deformacijo za odpoved lepila;
- strižnega modula lepila;
- drugih lepilnih lastnosti, ki se lahko izpeljejo iz krivulje napetost/deformacija, kot sta maksimalna strižna napetost in strižna deformacija;
- učinka temperature, okolja, preskusne hitrosti itd. na te lastnosti.
General Information
- Status
- Published
- Publication Date
- 10-May-2011
- Withdrawal Date
- 29-Nov-2011
- Technical Committee
- CEN/TC 193 - Adhesives
- Drafting Committee
- CEN/TC 193/WG 2 - Structural adhesives
- Current Stage
- 9093 - Decision to confirm - Review Enquiry
- Start Date
- 12-Jul-2023
- Completion Date
- 11-Feb-2026
Not Harmonized89/106/EEC - Construction products
Relations
- Effective Date
- 20-Feb-2010
- Effective Date
- 09-Feb-2026
- Effective Date
- 28-Jan-2026
- Effective Date
- 28-Jan-2026
- Effective Date
- 28-Jan-2026
- Effective Date
- 28-Jan-2026
- Effective Date
- 28-Jan-2026
- Referred By
EN 17460:2022 - Railway applications - Adhesive bonding of rail vehicles and their components - Effective Date
- 28-Jan-2026
- Effective Date
- 28-Jan-2026
Overview
EN 14869-2:2011 - published by CEN (May 2011) - specifies a laboratory test method for determining the shear behaviour of structural adhesives in a single-lap bonded assembly using the thick adherends shear test (ISO 11003-2:2001, modified). The method uses specimens with thick, rigid adherends and a short overlap to achieve the most uniform shear-stress distribution possible and to minimize secondary stress states that could initiate failure.
Key measurable outcomes:
- Shear stress vs. shear strain curve to failure
- Shear modulus of the adhesive
- Maximum shear stress and shear strain
- Influence of temperature, environment and test speed on shear properties
Key Topics and Technical Requirements
- Specimen types: flat-ended adherends or machined stepped adherends; bond thickness ≥ 0.05 mm.
- Number of tests: at least five specimens per adhesive/condition.
- Apparatus & accuracy:
- Tensile testing machine sized so fracture force is 10–80% of transducer full scale.
- Force transducer accuracy: 1% at shear strain = 0.01.
- Extensometers (one or two) to measure central shear displacement; displacement accuracy ~1 µm. Two extensometers are recommended to average out twisting.
- Micrometer and optical microscope for dimensional checks (accuracies given in the standard).
- Test conditions:
- Test temperature per EN ISO 291 standard atmospheres.
- Recommended machine speed for inter-material comparison: 0.5 mm/min.
- Measurements & calculations: overlap length, width, bond thickness, force and displacement are recorded continuously; shear stress and strain calculated from bond dimensions to produce stress–strain curves and compute shear modulus.
Applications and Who Uses It
This standard is practical for:
- Adhesive manufacturers (product development and batch verification)
- Materials and mechanical engineers (joint design validation)
- Independent test laboratories and quality control teams
- Sectors relying on structural bonding: automotive, aerospace, rail, marine, construction, and industrial assembly
Use cases:
- Comparing adhesive formulations
- Quantifying environmental/temperature effects on bond performance
- Providing test data for structural joint design and failure-mode analysis
Related Standards
EN 14869-2 references and aligns with other normative documents, for example:
- EN 923 (Adhesives - Terms and definitions)
- EN 13887 (Surface preparation guidelines)
- EN ISO 291 (Conditioning/testing atmospheres)
- EN ISO 10365 (Failure pattern designation)
- ISO 683-11, ISO 1052, ISO 4995 (adherend steel specifications)
EN 14869-2:2011 is suitable when consistent, reproducible shear-characteristic data of structural adhesives are required for design, specification, and comparative testing.
Get Certified
Connect with accredited certification bodies for this standard

Smithers Quality Assessments
US management systems and product certification.

DIN CERTCO
DIN Group product certification.
Sponsored listings
Frequently Asked Questions
EN 14869-2:2011 is a standard published by the European Committee for Standardization (CEN). Its full title is "Structural adhesives - Determination of shear behaviour of structural bonds - Part 2: Thick adherends shear test (ISO 11003-2:2001, modified)". This standard covers: This European Standard specifies a test method for determining the shear behaviour of an adhesive in a single lap joint bonded assembly when subjected to a tensile force. The test is performed on specimens consisting of thick, rigid adherends, with a short length of overlap, in order to obtain the most uniform distribution of shear stresses possible and to minimize other stress states which initiate failure. This test method may be used to determine: - the shear-stress against shear-strain curve to failure of the adhesive; - the shear modulus of the adhesive; - other adhesive properties that can be derived from the stress/strain curve such as the maximum shear stress and shear strain; - the effect of temperature, environment, test speed, etc. on these properties.
This European Standard specifies a test method for determining the shear behaviour of an adhesive in a single lap joint bonded assembly when subjected to a tensile force. The test is performed on specimens consisting of thick, rigid adherends, with a short length of overlap, in order to obtain the most uniform distribution of shear stresses possible and to minimize other stress states which initiate failure. This test method may be used to determine: - the shear-stress against shear-strain curve to failure of the adhesive; - the shear modulus of the adhesive; - other adhesive properties that can be derived from the stress/strain curve such as the maximum shear stress and shear strain; - the effect of temperature, environment, test speed, etc. on these properties.
EN 14869-2:2011 is classified under the following ICS (International Classification for Standards) categories: 83.180 - Adhesives. The ICS classification helps identify the subject area and facilitates finding related standards.
EN 14869-2:2011 has the following relationships with other standards: It is inter standard links to EN 14869-2:2004, ISO 4995:2008, EN ISO 291:2008, EN 13887:2003, EN 923:2005+A1:2008, EN ISO 10365:2022, EN 12001:2003, EN 17460:2022, EN 14258:2004. Understanding these relationships helps ensure you are using the most current and applicable version of the standard.
EN 14869-2:2011 is associated with the following European legislation: EU Directives/Regulations: 305/2011, 89/106/EEC. When a standard is cited in the Official Journal of the European Union, products manufactured in conformity with it benefit from a presumption of conformity with the essential requirements of the corresponding EU directive or regulation.
EN 14869-2:2011 is available in PDF format for immediate download after purchase. The document can be added to your cart and obtained through the secure checkout process. Digital delivery ensures instant access to the complete standard document.
Standards Content (Sample)
2003-01.Slovenski inštitut za standardizacijo. Razmnoževanje celote ali delov tega standarda ni dovoljeno.MHQStrukturklebstoffe - Bestimmung des Scherverhaltens struktureller Klebungen - Teil 2: Scherprüfung für dicke Fügeteile (ISO 11003-2:2001 Modifiziert)Adhésifs structuraux - Détermination du comportement en cisaillement d'adhésifs structuraux - Partie 2 : Méthode d'essai en traction sur éprouvette épaisse (ISO 11003-2:2001 Modifié)Structural adhesives - Determination of shear behaviour of structural bonds - Part 2: Thick adherends shear test (ISO 11003-2:2001, modified)83.180LepilaAdhesivesICS:Ta slovenski standard je istoveten z:EN 14869-2:2011SIST EN 14869-2:2011en,fr,de01-november-2011SIST EN 14869-2:2011SLOVENSKI
STANDARDSIST EN 14869-2:20041DGRPHãþD
EUROPEAN STANDARD NORME EUROPÉENNE EUROPÄISCHE NORM
EN 14869-2
May 2011 ICS 83.180 Supersedes EN 14869-2:2004English Version
Structural adhesives - Determination of shear behaviour of structural bonds - Part 2: Thick adherends shear test (ISO 11003-2:2001, modified)
Adhésifs structuraux - Détermination du comportement en cisaillement d'adhésifs structuraux - Partie 2 : Méthode d'essai en traction sur éprouvette épaisse (ISO 11003-2:2001, modifié)
Strukturklebstoffe - Bestimmung des Scherverhaltens struktureller Klebungen - Teil 2: Scherprüfung für dicke Fügeteile (ISO 11003-2:2001, modifiziert) This European Standard was approved by CEN on 10 March 2011.
CEN members are bound to comply with the CEN/CENELEC Internal Regulations which stipulate the conditions for giving this European Standard the status of a national standard without any alteration. Up-to-date lists and bibliographical references concerning such national standards may be obtained on application to the CEN-CENELEC Management Centre or to any CEN member.
This European Standard exists in three official versions (English, French, German). A version in any other language made by translation under the responsibility of a CEN member into its own language and notified to the CEN-CENELEC Management Centre has the same status as the official versions.
CEN members are the national standards bodies of Austria, Belgium, Bulgaria, Croatia, Cyprus, Czech Republic, Denmark, Estonia, Finland, France, Germany, Greece, Hungary, Iceland, Ireland, Italy, Latvia, Lithuania, Luxembourg, Malta, Netherlands, Norway, Poland, Portugal, Romania, Slovakia, Slovenia, Spain, Sweden, Switzerland and United Kingdom.
EUROPEAN COMMITTEE FOR STANDARDIZATION
COMITÉ EUROPÉEN DE NORMALISATION EUROPÄISCHES KOMITEE FÜR NORMUNG
Management Centre:
Avenue Marnix 17,
B-1000 Brussels © 2011 CEN All rights of exploitation in any form and by any means reserved worldwide for CEN national Members. Ref. No. EN 14869-2:2011: ESIST EN 14869-2:2011
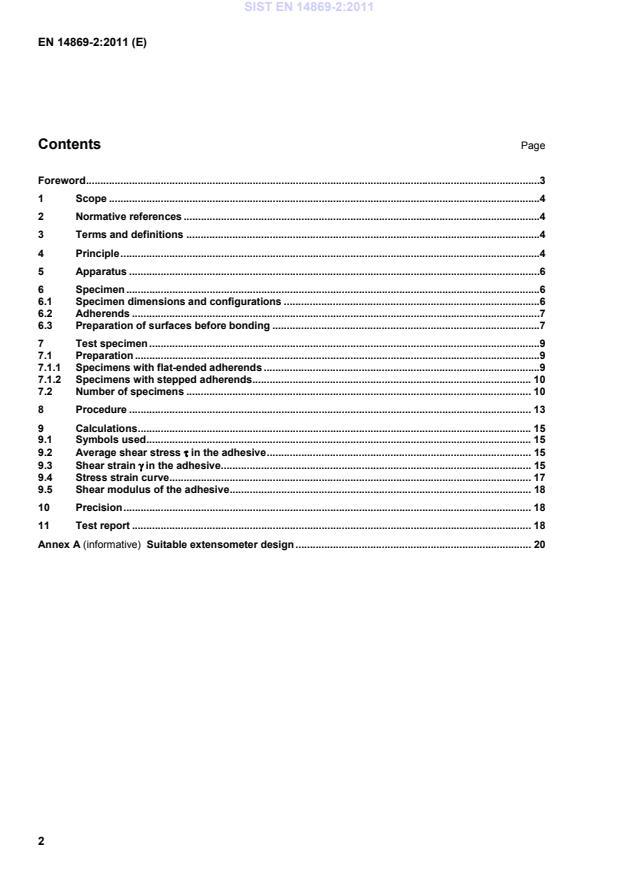
Suitable extensometer design . 20 SIST EN 14869-2:2011
Terms and definitions EN 13887, Structural Adhesives
Guidelines for surface preparation of metals and plastics prior to adhesive bonding EN ISO 291, Plastics — Standard atmospheres for conditioning and testing (ISO 291:2008) EN ISO 10365, Adhesives — Designation of main failure patterns (ISO 10365:1992) ISO 683-11, Heat-treatable steels, alloy steels and free-cutting steels — Part 11: Wrought case-hardening steels
ISO 1052, Steels for general engineering purposes ISO 4995, Hot-rolled steel sheet of structural quality 3 Terms and definitions For the purposes of this document, the terms and definitions given in EN 923:2005+A1:2008 apply. 4 Principle An adhesively bonded test specimen (see Figure 1) is subjected to a tensile force so that the adhesive is stressed in shear. SIST EN 14869-2:2011
Key a) Bonded adherends b) Machined adherends 1 Adhesive bond b Width of adhesive l Length of adhesive Figure 1 — Specimen dimensions and configuration SIST EN 14869-2:2011
For this purpose, the simple universal-joint design shown in Figure 2 is satisfactory. 5.3 Force transducer, capable of measuring the force in the specimen with an accuracy of 1 % of the force at a shear strain of 0,01. 5.4 One or two extensometers (see Note 2), for measuring the shear displacement between points of known separation on each adherend in the central region of the bond (see Figure 3 and Annex A).
The points of contact with the adherends shall be within a distance of 2 mm from the bonded faces. The device(s) shall be capable of measuring the shear displacement to an accuracy of 1 µm. NOTE 1 During loading, each adherend will bend slightly, leading to a small rotation of the central (bonded) region of the test specimen. In order to achieve high accuracy in displacement measurements, the extensometer(s) should rotate with the specimen. This has been achieved in the design shown in Figure 3 by double-pin contact with one of the adherends. NOTE 2 The use of two extensometers on opposing faces of the specimen is recommended to minimize, by averaging the extensometer readings, any contribution to measurements from a twisting moment applied to the specimen. The use of two extensometers will also serve to indicate any malfunctioning of one of the extensometers as revealed by significantly different readings from the two devices. 5.5 Data-logging equipment, to continuously record the relative displacement of the adherends and the applied load, from the start of application of the load until the specimen breaks. 5.6 Micrometer, having an accuracy of better than 0,002 mm, to measure the dimensions of the adherends. 5.7 Optical microscope, having an accuracy of better than 0,002 mm, to measure the thickness of the adhesive bond when the specimen configuration shown in Figure 1a) is used. 6 Specimen 6.1 Specimen dimensions and configurations Specimens shall be prepared either by bonding metal plates or strips together to produce the configuration shown in Figure 1a) or by bonding adherends that have been machined to the shape shown in Figure 1b). The dimensions of the specimen are given in F
...


Questions, Comments and Discussion
Ask us and Technical Secretary will try to provide an answer. You can facilitate discussion about the standard in here.
Loading comments...