ASTM E646-16
(Test Method)Standard Test Method for Tensile Strain-Hardening Exponents (n -Values) of Metallic Sheet Materials
Standard Test Method for Tensile Strain-Hardening Exponents (<emph type="bdit">n</emph > -Values) of Metallic Sheet Materials
SIGNIFICANCE AND USE
5.1 This test method is useful for estimating the strain at the onset of necking in a uniaxial tension test (1). Practically, it provides an empirical parameter for appraising the relative stretch formability of similar metallic systems. The strain-hardening exponent is also a measure of the increase in strength of a material due to plastic deformation.
5.2 The strain-hardening exponent may be determined over the entire plastic stress-strain curve or any portion(s) of the stress-strain curve specified in a product specification.
Note 4: The engineering strain interval 10–20% is commonly used for determining the strain-hardening exponent, n, of formable low-carbon steel products
5.3 This test method is not intended to apply to any portion of the true stress versus true strain curve that exhibits discontinuous behavior; however, the method may be applied by curve-smoothing techniques as agreed upon.
Note 5: For example, those portions of the stress-strain curves for mild steel, aluminum, or other alloys that exhibit yield point and Lüders band elongation, twinning, or Portevin–Le Chatelier effect (PLC) may be characterized as behaving discontinuously.
Note 6: Caution should be observed in the use of curve-smoothing techniques as they may affect the n-value.
5.4 This test method is suitable for determining the tensile stress-strain response of metallic sheet materials in the plastic region prior to the onset of necking.
5.5 The n-value may vary with the displacement rate or strain rate used, depending on the metal and test temperature.
SCOPE
1.1 This test method covers the determination of a strain-hardening exponent by tension testing of metallic sheet materials for which plastic-flow behavior obeys the power curve given in the Introduction.
Note 1: A single power curve may not be a satisfactory fit to the entire stress-strain curve between yield and necking. If such is the case, more than one value of the strain-hardening exponent may be obtained (2) by agreement using this test method.
1.2 This test method is specifically for metallic sheet materials with thicknesses of at least 0.005 in. (0.13 mm) but not greater than 0.25 in. (6.4 mm). The method has successfully been and may be applied to other forms and thicknesses by agreement
1.3 The values stated in inch-pound units are to be regarded as standard. The values given in parentheses are mathematical conversions to SI units that are provided for information only and are not considered standard.
Note 2: The value of the strain-hardening exponent, n, has no units and is independent of the units used in its determination
1.4 This standard does not purport to address all of the safety concerns, if any, associated with its use. It is the responsibility of the user of this standard to establish appropriate safety and health practices and determine the applicability of regulatory limitations prior to use.
General Information
- Status
- Published
- Publication Date
- 31-Jan-2016
- Technical Committee
- E28 - Mechanical Testing
- Drafting Committee
- E28.02 - Ductility and Formability
Relations
- Effective Date
- 01-Feb-2016
- Effective Date
- 01-Jan-2024
- Effective Date
- 15-Jul-2016
- Effective Date
- 01-Feb-2015
- Effective Date
- 01-Jun-2014
- Effective Date
- 01-May-2014
- Effective Date
- 01-Jun-2013
- Effective Date
- 01-May-2013
- Effective Date
- 01-May-2013
- Effective Date
- 01-Dec-2011
- Effective Date
- 01-Nov-2011
- Effective Date
- 01-Oct-2010
- Refers
ASTM E111-04(2010) - Standard Test Method for Young's Modulus, Tangent Modulus, and Chord Modulus - Effective Date
- 15-Sep-2010
- Effective Date
- 01-Jun-2010
- Effective Date
- 01-Jun-2010
Overview
ASTM E646-16: Standard Test Method for Tensile Strain-Hardening Exponents (n-Values) of Metallic Sheet Materials is a critical standard developed by ASTM International. This test method specifies how to determine the tensile strain-hardening exponent-commonly referred to as the n-value-for metallic sheet materials. The strain-hardening exponent is an essential property, representing the material’s ability to strengthen during plastic deformation. It serves as an empirical parameter for evaluating and comparing the stretch formability and work-hardening behavior of similar metallic systems.
This standard is designed for metallic sheets with thicknesses ranging from 0.005 in. (0.13 mm) to 0.25 in. (6.4 mm), but it may be extended to other forms and thicknesses by agreement.
Key Topics
Significance of n-Value
- The n-value provides insight into the increase in material strength due to plastic deformation.
- It is widely used to estimate the strain at necking onset in uniaxial tension, which is crucial for sheet metal forming processes.
- Higher n-values typically indicate improved stretch formability.
Test Scope
- Applicable to metallic sheet materials exhibiting continuous plastic-flow behavior that can be represented by a power law curve in a stress-strain test.
- Not valid for curve regions with discontinuous behavior (e.g., yield point elongation, twinning), unless curve-smoothing is applied by agreement.
Strain Interval
- Typically, the engineering strain interval of 10–20% is used for formable low-carbon steels.
- The n-value may be determined over the entire or partial plastic stress-strain curve, as specified in product specifications.
Variables Affecting Results
- Strain rate and test temperature can influence n-value outcomes, emphasizing the need for consistent test conditions.
Applications
Material Selection and Design
- The strain-hardening exponent is critical in choosing sheet metals for automotive body panels, appliances, and structural components where formability is a priority.
- n-Value data guides the development of alloys with optimal balance between formability and strength.
Quality Control and Comparison
- Enables manufacturers and suppliers to compare the deformation characteristics of different metallic sheet batches or grades.
- Supports compliance with customer or regulatory specifications for metal products.
Research and Development
- Fundamental for studying the mechanical properties of new metallic alloys and improving forming processes.
- Aids in calibrating material models used in finite element simulations for metal forming.
Process Optimization
- Helps engineers adjust forming parameters to minimize defects such as necking and fracture in stamped or drawn parts.
Related Standards
- ASTM E8/E8M – Test Methods for Tension Testing of Metallic Materials: Defines general procedures for tensile tests.
- ASTM E4 – Practices for Force Verification of Testing Machines: Ensures accuracy of testing equipment.
- ASTM E83 – Practice for Verification and Classification of Extensometer Systems: Specifies requirements for strain measurement devices.
- ASTM E29 – Practice for Using Significant Digits in Test Data: Provides rules for rounding and reporting of test values.
- ASTM E111 – Test Method for Young’s Modulus, Tangent Modulus, and Chord Modulus: Details stiffness measurement in metals.
- ISO 10275:2007 – Metallic materials - Sheet and strip - Determination of tensile strain hardening exponent: International standard closely aligned with ASTM E646.
The ASTM E646-16 standard is integral for industries reliant on metallic sheet forming, ensuring consistent, comparable, and reliable measures of material formability and work-hardening behavior. Adhering to this test method enhances material selection, product quality, and process control, supporting both manufacturing efficiency and innovation in metal forming applications.
Buy Documents
ASTM E646-16 - Standard Test Method for Tensile Strain-Hardening Exponents (<emph type="bdit">n</emph > -Values) of Metallic Sheet Materials
REDLINE ASTM E646-16 - Standard Test Method for Tensile Strain-Hardening Exponents (<emph type="bdit">n</emph > -Values) of Metallic Sheet Materials
Get Certified
Connect with accredited certification bodies for this standard

Element Materials Technology
Materials testing and product certification.

Inštitut za kovinske materiale in tehnologije
Institute of Metals and Technology. Materials testing, metallurgical analysis, NDT.
Sponsored listings
Frequently Asked Questions
ASTM E646-16 is a standard published by ASTM International. Its full title is "Standard Test Method for Tensile Strain-Hardening Exponents (<emph type="bdit">n</emph > -Values) of Metallic Sheet Materials". This standard covers: SIGNIFICANCE AND USE 5.1 This test method is useful for estimating the strain at the onset of necking in a uniaxial tension test (1). Practically, it provides an empirical parameter for appraising the relative stretch formability of similar metallic systems. The strain-hardening exponent is also a measure of the increase in strength of a material due to plastic deformation. 5.2 The strain-hardening exponent may be determined over the entire plastic stress-strain curve or any portion(s) of the stress-strain curve specified in a product specification. Note 4: The engineering strain interval 10–20% is commonly used for determining the strain-hardening exponent, n, of formable low-carbon steel products 5.3 This test method is not intended to apply to any portion of the true stress versus true strain curve that exhibits discontinuous behavior; however, the method may be applied by curve-smoothing techniques as agreed upon. Note 5: For example, those portions of the stress-strain curves for mild steel, aluminum, or other alloys that exhibit yield point and Lüders band elongation, twinning, or Portevin–Le Chatelier effect (PLC) may be characterized as behaving discontinuously. Note 6: Caution should be observed in the use of curve-smoothing techniques as they may affect the n-value. 5.4 This test method is suitable for determining the tensile stress-strain response of metallic sheet materials in the plastic region prior to the onset of necking. 5.5 The n-value may vary with the displacement rate or strain rate used, depending on the metal and test temperature. SCOPE 1.1 This test method covers the determination of a strain-hardening exponent by tension testing of metallic sheet materials for which plastic-flow behavior obeys the power curve given in the Introduction. Note 1: A single power curve may not be a satisfactory fit to the entire stress-strain curve between yield and necking. If such is the case, more than one value of the strain-hardening exponent may be obtained (2) by agreement using this test method. 1.2 This test method is specifically for metallic sheet materials with thicknesses of at least 0.005 in. (0.13 mm) but not greater than 0.25 in. (6.4 mm). The method has successfully been and may be applied to other forms and thicknesses by agreement 1.3 The values stated in inch-pound units are to be regarded as standard. The values given in parentheses are mathematical conversions to SI units that are provided for information only and are not considered standard. Note 2: The value of the strain-hardening exponent, n, has no units and is independent of the units used in its determination 1.4 This standard does not purport to address all of the safety concerns, if any, associated with its use. It is the responsibility of the user of this standard to establish appropriate safety and health practices and determine the applicability of regulatory limitations prior to use.
SIGNIFICANCE AND USE 5.1 This test method is useful for estimating the strain at the onset of necking in a uniaxial tension test (1). Practically, it provides an empirical parameter for appraising the relative stretch formability of similar metallic systems. The strain-hardening exponent is also a measure of the increase in strength of a material due to plastic deformation. 5.2 The strain-hardening exponent may be determined over the entire plastic stress-strain curve or any portion(s) of the stress-strain curve specified in a product specification. Note 4: The engineering strain interval 10–20% is commonly used for determining the strain-hardening exponent, n, of formable low-carbon steel products 5.3 This test method is not intended to apply to any portion of the true stress versus true strain curve that exhibits discontinuous behavior; however, the method may be applied by curve-smoothing techniques as agreed upon. Note 5: For example, those portions of the stress-strain curves for mild steel, aluminum, or other alloys that exhibit yield point and Lüders band elongation, twinning, or Portevin–Le Chatelier effect (PLC) may be characterized as behaving discontinuously. Note 6: Caution should be observed in the use of curve-smoothing techniques as they may affect the n-value. 5.4 This test method is suitable for determining the tensile stress-strain response of metallic sheet materials in the plastic region prior to the onset of necking. 5.5 The n-value may vary with the displacement rate or strain rate used, depending on the metal and test temperature. SCOPE 1.1 This test method covers the determination of a strain-hardening exponent by tension testing of metallic sheet materials for which plastic-flow behavior obeys the power curve given in the Introduction. Note 1: A single power curve may not be a satisfactory fit to the entire stress-strain curve between yield and necking. If such is the case, more than one value of the strain-hardening exponent may be obtained (2) by agreement using this test method. 1.2 This test method is specifically for metallic sheet materials with thicknesses of at least 0.005 in. (0.13 mm) but not greater than 0.25 in. (6.4 mm). The method has successfully been and may be applied to other forms and thicknesses by agreement 1.3 The values stated in inch-pound units are to be regarded as standard. The values given in parentheses are mathematical conversions to SI units that are provided for information only and are not considered standard. Note 2: The value of the strain-hardening exponent, n, has no units and is independent of the units used in its determination 1.4 This standard does not purport to address all of the safety concerns, if any, associated with its use. It is the responsibility of the user of this standard to establish appropriate safety and health practices and determine the applicability of regulatory limitations prior to use.
ASTM E646-16 is classified under the following ICS (International Classification for Standards) categories: 77.140.50 - Flat steel products and semi-products. The ICS classification helps identify the subject area and facilitates finding related standards.
ASTM E646-16 has the following relationships with other standards: It is inter standard links to ASTM E646-15, ASTM E8/E8M-24, ASTM E8/E8M-16, ASTM E8/E8M-15, ASTM E4-14, ASTM E177-14, ASTM E8/E8M-13, ASTM E177-13, ASTM E691-13, ASTM E8/E8M-11, ASTM E691-11, ASTM E177-10, ASTM E111-04(2010), ASTM E83-10a, ASTM E4-10. Understanding these relationships helps ensure you are using the most current and applicable version of the standard.
ASTM E646-16 is available in PDF format for immediate download after purchase. The document can be added to your cart and obtained through the secure checkout process. Digital delivery ensures instant access to the complete standard document.
Standards Content (Sample)
This international standard was developed in accordance with internationally recognized principles on standardization established in the Decision on Principles for the
Development of International Standards, Guides and Recommendations issued by the World Trade Organization Technical Barriers to Trade (TBT) Committee.
Designation: E646 − 16
Standard Test Method for
Tensile Strain-Hardening Exponents (n -Values) of Metallic
Sheet Materials
This standard is issued under the fixed designation E646; the number immediately following the designation indicates the year of
original adoption or, in the case of revision, the year of last revision. A number in parentheses indicates the year of last reapproval. A
superscript epsilon (´) indicates an editorial change since the last revision or reapproval.
INTRODUCTION
This test method for determining tensile strain-hardening exponents n utilizes stress-stain data
obtained in a uniaxial tension test. Tensile data are obtained in a continuous and rate-controlled
manner via displacement or strain control. The strain-hardening exponents are determined from an
empirical representation over the range of interest of the true-stress versus true-strain curve. The
mathematical representation used in this method is a power curve (Note 1) of the form (1) :
n
σ = Kε
where:
σ = true stress,
ε = plastic component of true strain, but in special cases may be the total true strain. (See 10.2),
K = is a constant, often called the strength coefficient having the units of stress, and
n = strain-hardening exponent
1. Scope* 1.4 This standard does not purport to address all of the
safety concerns, if any, associated with its use. It is the
1.1 This test method covers the determination of a strain-
responsibility of the user of this standard to establish appro-
hardening exponent by tension testing of metallic sheet mate-
priate safety and health practices and determine the applica-
rials for which plastic-flow behavior obeys the power curve
bility of regulatory limitations prior to use.
given in the Introduction.
NOTE1—Asinglepowercurvemaynotbeasatisfactoryfittotheentire
2. Referenced Documents
stress-strain curve between yield and necking. If such is the case, more
than one value of the strain-hardening exponent may be obtained (2) by 2.1 ASTM Standards:
agreement using this test method.
E4 Practices for Force Verification of Testing Machines
E6 Terminology Relating to Methods of Mechanical Testing
1.2 This test method is specifically for metallic sheet mate-
E8/E8M Test Methods for Tension Testing of Metallic Ma-
rials with thicknesses of at least 0.005 in. (0.13 mm) but not
terials
greater than 0.25 in. (6.4 mm). The method has successfully
E29 Practice for Using Significant Digits in Test Data to
been and may be applied to other forms and thicknesses by
Determine Conformance with Specifications
agreement
E83 Practice for Verification and Classification of Exten-
1.3 The values stated in inch-pound units are to be regarded
someter Systems
as standard. The values given in parentheses are mathematical
E111 Test Method for Young’s Modulus, Tangent Modulus,
conversions to SI units that are provided for information only
and Chord Modulus
and are not considered standard.
E177 Practice for Use of the Terms Precision and Bias in
ASTM Test Methods
NOTE 2—The value of the strain-hardening exponent, n, has no units
and is independent of the units used in its determination
E691 Practice for Conducting an Interlaboratory Study to
Determine the Precision of a Test Method
2.2 ISO Standard
ISO 10275:2007 Metallic materials -- Sheet and strip --
This test method is under the jurisdiction of ASTM Committee E28 on
Mechanical Testing and is the direct responsibility of Subcommittee E28.02 on Determination of tensile strain hardening exponent
Ductility and Formability.
Current edition approved Feb. 1, 2016. Published March 2016. Originally
approved in 1978. Last previous edition approved in 2015 as E646 - 15. DOI: For referenced ASTM standards, visit the ASTM website, www.astm.org, or
10.1520/E0646-16 contact ASTM Customer Service at service@astm.org. For Annual Book of ASTM
The boldface numbers in parentheses refer to the list of references appended to Standards volume information, refer to the standard’s Document Summary page on
this method. the ASTM website.
*A Summary of Changes section appears at the end of this standard
Copyright © ASTM International, 100 Barr Harbor Drive, PO Box C700, West Conshohocken, PA 19428-2959. United States
E646 − 16
range for metallic sheet material for which the true-stress true-strain data
3. Terminology
follow the stated relationship.
3.1 For definitions of other terms used in this test method,
5. Significance and Use
refer to E6 (Standard Terminology Relating to Methods of
Mechanical Testing).
5.1 This test method is useful for estimating the strain at the
onset of necking in a uniaxial tension test (1). Practically, it
3.2 Definitions:
provides an empirical parameter for appraising the relative
3.2.1 elastic true strain, ɛ,n—elastic component of the
e
stretch formability of similar metallic systems. The strain-
true strain.
hardening exponent is also a measure of the increase in
3.2.2 engineering strain, e, n—a dimensionless value that is
strength of a material due to plastic deformation.
the change in length (∆L) per unit length of original linear
5.2 The strain-hardening exponent may be determined over
dimension (L ) along the loading axis of the specimen; that is,
the entire plastic stress-strain curve or any portion(s) of the
e= ∆L/L .
-2 stress-strain curve specified in a product specification.
3.2.3 engineering stress, S [FL ], n—the normal stress,
NOTE 4—The engineering strain interval 10–20% is commonly used for
expressed in units of applied force, F per unit of original
determining the strain-hardening exponent, n, of formable low-carbon
cross-sectional area, A ; that is, S = F/A
0 0 steel products
3.2.4 necking, n—the onset of nonuniform or localized
5.3 This test method is not intended to apply to any portion
plastic deformation, resulting in a localized reduction of
of the true stress versus true strain curve that exhibits discon-
cross-sectional area.
tinuous behavior; however, the method may be applied by
curve-smoothing techniques as agreed upon.
3.2.5 plastic true strain, ɛ,n—the inelastic component of
p
true strain.
NOTE 5—For example, those portions of the stress-strain curves for
mild steel, aluminum, or other alloys that exhibit yield point and Lüders
3.2.6 strain hardening, n—an increase in hardness and
band elongation, twinning, or Portevin–Le Chatelier effect (PLC) may be
strength caused by plastic deformation.
characterized as behaving discontinuously.
3.2.7 true strain, ɛ,n—the natural logarithm of the ratio of
NOTE 6—Caution should be observed in the use of curve-smoothing
techniques as they may affect the n-value.
instantaneous gauge length, L, to the original gauge length, L ;
that is, ɛ=ln(L/L)or ɛ=ln(1+e).
0 5.4 This test method is suitable for determining the tensile
-2
stress-strain response of metallic sheet materials in the plastic
3.2.8 true stress, σ [FL ], n—the instantaneous normal
region prior to the onset of necking.
stress, calculated on the basis of the instantaneous cross-
sectional area, A; that is, σ = F/A; if no necking has occurred,
5.5 The n-value may vary with the displacement rate or
σ=S(1+e).
strain rate used, depending on the metal and test temperature.
3.3 Definitions of Terms Specific to This Standard:
6. Apparatus
3.3.1 strain-hardening exponent (n), n—an experimental
6.1 Testing Machines—Machines used for tension testing
constant, computed from the least squares best fit, linear slope
shall conform to the requirements of Practices E4. The forces
of log σ versus log ε data over a specific strain range where ε
used to determine stress shall be within the force range of the
is the plastic component of true strain, but in special cases may
testing machine as defined in Practices E4.
be the total true strain (see 10.2).
–2
6.2 Strain-Measurement Equipment—Equipment for mea-
3.3.2 strength coeffıcient (K) [FL ], n—an experimental
surement of extension shall conform to the requirements of
constant, computed from the fit of the data to the assumed
Class C or better as defined in Practice E83.
powercurve,thatisnumericallyequaltotheextrapolatedvalue
of true stress at a true strain of 1.00.
7. Sampling
7.1 Samples shall be taken from the material as specified in
4. Summary of Test Method
the applicable product specification.
4.1 This test method applies to materials exhibiting a
8. Test Specimens
continuous stress-strain curve in the plastic region. The dis-
placement or strain is applied in a continuous and rate-
8.1 Selection and Preparation of Specimens:
controlled manner while the normal tensile load and strain are
8.1.1 In the selection of specimen blanks, special care shall
monitored. The instantaneous cross-sectional area may be
be taken to assure obtaining representative material that is flat
monitored or calculated by assuming constancy of volume in
and uniform in thickness.
the plastic region. Equations are presented that permit the
8.1.2 In the preparation of specimens, special care shall be
calculation of the true stress, σ, true strain, ε, strain-hardening
taken to prevent the introduction of residual stresses.
exponent, n, and strength coefficient, K, for that continuous
8.2 Dimensions—Recommended metallic sheet specimen
portionofthetrue-stressversustrue-straincurvewhichfollows
configurations are shown in Fig. 1. Specimen configurations
the empirical relationships described.
shall have sides parallel to 0.001 in. and dimensions shall be
NOTE 3—This test method is recommended for use only in the plastic reported as stated in 11.1.6.
E646 − 16
Dimensions
Required Dimensions for Reduced Section of Specimen
Dimensions
in. mm
G Gage length 2.000 ± 0.005 50.0 ± 0.10
A
W Width 0.500 ± 0.010 12.5 ± 0.25
B
T Thickness thickness of material
R Radius of fillet, min ⁄2 13
L Overall length, min 8 200
A Length of reduced section, min 2 ⁄4 60
B Length of grip section, min 2 50
Suggested Dimensions for Ends of Specimen
“Plain-End” Specimens
Cand D
C Width of grip section ⁄4 20
“Pin-End” Specimens
E
C Width of grip section, approximate 250
F 1
D Diameter of hole for pin ⁄2 13
E Distance of center of pin from end, ap- 1 ⁄2 38
proximate
F Distance of edge of hole from fillet, min ⁄2 13
A
The width of the reduced section shall be parallel to within ±0.001 in. (±0.025 mm).
B
The thickness of the reduced section shall not vary by more than ±0.0005 in. (0.013 mm) or 1 %, whichever is larger, within the gage length, G.
C
It is desirable, if possible, that the grip sections be long enough to extend into the grips a distance equal to two-thirds or more the length of the grips.
D
Narrower grip sections may be used. If desired, the width may be 0.500± 0.010 in. (12.5 ± 0.25 mm) throughout the length of the specimen, but the requirement for
dimensional tolerance in the central reduced section stated in footnoteAshall apply. The ends of the specimen shall be symmetrical with the center line of the reduced
section within 0.01 in. (0.25 mm).
E
The ends of the specimen shall be symmetrical with the center line of the reduced section within 0.01 in. (0.25 mm).
F
Holes shall be on the centerline of the reduced section, within ±0.002 in. (±0.05 mm).
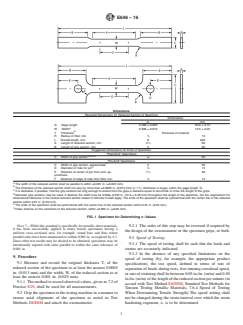
FIG. 1 Specimen for Determining n -Values
NOTE7—Whilethisstandardisspecificallyformetallicsheetmaterials,
9.2.1 The order of this step may be reversed if required by
it has been successfully applied to many tensile specimens having a
the design of the extensometer or the specimen grips, or both.
uniform cross-sectional area, for example, round bars and flats where
parallel sides have been maintained to within 0.001 in. as required by 8.2.
9.3 Speed of Testing:
Since other test results may be desired to be obtained, specimens may be
9.3.1 The speed of testing shall be such that the loads and
intentionally tapered with sides parallel to within the same tolerance of
strains are accurately indicated.
0.001 in.
9.3.2 In the absence of any specified limitations on the
9. Procedure
speed of testing (by, for example, the appropriate product
9.1 Measure and record the original thickness T, of the
specification), the test speed, defined in terms of rate of
reduced section of the specimen to at least the nearest 0.0005
separation of heads during tests, free running crosshead speed,
in. (0.013 mm) and the width, W, of the reduced section to at
orrateofstrainingshallbebetween0.05in./in.(m/m)and0.50
least the nearest 0.001 in. (0.025 mm).
in./in.(m/m)ofthelengthofthereducedsectionperminute(in
9.1.1 The method to record observed values, given in 7.2 of
accord with Test Method E8/E8M, Standard Test Methods for
Practice E29, shall be used for all measurements.
Tension Testing Metallic Materials, 7.6.4 Speed of Testing
9.2 Grip the specimen in the testing machine in a manner to When Determining Tensile Strength) The speed setting shall
ensure axial alignment of the specimen as noted in Test not be changed during the strain interval over which the strain
Methods E8/E8M and attach the extensometer. hardening exponent, n, is to be determined
E646 − 16
NOTE 8—The mode of control and the rate used may affect the values
9.4.1 The test is not valid if fewer than five data pairs are
obtained.
obtained.
9.3.3 If the yield point, yield-point elongation, yield
9.4.2 If multiple values of the strain-hardening exponent are
strength, or any combination of these is to be determined also,
to be determined (Note 1), use at least five stress and strain
the rate of stress or strain application or crosshead separation
values for the calculation of the strain-hardening exponent in
during this portion of the test shall be within the range
each interval of strain.
permitted by Test Methods E8/E8M or any other specified
9.4.3 Other parameters may be recorded in place of forces
value.Afterexceedingthestrainnecessaryforthisinformation,
and strains provided that they can ultimately be transformed
adjust the crosshead speed to within the range specified by this
into true stress and true strain at least as accurately as those
standard.
measured using the techniques already described in this test
9.4 Record the force and corresponding strain for at least
method.
five approximately equally spaced levels of strain (Note 9)
covering the strain range of interest or required in the product
10. Calculations
specification. Usually, the greatest of these strains is at or
10.1 The calculations in this section are based on true strain
slightly prior to the strain at which the maximum force occurs,
and true stress (3, 4, 5). The true strain (also called the
and usually the lower bound of these strains is the yield strain
logarithmic strain) is given by (Terminology E6):
(for continuous-yielding material) or the end of yield-point
extension (for discontinuous-yielding material). See Fig. 2.
L
ε 51n 51n 1 1 e
~ !
The requirement that at least five force-strain data pairs be
L
o
recordedismetwithanautographicrecordingandtheselection
where:
of five or more pairs from that curve.
L = is the current length of the gauge length,
NOTE9—Sincetheslopeofthecurvemayvaryslightlyalongitslength,
L = is the initial gauge length, and
o
there is a statistical basis for choosing points equally spaced out along the
e = is the engineering strain.
strain range.
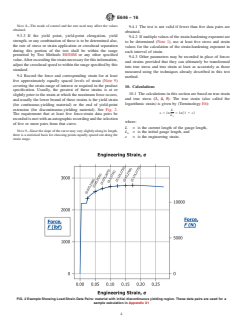
FIG. 2 Example Showing Load-Strain Data Pairs: material with initial discontinuous yielding region. These data pairs are used for a
sample calculation in Appendix X1
E646 − 16
FIG. 3 Example Showing Force-Strain Data Pairs: material with no discontinuous yielding
If L or e is measured under load, then the true strain is the strainrange.MethodAhasnosuchrestrictionandmaybeused
total true strain. If L or e is measured in the unloaded state, or everywhere that Met
...
This document is not an ASTM standard and is intended only to provide the user of an ASTM standard an indication of what changes have been made to the previous version. Because
it may not be technically possible to adequately depict all changes accurately, ASTM recommends that users consult prior editions as appropriate. In all cases only the current version
of the standard as published by ASTM is to be considered the official document.
Designation: E646 − 15 E646 − 16
Standard Test Method for
Tensile Strain-Hardening Exponents (n -Values) of Metallic
Sheet Materials
This standard is issued under the fixed designation E646; the number immediately following the designation indicates the year of
original adoption or, in the case of revision, the year of last revision. A number in parentheses indicates the year of last reapproval. A
superscript epsilon (´) indicates an editorial change since the last revision or reapproval.
INTRODUCTION
This test method for determining tensile strain-hardening exponents n utilizes stress-stain data
obtained in a uniaxial tension test. Tensile data are obtained in a continuous and rate-controlled
manner via displacement or strain control. The strain-hardening exponents are determined from an
empirical representation over the range of interest of the true-stress versus true-strain curve. The
mathematical representation used in this method is a power curve (Note 1) of the form (1) :
n
σ = Kε
where:
σ = true stress,
ε = plastic component of true strain, but in special cases may be the total true strain. (See 10.2),
K = is a constant, often called the strength coefficient having the units of stress, and
n = strain-hardening exponent
1. Scope Scope*
1.1 This test method covers the determination of a strain-hardening exponent by tension testing of metallic sheet materials for
which plastic-flow behavior obeys the power curve given in the Introduction.
NOTE 1—A single power curve may not be a satisfactory fit to the entire stress-strain curve between yield and necking. If such is the case, more than
one value of the strain-hardening exponent may be obtained (2) by agreement using this test method.
1.2 This test method is specifically for metallic sheet materials with thicknesses of at least 0.005 in. (0.13 mm) but not greater
than 0.25 in. (6.4 mm). The method has successfully been and may be applied to other forms and thicknesses by agreement
1.3 The values stated in inch-pound units are to be regarded as standard. The values given in parentheses are mathematical
conversions to SI units that are provided for information only and are not considered standard.
NOTE 2—The value of the strain-hardening exponent, n, is has no units and is independent of the units used in its determination
1.4 This standard does not purport to address all of the safety concerns, if any, associated with its use. It is the responsibility
of the user of this standard to establish appropriate safety and health practices and determine the applicability of regulatory
limitations prior to use.
2. Referenced Documents
2.1 ASTM Standards:
E4 Practices for Force Verification of Testing Machines
E6 Terminology Relating to Methods of Mechanical Testing
E8/E8M Test Methods for Tension Testing of Metallic Materials
E29 Practice for Using Significant Digits in Test Data to Determine Conformance with Specifications
E83 Practice for Verification and Classification of Extensometer Systems
E111 Test Method for Young’s Modulus, Tangent Modulus, and Chord Modulus
This test method is under the jurisdiction of ASTM Committee E28 on Mechanical Testing and is the direct responsibility of Subcommittee E28.02 on Ductility and
Formability.
Current edition approved Nov. 15, 2015Feb. 1, 2016. Published February 2016March 2016. Originally approved in 1978. Last previous edition approved in 20072015 as
ɛ1
E646 - 07E646 - 15. . DOI: 10.1520/E0646-15.10.1520/E0646-16
The boldface numbers in parentheses refer to the list of references appended to this method.
For referenced ASTM standards, visit the ASTM website, www.astm.org, or contact ASTM Customer Service at service@astm.org. For Annual Book of ASTM Standards
volume information, refer to the standard’s Document Summary page on the ASTM website.
*A Summary of Changes section appears at the end of this standard
Copyright © ASTM International, 100 Barr Harbor Drive, PO Box C700, West Conshohocken, PA 19428-2959. United States
E646 − 16
E177 Practice for Use of the Terms Precision and Bias in ASTM Test Methods
E691 Practice for Conducting an Interlaboratory Study to Determine the Precision of a Test Method
2.2 ISO Standard
ISO 10275:2007 Metallic materials -- Sheet and strip -- Determination of tensile strain hardening exponent
3. Terminology
3.1 For definitions of other terms used in this test method, refer to E6 (Standard Terminology Relating to Methods of
Mechanical Testing).
3.2 Definitions:
3.2.1 elastic true strain, ɛ , n—elastic component of the true strain.
e
3.2.2 engineering strain, e, n—a dimensionless value that is the change in length (ΔL) per unit length of original linear
dimension (L ) along the loading axis of the specimen; that is, e = ΔL/L .
0 0
-2
3.2.3 engineering stress, S [FL ], n—the normal stress, expressed in units of applied force, F per unit of original
cross-sectional area, A ; that is, S = F/A
0 0
3.2.4 necking, n—the onset of nonuniform or localized plastic deformation, resulting in a localized reduction of cross-sectional
area.
3.2.5 plastic true strain, ɛ ,,, n—the inelastic component of true strain.
p
3.2.6 strain hardening, n—an increase in hardness and strength caused by plastic deformation.
3.2.7 true strain, ɛ, n—the natural logarithm of the ratio of instantaneous gauge length, L, to the original gauge length, L ; that
is, ɛ = ln (L/L ) or ɛ = ln (1+e).
-2
3.2.8 true stress, σ [FL ], n—the instantaneous normal stress, calculated on the basis of the instantaneous cross-sectional area,
A; that is, σ = F/A; if no necking has occurred , occurred, σ = S(1+e).
3.3 Definitions of Terms Specific to This Standard:
3.3.1 strain-hardening exponent (n), n—an experimental constant, computed from the least squares best fit, linear slope of log
σ versus log ε or data over a specific strain range where ε is the plastic component of true strain, but in special cases may be the
total true strain (see 10.2).
–2
3.3.2 strength coeffıcient (K) [FL ], n—an experimental constant, computed from the fit of the data to the assumed power
curve, that is numerically equal to the extrapolated value of true stress at a true strain of 1.00.
4. Summary of Test Method
4.1 This test method applies to materials exhibiting a continuous stress-strain curve in the plastic region. The displacement or
strain is applied in a continuous and rate-controlled manner while the normal tensile load and strain are monitored. The
instantaneous cross-sectional area may be monitored or calculated by assuming constancy of volume in the plastic region.
Equations are presented that permit the calculation of the true stress, σ, true strain, ε, strain-hardening exponent, n, and strength
coefficient, K, for that continuous portion of the true-stress versus true-strain curve which follows the empirical relationships
described.
NOTE 3—This test method is recommended for use only in the plastic range for metallic sheet material for which the true-stress true-strain data follow
the stated relationship.
5. Significance and Use
5.1 This test method is useful for estimating the strain at the onset of necking in a uniaxial tension test (1). Practically, it
provides an empirical parameter for appraising the relative stretch formability of similar metallic systems. The strain-hardening
exponent is also a measure of the increase in strength of a material due to plastic deformation.
5.2 The strain-hardening exponent may be determined over the entire plastic stress-strain curve or any portion(s) of the
stress-strain curve specified in a product specification.
NOTE 4—The engineering strain interval 10–20% is commonly used for determining the strain-hardening exponent, n, of formable low-carbon steel
products
5.3 This test method is not intended to apply to any portion of the true -stressstress versus true -strainstrain curve that exhibits
discontinuous behavior; however, the method may be applied by curve-smoothing techniques as agreed upon.
NOTE 5—For example, those portions of the stress-strain curves for mild steel, aluminum, or other alloys that exhibit yield point and Lüders band
elongation, twinning, or Portevin–Le Chatelier effect (PLC) may be characterized as behaving discontinuously.
NOTE 6—Caution should be observed in the use of curve-smoothing techniques as they may affect the n-value.
5.4 This test method is suitable for determining the tensile stress-strain response of metallic sheet materials in the plastic region
prior to the onset of necking.
E646 − 16
5.5 The n-value may vary with the displacement rate or strain rate used, depending on the metal and test temperature.
6. Apparatus
6.1 Testing Machines—Machines used for tension testing shall conform to the requirements of Practices E4. The loadsforces
used to determine stress shall be within the loadingforce range of the testing machine as defined in Practices E4.
6.2 Strain-Measurement Equipment—Equipment for measurement of extension shall conform to the requirements of Class C or
better as defined in Practice E83.
7. Sampling
7.1 Samples shall be taken from the material as specified in the applicable product specification.
8. Test Specimens
8.1 Selection and Preparation of Specimens:
8.1.1 In the selection of specimen blanks, special care shall be taken to assure obtaining representative material that is flat and
uniform in thickness.
8.1.2 In the preparation of specimens, special care shall be taken to prevent the introduction of residual stresses.
8.2 Dimensions—Recommended metallic sheet specimen configurations are shown in Fig. 1. Specimen configurations shall
have sides parallel to 0.001 in. and dimensions shall be reported as stated in 11.1.6.
E646 − 16
Dimensions
Required Dimensions for Reduced Section of Specimen
Dimensions
in. mm
G Gage length 2.000 ± 0.005 50.0 ± 0.10
W Width(Note 1) 0.500 ± 0.010 12.5 ± 0.25
A
W Width 0.500 ± 0.010 12.5 ± 0.25
T Thickness(Note 2) thickness of material
B
T Thickness thickness of material
R Radius of fillet, min ⁄2 13
L Overall length, min 8 200
A Length of reduced section, min 2 ⁄4 60
B Length of grip section, min 2 50
Suggested Dimensions for Ends of Specimen
“Plain-End” Specimens
C Width of grip section(Note 3andNote 4) ⁄4 20
Cand D
C Width of grip section ⁄4 20
“Pin-End” Specimens
C Width of grip section, approxi- 2 50
mate(Note 5)
E
C Width of grip section, approximate 2 50
D Diameter of hole for pin(Note 6) ⁄2 13
F
D Diameter of hole for pin ⁄2 13
E Distance of center of pin from end, ap- 1 ⁄2 38
proximate
F Distance of edge of hole from fillet, min ⁄2 13
A
The width of the reduced section shall be parallel to within ±0.001 in. (±0.025 mm).
NOTE 1—The width of the reduced section shall be parallel to within 60.001 in. (60.025 mm).
B
The thickness of the reduced section shall not vary by more than ±0.0005 in. (0.013 mm) or 1 %, whichever is larger, within the gage length, G.
C
It is desirable, if possible, that the grip sections be long enough to extend into the grips a distance equal to two-thirds or more the length of the grips.
NOTE 2—The thickness of the reduced section shall not vary by more than 60.0005 in. (0.013 mm) or 1 %, whichever is larger, within the gage length,
G.
D
Narrower grip sections may be used. If desired, the width may be 0.500± 0.010 in. (12.5 ± 0.25 mm) throughout the length of the specimen, but the requirement for
dimensional tolerance in the central reduced section stated in footnote A shall apply. The ends of the specimen shall be symmetrical with the center line of the reduced
section within 0.01 in. (0.25 mm).
E
The ends of the specimen shall be symmetrical with the center line of the reduced section within 0.01 in. (0.25 mm).
NOTE 3—It is desirable, if possible, that the grip sections be long enough to extend into the grips a distance equal to two-thirds or more the length of
the grips.
F
Holes shall be on the centerline of the reduced section, within ±0.002 in. (±0.05 mm).
NOTE 4—Narrower grip sections may be used. If desired, the width may be 0.5006 0.010 in. (12.5 6 0.25 mm) throughout the length of the specimen,
but the requirement for dimensional tolerance in the central reduced section stated in Note 1 shall apply. The ends of the specimen shall be symmetrical
with the center line of the reduced section within 0.01 in. (0.25 mm).
NOTE 5—The ends of the specimen shall be symmetrical with the center line of the reduced section within 0.01 in. (0.25 mm).
NOTE 6—Holes shall be on the centerline of the reduced section, within 60.002 in. (60.05 mm).
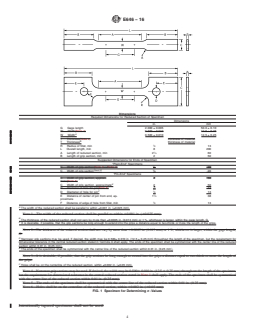
FIG. 1 Specimen for Determining n -Values
Intentionally tapered specimens shall not be used.
E646 − 16
NOTE 7—While this test method standard is specifically for metallic sheet materials, it has been successfully applied to many tensile specimens having
a uniform cross-sectional area, that is,for example, round bars and flats where parallel sides have been maintained.maintained to within 0.001 in. as
required by 8.2. Since other test results may be desired to be obtained, specimens may be intentionally tapered with sides parallel to within the same
tolerance of 0.001 in.
9. Procedure
9.1 Measure and record the original thickness T, of the reduced section of the specimen to at least the nearest 0.0005 in. (0.013
mm) and the width, W, of the reduced section to at least the nearest 0.001 in. (0.025 mm).
9.1.1 The rounding-off method given in method to record observed values, given in 7.2 of Practice E29, shall be used for all
measurements.
9.2 Grip the specimen in the testing machine in a manner to ensure axial alignment of the specimen as noted in Test Methods
E8/E8M and attach the extensometer.
9.2.1 The order of this step may be reversed if required by the design of the extensometer or the specimen grips, or both.
9.3 Speed of Testing:
9.3.1 The speed of testing shall be such that the loads and strains are accurately indicated.
9.3.2 In the absence of any specified limitations on the speed of testing (by, for example, the appropriate product specification),
the test speed, defined in terms of rate of separation of heads during tests, free running crosshead speed, or rate of straining shall
be between 0.05 in./in. (m/m) and 0.50 in./in. (m/m) of the length of the reduced section per minute (in accord with Test Method
E8/E8M, Standard Test Methods for Tension Testing Metallic Materials, 7.6.4 Speed of Testing When Determining Tensile
Strength) The speed setting shall not be changed during the strain interval over which the strain hardening exponent, n, is to be
determined
NOTE 8—The mode of control and the rate used may affect the values obtained.
9.3.3 If the yield point, yield-point elongation, yield strength, or any combination of these is to be determined also, the rate of
stress or strain application or crosshead separation during this portion of the test shall be within the range permitted by Test
Methods E8/E8M or any other specified value. After exceeding the strain necessary for this information, adjust the crosshead speed
to within the range specified by this standard.
9.4 Record the force and corresponding strain for at least five approximately equally spaced levels of strain (Note 9) covering
the strain range of interest or required in the product specification. Usually, the greatest of these strains is at or slightly prior to
the strain at which the maximum force occurs, and usually the lower bound of these strains is the yield strain (for
continuous-yielding material) or the end of yield-point extension (for discontinuous-yielding material). See Fig. 2. The requirement
that at least five force-strain data pairs be recorded is met with an autographic recording and the selection of five or more pairs
from that curve.
NOTE 9—Since the slope of the curve may vary slightly along its length, there is a statistical basis for choosing points equally spaced out along the
strain range.
9.4.1 The test is not valid if fewer than five data pairs are obtained.
9.4.2 If multiple values of the strain-hardening exponent are to be determined (Note 1), use at least five stress and strain values
for the calculation of the strain-hardening exponent in each interval of strain.
9.4.3 Other parameters may be recorded in place of forces and strains provided that they can ultimately be transformed into true
stress and true strain at least as accurately as those measured using the techniques already described in this test method.
10. Calculations
10.1 The calculations in this section are based on true strain and true stress (3, 4, 5). The true strain (also called the logarithmic
strain) is given by (Terminology E6):
L
ε 5 1n 5 1n 1 1 e
~ !
L
o
where:
L = is the current length of the gauge length,
L = is the initial gauge length, and
o
e = is the engineering strain.
where L is the current length of the gauge length, L is the initial gauge length, and e is the engineering strain. If L or e is
o
measured under load, then the tr
...
Questions, Comments and Discussion
Ask us and Technical Secretary will try to provide an answer. You can facilitate discussion about the standard in here.
Loading comments...