ASTM E646-07
(Test Method)Standard Test Method for Tensile Strain-Hardening Exponents (n -Values) of Metallic Sheet Materials
Standard Test Method for Tensile Strain-Hardening Exponents (<span class="bdit">n</span> -Values) of Metallic Sheet Materials
SIGNIFICANCE AND USE
This test method is useful for estimating the strain at the onset of necking in a uniaxial tension test (1). Practically, it provides an empirical parameter for appraising the relative stretch formability of similar metallic systems. The strain-hardening exponent is also a measure of the increase in strength of a material due to plastic deformation.
The strain-hardening exponent may be determined over the entire plastic stress-strain curve or any portion(s) of the stress-strain curve specified in a product specification.
Note 3—The strain interval 10–20% is commonly utilized for determining the n-value of formable low carbon steel products.
This test method is not intended to apply to any portion of the true-stress versus true-strain curve that exhibits discontinuous behavior; however, the method may be applied by curve-smoothing techniques as agreed upon.
Note 4—For example, those portions of the stress-strain curves for mild steel or aluminum alloys which exhibit yield-point elongation or Lüders bands may be characterized as behaving discontinuously.
Note 5—Caution should be observed in the use of curve-smoothing techniques as they may affect the n-value.
This test method is suitable for determining the tensile stress-strain response of metallic sheet materials in the plastic region prior to the onset of necking.
The n-value may vary with the displacement rate or strain rate used, depending on the metal and test temperature.
SCOPE
1.1 This test method covers the determination of a strain-hardening exponent by tension testing of metallic sheet materials for which plastic-flow behavior obeys the power curve given in the Introduction.
Note 1—A single power curve may not fit the entire stress-strain curve between yield and necking. If such is the case, more than one value of the strain-hardening exponent can be obtained (2).
1.2 This test method is for metallic sheet materials with thicknesses of at least 0.005 in. (0.13 mm) but not greater than 0.25 in. (6.4 mm).
1.3 The values stated in inch-pound units are to be regarded as the standard. The SI equivalents shown may be approximate.
1.4 This standard does not purport to address all of the safety concerns, if any, associated with its use. It is the responsibility of the user of this standard to establish appropriate safety and health practices and determine the applicability of regulatory limitations prior to use.
General Information
Relations
Buy Standard
Standards Content (Sample)
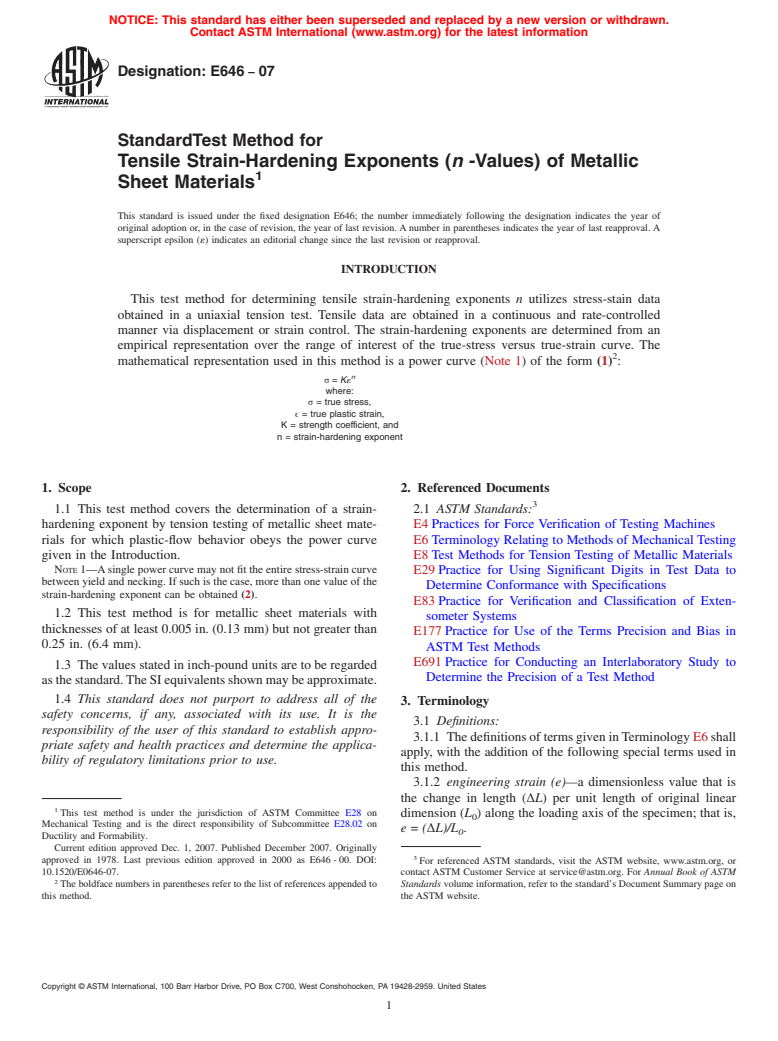
NOTICE: This standard has either been superseded and replaced by a new version or withdrawn.
Contact ASTM International (www.astm.org) for the latest information
Designation: E646 − 07
StandardTest Method for
Tensile Strain-Hardening Exponents (n -Values) of Metallic
1
Sheet Materials
This standard is issued under the fixed designation E646; the number immediately following the designation indicates the year of
original adoption or, in the case of revision, the year of last revision. A number in parentheses indicates the year of last reapproval. A
superscript epsilon (´) indicates an editorial change since the last revision or reapproval.
INTRODUCTION
This test method for determining tensile strain-hardening exponents n utilizes stress-stain data
obtained in a uniaxial tension test. Tensile data are obtained in a continuous and rate-controlled
manner via displacement or strain control. The strain-hardening exponents are determined from an
empirical representation over the range of interest of the true-stress versus true-strain curve. The
2
mathematical representation used in this method is a power curve (Note 1) of the form (1) :
n
σ = K´
where:
σ = true stress,
ϵ = true plastic strain,
K = strength coefficient, and
n = strain-hardening exponent
1. Scope 2. Referenced Documents
3
1.1 This test method covers the determination of a strain- 2.1 ASTM Standards:
hardening exponent by tension testing of metallic sheet mate- E4 Practices for Force Verification of Testing Machines
rials for which plastic-flow behavior obeys the power curve E6 Terminology Relating to Methods of Mechanical Testing
given in the Introduction. E8 Test Methods for Tension Testing of Metallic Materials
NOTE 1—Asingle power curve may not fit the entire stress-strain curve
E29 Practice for Using Significant Digits in Test Data to
between yield and necking. If such is the case, more than one value of the
Determine Conformance with Specifications
strain-hardening exponent can be obtained (2).
E83 Practice for Verification and Classification of Exten-
1.2 This test method is for metallic sheet materials with
someter Systems
thicknesses of at least 0.005 in. (0.13 mm) but not greater than
E177 Practice for Use of the Terms Precision and Bias in
0.25 in. (6.4 mm).
ASTM Test Methods
E691 Practice for Conducting an Interlaboratory Study to
1.3 The values stated in inch-pound units are to be regarded
Determine the Precision of a Test Method
asthestandard.TheSIequivalentsshownmaybeapproximate.
1.4 This standard does not purport to address all of the
3. Terminology
safety concerns, if any, associated with its use. It is the
3.1 Definitions:
responsibility of the user of this standard to establish appro-
3.1.1 ThedefinitionsoftermsgiveninTerminologyE6shall
priate safety and health practices and determine the applica-
apply, with the addition of the following special terms used in
bility of regulatory limitations prior to use.
this method.
3.1.2 engineering strain (e)—a dimensionless value that is
the change in length (∆L) per unit length of original linear
1
This test method is under the jurisdiction of ASTM Committee E28 on
dimension (L ) along the loading axis of the specimen; that is,
0
Mechanical Testing and is the direct responsibility of Subcommittee E28.02 on
e=(∆L)/L .
0
Ductility and Formability.
Current edition approved Dec. 1, 2007. Published December 2007. Originally
3
approved in 1978. Last previous edition approved in 2000 as E646 - 00. DOI: For referenced ASTM standards, visit the ASTM website, www.astm.org, or
10.1520/E0646-07. contact ASTM Customer Service at service@astm.org. For Annual Book of ASTM
2
The boldface numbers in parentheses refer to the list of references appended to Standards volume information, refer to the standard’s Document Summary page on
this method. the ASTM website.
Copyright © ASTM International, 100 Barr Harbor Drive, PO Box C700, West Conshohocken, PA 19428-2959. United States
1
---------------------- Page: 1 ----------------------
E646 − 07
−2
3.1.3 engineering stress (S) [FL ]—the normal stress, ex- 5.4 This test method is suitable for determining the tensile
pressed in units of applied force, F, per unit of original stress-strain response of metallic sheet materials in the plastic
cross-sectional area, A ; that is, S = F/A . region prior to the onset of necking.
0 0
3.1.4 necking—the onset of nonuniform or localized plastic
5.5 The n-value may vary with the displacement rate or
deformation, resulting in a localized reduction of cross-
strain rate used, depending on the metal and test temperature.
sectional area.
6. Apparatus
3.1.5 strain-hardening (n)—an increase in hardness and
6.1 Testing Machines—Machines used for tension testing
strength caused by plastic deformation.
−2 shall conform to the requirements of Practices E4. The loads
3.1.6 strength coeffıcient (K) [FL ]—an experimental
usedtodeterminestressshallbewithintheloadingrangeofthe
constant, computed from the fit of the data to the assumed
testing machi
...
This document is not anASTM standard and is intended only to provide the user of anASTM standard an indication of what changes have been made to the previous version. Because
it may not be technically possible to adequately depict all changes accurately, ASTM recommends that users consult prior editions as appropriate. In all cases only the current version
of the standard as published by ASTM is to be considered the official document.
Designation:E646–00 Designation:E646–07
Standard Test Method for
Tensile Strain-Hardening Exponents (n -Values) of Metallic
1
Sheet Materials
This standard is issued under the fixed designation E646; the number immediately following the designation indicates the year of
original adoption or, in the case of revision, the year of last revision.Anumber in parentheses indicates the year of last reapproval.A
superscript epsilon (e) indicates an editorial change since the last revision or reapproval.
INTRODUCTION
This test method for determining tensile strain-hardening exponents n utilizes stress-stain data
obtained in a uniaxial tension test. Tensile data are obtained in a continuous and rate-controlled
manner via displacement or strain control. The strain-hardening exponents are determined from an
empirical representation over the range of interest of the true-stress versus true-strain curve. The
2
mathematical representation used in this method is a power curve (Note 1) of the form (1) :
n
s5Ke
where: :
n
s=Ke
s = true stress,
s = true stress, where:
e = true plastic strain,
e = true plastic strain, s = true stress,
K = strength coefficient, and
K = strength coefficient, and e = true plastic strain,
n = strain-hardening exponentK = strength coefficient, and
n
=
strain-hardening
exponent
1.Scope
1.1This test method covers the determination of a strain-hardening exponent by tension testing of metallic sheet materials for
which plastic-flow behavior obeys the power curve given in the Introduction.
NOTE1—A single power curve may not fit the entire stress-strain curve between yield and necking. If such is the case, more than one value of the
strain-hardening exponent can be obtained (2).
1.2This test method is for metallic sheet materials with thicknesses of at least 0.005 in. (0.13 mm) but not greater than 0.25 in.
(6.4 mm).
1.3The values stated in inch-pound units are to be regarded as the standard. The SI equivalents shown may be approximate.
1.4This standard does not purport to address all of the safety concerns, if any, associated with its use. It is the responsibility
of the user of this standard to establish appropriate safety and health practices and determine the applicability of regulatory
limitations prior to use.
1
This test method is under the jurisdiction ofASTM Committee E-28 on Mechanical Testing, and is the direct responsibility of Subcommittee E28.02 on Ductility and
Flexure.
Current edition approved May 10, 2000. Published August 2000. Originally published as E646-78. Last previous edition E646-98.
1
This test method is under the jurisdiction of ASTM Committee E28 on Mechanical Testing and is the direct responsibility of Subcommittee E28.02 on Ductility and
Flexure Testing.
Current edition approved Dec. 1, 2007. Published December 2007. Originally approved in 1978. Last previous edition approved in 2000 as E646-00.
2
The boldface numbers in parentheses refer to the list of references appended to this method.
Copyright © ASTM International, 100 Barr Harbor Drive, PO Box C700, West Conshohocken, PA 19428-2959, United States.
1
---------------------- Page: 1 ----------------------
E646–07
2.Referenced Documents
2.1ASTM Standards:
E4Practices for Force Verification of Testing Machines
E6Terminology Relating to Methods of Mechanical Testing
E8Test Methods for Tension Testing of Metallic Materials
E29Practice for Using Significant Digits in Test Data to Determine Conformance with Specifications
E83Practice for Verification and Classification of Extensometer Systems
4
E177Practice for Use of the Terms Precision and Bias in ASTM Test Methods Practice for Use of the Terms Precision and
Bias in ASTM Test Methods
E691 Practice for Conducting an Interlaboratory Study to Determine the Precision of a Test Method
3. Terminology
3.1 Definitions:
3.1.1 The definitions of terms given in Terminology E6 shall apply, with the addition of the following special terms used in
this method.
3.1.2 engineering strain (e)—adimensionlessvaluethatisthechangeinlength(DL)perunitlengthoforiginallineardimension
(L ) along the loading axis of the specimen; that is,e=(DL)/L .
0 0
−2
3.1.3 engineering stress (S)[FL ]—thenormalstress,expressedinunitsofappliedforce, F,perunitoforiginalcross-sectional
area, A ; that is, S = F/A .
0 0
3.1.4 necking—the onset of nonuniform or localized plastic deformation, resulting in a localized reduction of cross-sectional
area.
3.1.5 strain-hardening (n)—an increase in hardness and strength caused by plastic deformation.
−2
3.1.6 strength coeffıcient (K) [FL ]—an experimenta
...


Questions, Comments and Discussion
Ask us and Technical Secretary will try to provide an answer. You can facilitate discussion about the standard in here.