ASTM D5796-10
(Test Method)Standard Test Method for Measurement of Dry Film Thickness of Thin Film Coil-Coated Systems by Destructive Means Using a Boring Device
Standard Test Method for Measurement of Dry Film Thickness of Thin Film Coil-Coated Systems by Destructive Means Using a Boring Device
SIGNIFICANCE AND USE
Measurement of dry film thickness of organic coatings by physically cutting through the film and optically observing and measuring the thickness offers the advantage of direct measurement as compared with nondestructive means.
Constituent coating layers of an overall thickness of a coating system can usually be measured individually by this test method, provide adhesion between each layer is sufficient. (However, this can be difficult in cases where the primer, topcoat, or multiple coating layers have the same, or very similar, appearance.)
SCOPE
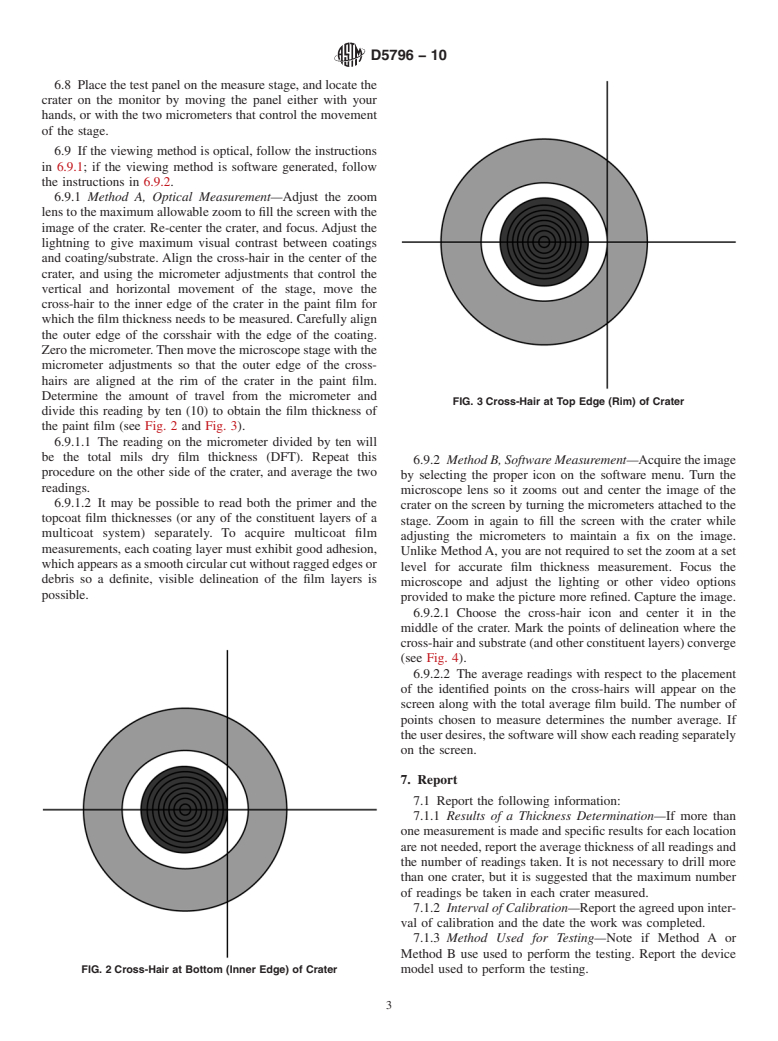
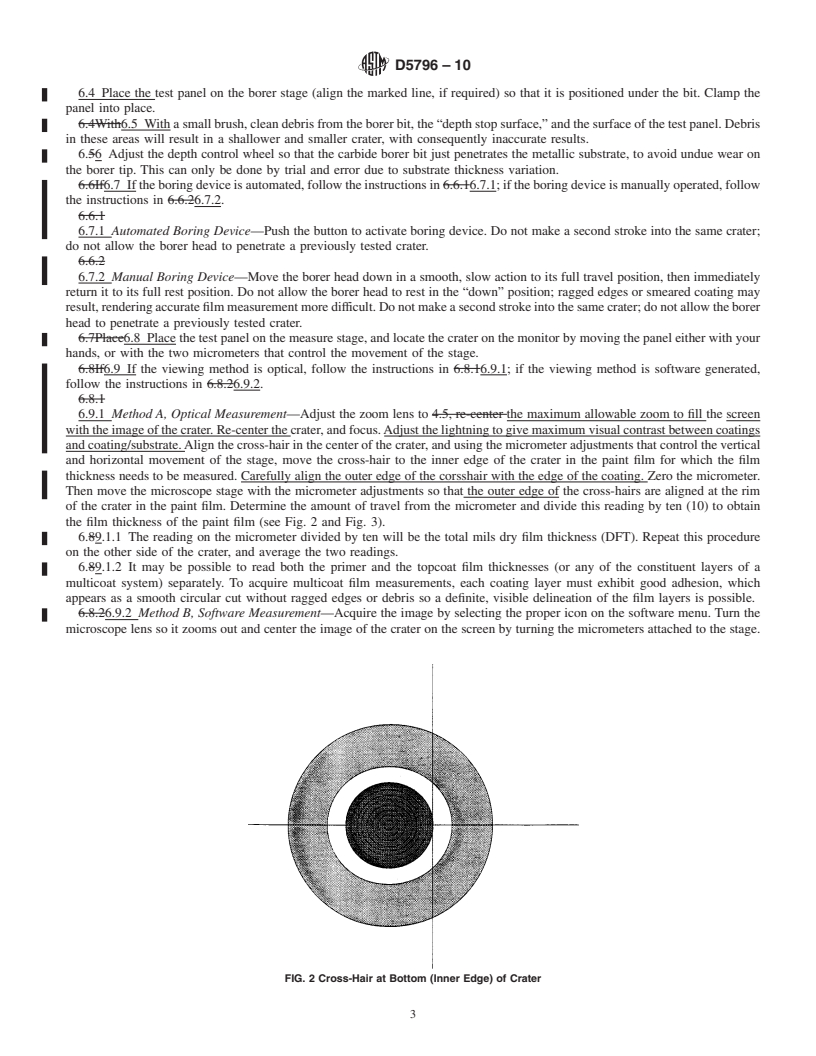
1.1 This test method covers the measurement of dry film thickness (DFT) of coating films by microscopic observation of a precision-cut, shallow-angle crater bored into the coating film. This crater reveals cross sectional layers appearing as rings, whose width is proportional to the depth of the coating layer(s) and allows for direct calculation of dry film thickness.
1.1.1 The Apparatus, Procedure, and Precision and Bias discussions include Method A and Method B. Method A involves the use of an optical measurement apparatus which is no longer commercially available, but remains a valid method of dry film measurement. Method B is a software driven measurement procedure that supersedes Method A.
1.2 The substrate may be any rigid, metallic material, such as cold-rolled steel, hot-dipped galvanized steel, aluminum, etc. The substrate must be planar with the exception of substrates exhibiting “coil set,” which may be held level by the use of the clamping tool on the drilling device.
Note 1—Variations in the surface profile of the substrate may result in misrepresentative organic coating thickness readings. This condition may exist over substrates such as hot-dipped, coated steel sheet. This is true of all “precision cut” methods that are used to determine dry film thickness of organic coatings. This is why several measurements across the strip may be useful if substrate surface profile is suspect.
1.3 The range of thickness measurement is 0 to 3.5 mils (0 to 89 μm).
Note 2—For DFT measurements of films greater than 3.5 mils (89μm), but less than 63 mils (1600 μm), a 45° borer may be used in accordance with this test method, with the exception of 6.8, where the micrometer reading would provide a direct read-out, and division by ten would be unnecessary per 4.3.1 Method A.
1.4 Measurements may be made on coil-coated sheet, certain formed products, or on test panels.
1.5 The values stated in SI units are to be regarded as the standard. The values given in parentheses are for information only.
1.6 This standard does not purport to address all of the safety concerns, if any, associated with its use. It is the responsibility of the user of this standard to establish appropriate safety and health practices and determine the applicability of regulatory limitations prior to use.
General Information
Relations
Buy Standard
Standards Content (Sample)
NOTICE: This standard has either been superseded and replaced by a new version or withdrawn.
Contact ASTM International (www.astm.org) for the latest information
Designation: D5796 − 10
StandardTest Method for
Measurement of Dry Film Thickness of Thin-Film Coil-
Coated Systems by Destructive Means Using a Boring
1
Device
This standard is issued under the fixed designation D5796; the number immediately following the designation indicates the year of
original adoption or, in the case of revision, the year of last revision. A number in parentheses indicates the year of last reapproval. A
superscript epsilon (´) indicates an editorial change since the last revision or reapproval.
1. Scope 1.5 The values stated in SI units are to be regarded as the
standard. The values given in parentheses are for information
1.1 This test method covers the measurement of dry film
only.
thickness(DFT)ofcoatingfilmsbymicroscopicobservationof
1.6 This standard does not purport to address all of the
a precision-cut, shallow-angle crater bored into the coating
safety concerns, if any, associated with its use. It is the
film. This crater reveals cross sectional layers appearing as
responsibility of the user of this standard to establish appro-
rings, whose width is proportional to the depth of the coating
priate safety and health practices and determine the applica-
layer(s) and allows for direct calculation of dry film thickness.
bility of regulatory limitations prior to use.
1.1.1 The Apparatus, Procedure, and Precision and Bias
discussions include Method A and Method B. Method A
2. Referenced Documents
involves the use of an optical measurement apparatus which is
2
no longer commercially available, but remains a valid method 2.1 ASTM Standards:
of dry film measurement. Method B is a software driven D3794 Guide for Testing Coil Coatings
measurement procedure that supersedes Method A.
3. Significance and Use
1.2 The substrate may be any rigid, metallic material, such
3.1 Measurement of dry film thickness of organic coatings
as cold-rolled steel, hot-dipped galvanized steel, aluminum,
by physically cutting through the film and optically observing
etc. The substrate must be planar with the exception of
and measuring the thickness offers the advantage of direct
substrates exhibiting “coil set,” which may be held level by the
measurement as compared with nondestructive means.
use of the clamping tool on the drilling device.
3.2 Constituent coating layers of an overall thickness of a
NOTE 1—Variations in the surface profile of the substrate may result in
coating system can usually be measured individually by this
misrepresentative organic coating thickness readings. This condition may
exist over substrates such as hot-dipped, coated steel sheet. This is true of test method, provide adhesion between each layer is sufficient.
all “precision cut” methods that are used to determine dry film thickness
(However, this can be difficult in cases where the primer,
of organic coatings. This is why several measurements across the strip
topcoat, or multiple coating layers have the same, or very
may be useful if substrate surface profile is suspect.
similar, appearance.)
1.3 The range of thickness measurement is 0 to 3.5 mils (0
to 89 µm). 4. Apparatus
3
4.1 Dry Film Thickness Device, Itisanapparatusconsisting
NOTE 2—For DFTmeasurements of films greater than 3.5 mils (89µm),
but less than 63 mils (1600 µm), a 45° borer may be used in accordance of either a manual or automated carbide-tipped drill that raises
with this test method, with the exception of 6.8, where the micrometer
and lowers the boring tip perpendicular to the surface to be
reading would provide a direct read-out, and division by ten would be
tested, a cleaning brush, a marking device (optional), and a
unnecessary per 4.3.1 Method A.
1.4 Measurements may be made on coil-coated sheet, cer-
tain formed products, or on test panels.
2
For referenced ASTM standards, visit the ASTM website, www.astm.org, or
contact ASTM Customer Service at service@astm.org. For Annual Book of ASTM
Standards volume information, refer to the standard’s Document Summary page on
the ASTM website.
1 3
This test method is under the jurisdiction of ASTM Committee D01 on Paint The sole source of supply of the dry film thickness device known to the
and Related Coatings, Materials, andApplications and is the direct responsibility of committee at this time is DJH Designs, 2366Wyecroft Rd., Unit D4, Oakville, Ont.,
Subcommittee D01.53 on Coil Coated Metal. Canada L6L 6M1. If you are aware of alternative suppliers, please provide this
Current edition approved Dec. 1, 2010. Published December 2010. Originally information to ASTM International Headquarters. Your comments will receive
1
approved in 1995. Last previous edition approved in 2010 as D5796 – 03 (2010). careful consideration at a meeting of the responsible technical committee, which
DOI: 10.1520/D5796-10. you may attend.
Copyright © ASTM International, 100 Barr Harbor Drive, PO
...
This document is not anASTM standard and is intended only to provide the user of anASTM standard an indication of what changes have been made to the previous version. Because
it may not be technically possible to adequately depict all changes accurately, ASTM recommends that users consult prior editions as appropriate. In all cases only the current version
of the standard as published by ASTM is to be considered the official document.
Designation:D5796–03(Reapproved2010) Designation:D5796–10
Standard Test Method for
Measurement of Dry Film Thickness of Thin-Film Coil-
Coated Systems by Destructive Means Using a Boring
1
Device
This standard is issued under the fixed designation D5796; the number immediately following the designation indicates the year of
original adoption or, in the case of revision, the year of last revision. A number in parentheses indicates the year of last reapproval. A
superscript epsilon (´) indicates an editorial change since the last revision or reapproval.
1. Scope
1.1 This test method covers the measurement of dry film thickness (DFT) of coating films by microscopic observation of a
precision-cut, shallow-angle crater bored into the coating film. This crater reveals cross sectional layers appearing as rings, whose
width is proportional to the depth of the coating layer(s) and allows for direct calculation of dry film thickness.
1.1.1 The Apparatus, Procedure, and Precision and Bias discussions include Method A and Method B. Method A involves the
use of an optical measurement apparatus which is no longer commercially available, but remains a valid method of dry film
measurement. Method B is a software driven measurement procedure that supersedes Method A.
1.2 The substrate may be any rigid, metallic material, such as cold-rolled steel, hot-dipped galvanized steel, aluminum, etc.The
substrate must be planar with the exception of substrates exhibiting “coil set,” which may be held level by the use of the clamping
tool on the drilling device.
NOTE 1—Variations in the surface profile of the substrate may result in misrepresentative organic coating thickness readings. This condition may exist
over substrates such as hot-dipped, coated steel sheet. This is true of all “precision cut” methods that are used to determine dry film thickness of organic
coatings. This is why several measurements across the strip may be useful if substrate surface profile is suspect.
1.3 The range of thickness measurement is 0 to 3.5 mils (0 to 89 µm).
NOTE 2—For DFT measurements of films greater than 3.5 mils (89µm), but less than 63 mils (1600 µm), a 45° borer may be used in accordance with
this test method, with the exception of 6.8, where the micrometer reading would provide a direct read-out, and division by ten would be unnecessary per
4.3.1 Method A.
1.4 Measurements may be made on coil-coated sheet, certain formed products, or on test panels.
1.5 The values stated in SI units are to be regarded as the standard. The values given in parentheses are for information only.
1.6 This standard does not purport to address all of the safety concerns, if any, associated with its use. It is the responsibility
of the user of this standard to establish appropriate safety and health practices and determine the applicability of regulatory
limitations prior to use.
2. Referenced Documents
2
2.1 ASTM Standards:
D3794 Guide for Testing Coil Coatings
3. Significance and Use
3.1 Measurement of dry film thickness of organic coatings by physically cutting through the film and optically observing and
measuring the thickness offers the advantage of direct measurement as compared with nondestructive means.
3.2 Constituent coating layers of an overall thickness of a coating system can usually be measured individually by this test
method, provide adhesion between each layer is sufficient. (However, this can be difficult in cases where the primer, topcoat, or
multiple coating layers have the same, or very similar, appearance.)
1
This test method is under the jurisdiction of ASTM Committee D01 on Paint and Related Coatings, Materials, and Applications and is the direct responsibility of
Subcommittee D01.53 on Coil Coated Metal.
Current edition approved JuneDec. 1, 2010. Published JulyDecember 2010. Originally approved in 1995. Last previous edition approved in 20032010 as
D5796 – 03 (2010). DOI: 10.1520/D5796-03R10.10.1520/D5796-10.
2
For referencedASTM standards, visit theASTM website, www.astm.org, or contactASTM Customer Service at service@astm.org. For Annual Book of ASTM Standards
volume information, refer to the standard’s Document Summary page on the ASTM website.
Copyright © ASTM International, 100 Barr Harbor Drive, PO Box C700, West Conshohocken, PA 19428-2959, United States.
1
---------------------- Page: 1 ----------------------
D5796–10
NOTE 1—Thedrawingisnottoscale.Itisforillustrationpurposesonly.
NOTE 2—u = 5° 42’ ft 389 in.
Tan u = A/B = 0.1
A = 0.1B
FIG. 1 Typical Crater Formed by Boring Device
4. Apparatus
3
4.1 Dry Film T
...


Questions, Comments and Discussion
Ask us and Technical Secretary will try to provide an answer. You can facilitate discussion about the standard in here.