ASTM E1269-11(2018)
(Test Method)Standard Test Method for Determining Specific Heat Capacity by Differential Scanning Calorimetry
Standard Test Method for Determining Specific Heat Capacity by Differential Scanning Calorimetry
SIGNIFICANCE AND USE
5.1 Differential scanning calorimetric measurements provide a rapid, simple method for determining specific heat capacities of materials.
5.2 Specific heat capacities are important for reactor and cooling system design purposes, quality control, and research and development.
SCOPE
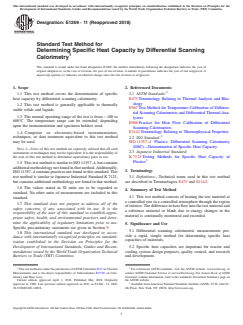
1.1 This test method covers the determination of specific heat capacity by differential scanning calorimetry.
1.2 This test method is generally applicable to thermally stable solids and liquids.
1.3 The normal operating range of the test is from − 100 to 600°C. The temperature range can be extended, depending upon the instrumentation and specimen holders used.
1.4 Computer or electronic-based instrumentation, techniques, or data treatment equivalent to this test method may be used.
Note 1: Users of this test method are expressly advised that all such instruments or techniques may not be equivalent. It is the responsibility of the user of this test method to determine equivalency prior to use.
1.5 This test method is similar to ISO 11357–4, but contains additional methodology not found in that method. Additionally, ISO 11357–4 contains practices not found in this standard. This test method is similar to Japanese Industrial Standard K 7123, but contains additional methodology not found in that method.
1.6 The values stated in SI units are to be regarded as standard. No other units of measurement are included in this standard.
1.7 This standard does not purport to address all of the safety concerns, if any, associated with its use. It is the responsibility of the user of this standard to establish appropriate safety, health, and environmental practices and determine the applicability of regulatory limitations prior to use. Specific precautionary statements are given in Section 9.
1.8 This international standard was developed in accordance with internationally recognized principles on standardization established in the Decision on Principles for the Development of International Standards, Guides and Recommendations issued by the World Trade Organization Technical Barriers to Trade (TBT) Committee.
General Information
- Status
- Published
- Publication Date
- 31-Mar-2018
- Technical Committee
- E37 - Thermal Measurements
- Drafting Committee
- E37.01 - Calorimetry and Mass Loss
Relations
- Effective Date
- 01-Apr-2018
- Effective Date
- 01-Oct-2023
- Effective Date
- 01-Oct-2023
- Effective Date
- 01-May-2015
- Effective Date
- 15-Aug-2014
- Effective Date
- 15-Aug-2014
- Effective Date
- 01-Apr-2014
- Effective Date
- 15-Feb-2014
- Effective Date
- 01-Sep-2012
- Effective Date
- 01-Aug-2011
- Effective Date
- 15-Jun-2011
- Effective Date
- 15-Jun-2011
- Effective Date
- 01-Apr-2011
- Effective Date
- 01-Apr-2011
- Effective Date
- 01-Mar-2010
Overview
ASTM E1269-11(2018): Standard Test Method for Determining Specific Heat Capacity by Differential Scanning Calorimetry is a globally recognized standard developed by ASTM International. This method provides a rapid and reliable approach for measuring the specific heat capacity of materials using Differential Scanning Calorimetry (DSC). Applicable to both thermally stable solids and liquids, this test method covers operational temperature ranges from −100°C to 600°C, with possible extension based on the instrumentation used. The standard is critical for applications involving reactor and cooling system design, quality control, and research and development.
Key Topics
- Differential Scanning Calorimetry (DSC): The standard outlines procedures for using DSC to measure heat flow differences between a test specimen and a reference, enabling accurate determination of specific heat capacity.
- Applicability: Suitable for thermally stable solids and liquids. The technique is sensitive to specimen homogeneity and representative sampling.
- Temperature Range: Standard operating range is −100°C to 600°C. The actual range may be extended with specialized equipment and sample holders.
- Calibration & Apparatus: Emphasizes the importance of frequent calibration using standard materials (e.g., synthetic sapphire), and outlines apparatus requirements including balance accuracy, specimen containers, purge gases, and temperature controls.
- Safety & Good Laboratory Practice: The standard highlights the need for appropriate safety, health, and environmental precautions. For volatile or thermally sensitive materials, special handling and sealing may be required.
Applications
- Engineering Design: Precise determination of specific heat capacity is crucial for the design and optimization of reactors, heat exchangers, and cooling systems in various industries.
- Quality Control: Routine testing allows manufacturers to verify material consistency and compliance with specifications, helping ensure product quality and performance.
- Research & Development: Material scientists and engineers utilize this method to investigate thermal properties of new materials and improve formulations.
- Academic Use: Universities and technical institutes adopt this standard in teaching laboratories for hands-on learning about material thermophysical properties.
Effective application of ASTM E1269-11(2018) ensures accurate and repeatable measurements, providing valuable data that influences product development, safety assessments, and energy management.
Related Standards
- ISO 11357-4: Plastics – Differential Scanning Calorimetry (DSC) – Determination of Specific Heat Capacity. ASTM E1269 is similar but includes additional methodologies and practices.
- Japanese Industrial Standard K 7123: Testing Methods for Specific Heat Capacity of Plastics, which is referenced for comparative purposes.
- ASTM E473: Terminology Relating to Thermal Analysis and Rheology.
- ASTM E967: Test Method for Temperature Calibration of Differential Scanning Calorimeters and Differential Thermal Analyzers.
- ASTM E968: Practice for Heat Flow Calibration of Differential Scanning Calorimeters.
- ASTM E1142: Terminology Relating to Thermophysical Properties.
Organizations adopting ASTM E1269-11(2018) benefit from its established international credibility and alignment with WTO principles on standardization, leading to higher confidence in material data, compliance, and global interoperability.
Keywords: ASTM E1269-11(2018), specific heat capacity, Differential Scanning Calorimetry, DSC, thermal analysis, material properties, quality control, reactor design, ISO 11357-4, heat flow calibration.
Buy Documents
ASTM E1269-11(2018) - Standard Test Method for Determining Specific Heat Capacity by Differential Scanning Calorimetry
Get Certified
Connect with accredited certification bodies for this standard

BSMI (Bureau of Standards, Metrology and Inspection)
Taiwan's standards and inspection authority.
Sponsored listings
Frequently Asked Questions
ASTM E1269-11(2018) is a standard published by ASTM International. Its full title is "Standard Test Method for Determining Specific Heat Capacity by Differential Scanning Calorimetry". This standard covers: SIGNIFICANCE AND USE 5.1 Differential scanning calorimetric measurements provide a rapid, simple method for determining specific heat capacities of materials. 5.2 Specific heat capacities are important for reactor and cooling system design purposes, quality control, and research and development. SCOPE 1.1 This test method covers the determination of specific heat capacity by differential scanning calorimetry. 1.2 This test method is generally applicable to thermally stable solids and liquids. 1.3 The normal operating range of the test is from − 100 to 600°C. The temperature range can be extended, depending upon the instrumentation and specimen holders used. 1.4 Computer or electronic-based instrumentation, techniques, or data treatment equivalent to this test method may be used. Note 1: Users of this test method are expressly advised that all such instruments or techniques may not be equivalent. It is the responsibility of the user of this test method to determine equivalency prior to use. 1.5 This test method is similar to ISO 11357–4, but contains additional methodology not found in that method. Additionally, ISO 11357–4 contains practices not found in this standard. This test method is similar to Japanese Industrial Standard K 7123, but contains additional methodology not found in that method. 1.6 The values stated in SI units are to be regarded as standard. No other units of measurement are included in this standard. 1.7 This standard does not purport to address all of the safety concerns, if any, associated with its use. It is the responsibility of the user of this standard to establish appropriate safety, health, and environmental practices and determine the applicability of regulatory limitations prior to use. Specific precautionary statements are given in Section 9. 1.8 This international standard was developed in accordance with internationally recognized principles on standardization established in the Decision on Principles for the Development of International Standards, Guides and Recommendations issued by the World Trade Organization Technical Barriers to Trade (TBT) Committee.
SIGNIFICANCE AND USE 5.1 Differential scanning calorimetric measurements provide a rapid, simple method for determining specific heat capacities of materials. 5.2 Specific heat capacities are important for reactor and cooling system design purposes, quality control, and research and development. SCOPE 1.1 This test method covers the determination of specific heat capacity by differential scanning calorimetry. 1.2 This test method is generally applicable to thermally stable solids and liquids. 1.3 The normal operating range of the test is from − 100 to 600°C. The temperature range can be extended, depending upon the instrumentation and specimen holders used. 1.4 Computer or electronic-based instrumentation, techniques, or data treatment equivalent to this test method may be used. Note 1: Users of this test method are expressly advised that all such instruments or techniques may not be equivalent. It is the responsibility of the user of this test method to determine equivalency prior to use. 1.5 This test method is similar to ISO 11357–4, but contains additional methodology not found in that method. Additionally, ISO 11357–4 contains practices not found in this standard. This test method is similar to Japanese Industrial Standard K 7123, but contains additional methodology not found in that method. 1.6 The values stated in SI units are to be regarded as standard. No other units of measurement are included in this standard. 1.7 This standard does not purport to address all of the safety concerns, if any, associated with its use. It is the responsibility of the user of this standard to establish appropriate safety, health, and environmental practices and determine the applicability of regulatory limitations prior to use. Specific precautionary statements are given in Section 9. 1.8 This international standard was developed in accordance with internationally recognized principles on standardization established in the Decision on Principles for the Development of International Standards, Guides and Recommendations issued by the World Trade Organization Technical Barriers to Trade (TBT) Committee.
ASTM E1269-11(2018) is classified under the following ICS (International Classification for Standards) categories: 17.200.10 - Heat. Calorimetry. The ICS classification helps identify the subject area and facilitates finding related standards.
ASTM E1269-11(2018) has the following relationships with other standards: It is inter standard links to ASTM E1269-11, ASTM E473-23b, ASTM E1142-23b, ASTM E1142-15, ASTM E1142-14b, ASTM E473-14, ASTM E1142-14a, ASTM E1142-14, ASTM E1142-12, ASTM E1142-11b, ASTM E1142-11a, ASTM E473-11a, ASTM E473-11, ASTM E1142-11, ASTM E473-10. Understanding these relationships helps ensure you are using the most current and applicable version of the standard.
ASTM E1269-11(2018) is available in PDF format for immediate download after purchase. The document can be added to your cart and obtained through the secure checkout process. Digital delivery ensures instant access to the complete standard document.
Standards Content (Sample)
This international standard was developed in accordance with internationally recognized principles on standardization established in the Decision on Principles for the
Development of International Standards, Guides and Recommendations issued by the World Trade Organization Technical Barriers to Trade (TBT) Committee.
Designation:E1269 −11 (Reapproved 2018)
Standard Test Method for
Determining Specific Heat Capacity by Differential Scanning
Calorimetry
This standard is issued under the fixed designation E1269; the number immediately following the designation indicates the year of
original adoption or, in the case of revision, the year of last revision.Anumber in parentheses indicates the year of last reapproval.A
superscript epsilon (´) indicates an editorial change since the last revision or reapproval.
1. Scope 2. Referenced Documents
1.1 This test method covers the determination of specific 2.1 ASTM Standards:
heat capacity by differential scanning calorimetry. E473Terminology Relating to Thermal Analysis and Rhe-
ology
1.2 This test method is generally applicable to thermally
E967Test Method for Temperature Calibration of Differen-
stable solids and liquids.
tial Scanning Calorimeters and Differential ThermalAna-
1.3 The normal operating range of the test is from−100 to
lyzers
600°C. The temperature range can be extended, depending
E968Practice for Heat Flow Calibration of Differential
upon the instrumentation and specimen holders used.
Scanning Calorimeters
E1142Terminology Relating to Thermophysical Properties
1.4 Computer or electronic-based instrumentation,
techniques, or data treatment equivalent to this test method
2.2 ISO Standard:
may be used. ISO11357–4 Plastics: Differential Scanning Calorimetry
(DSC)—Determination of Specific Heat Capacity
NOTE 1—Users of this test method are expressly advised that all such
2.3 Japanese Industrial Standard:
instrumentsortechniquesmaynotbeequivalent.Itistheresponsibilityof
the user of this test method to determine equivalency prior to use.
K7123Testing Methods for Specific Heat Capacity of
Plastics
1.5 ThistestmethodissimilartoISO11357–4,butcontains
additionalmethodologynotfoundinthatmethod.Additionally,
3. Terminology
ISO11357–4containspracticesnotfoundinthisstandard.This
test method is similar to Japanese Industrial Standard K7123, 3.1 Definitions—Technical terms used in this test method
are described in Terminologies E473 and E1142.
but contains additional methodology not found in that method.
1.6 The values stated in SI units are to be regarded as
4. Summary of Test Method
standard. No other units of measurement are included in this
4.1 This test method consists of heating the test material at
standard.
a controlled rate in a controlled atmosphere through the region
1.7 This standard does not purport to address all of the
ofinterest.Thedifferenceinheatflowintothetestmaterialand
safety concerns, if any, associated with its use. It is the
a reference material or blank due to energy changes in the
responsibility of the user of this standard to establish appro-
material is continually monitored and recorded.
priate safety, health, and environmental practices and deter-
mine the applicability of regulatory limitations prior to use.
5. Significance and Use
Specific precautionary statements are given in Section 9.
5.1 Differential scanning calorimetric measurements pro-
1.8 This international standard was developed in accor-
vide a rapid, simple method for determining specific heat
dance with internationally recognized principles on standard-
capacities of materials.
ization established in the Decision on Principles for the
Development of International Standards, Guides and Recom- 5.2 Specific heat capacities are important for reactor and
mendations issued by the World Trade Organization Technical cooling system design purposes, quality control, and research
Barriers to Trade (TBT) Committee. and development.
1 2
ThistestmethodisunderthejurisdictionofASTMCommitteeE37onThermal For referenced ASTM standards, visit the ASTM website, www.astm.org, or
Measurements and is the direct responsibility of Subcommittee E37.01 on Calo- contact ASTM Customer Service at service@astm.org. For Annual Book of ASTM
rimetry and Mass Loss. Standards volume information, refer to the standard’s Document Summary page on
Current edition approved April 1, 2018. Published May 2018. Originally the ASTM website.
approved in 1990. Last previous edition approved in 2011 as E1269–11. DOI: Available fromAmerican National Standards Institute (ANSI), 25 W. 43rd St.,
10.1520/E1269-11R18. 4th Floor, New York, NY 10036, http://www.ansi.org.
Copyright © ASTM International, 100 Barr Harbor Drive, PO Box C700, West Conshohocken, PA 19428-2959. United States
E1269−11 (2018)
6. Interferences 8. Reagents and Materials
8.1 Specific heat capacity standard: synthetic sapphire disk,
6.1 Since milligram quantities of specimen are used, it is
10 to 100 mg.
essential that specimens are homogeneous and representative.
NOTE 3—Interlaboratory studies indicate that physical forms of the
6.2 The occurrence of chemical changes or mass loss on
synthetic sapphire other than disks give lower precision and greater bias
heating during the measurement may invalidate the test.
in the results.
Therefore, the temperature range and specimen holders should
be chosen so as to avoid these processes.
9. Hazards
6.3 Water samples have a special interference. The large
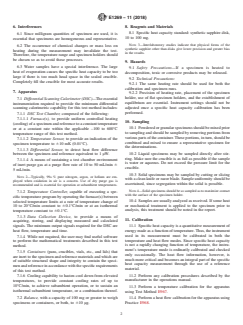
9.1 Safety Precautions—If a specimen is heated to
heat of evaporation causes the specific heat capacity to be too
decomposition, toxic or corrosive products may be released.
large if there is too much head space in the sealed crucible.
9.2 Technical Precautions:
Completely fill the crucible for most accurate results.
9.2.1 The same heating rate should be used for both the
calibration and specimen runs.
7. Apparatus
9.2.2 Precision of heating rate, placement of the specimen
holder, use of flat specimen holders, and the establishment of
7.1 DifferentialScanningCalorimeter(DSC)—Theessential
equilibrium are essential. Instrument settings should not be
instrumentation required to provide the minimum differential
adjusted once a specific heat capacity calibration has been
scanning calorimetric capability for this test method includes:
performed.
7.1.1 DSC Test Chamber, composed of the following:
7.1.1.1 Furnace(s), to provide uniform controlled heating
10. Sampling
(cooling)ofaspecimenandreferencetoaconstanttemperature
10.1 Powderedorgranularspecimensshouldbemixedprior
or at a constant rate within the applicable –100 to 600°C
tosamplingandshouldbesampledbyremovingportionsfrom
temperature range of this test method.
variouspartsofthecontainer.Theseportions,inturn,shouldbe
7.1.1.2 Temperature Sensor, to provide an indication of the
combined and mixed to ensure a representative specimen for
specimen temperature to 610 mK (0.01°C).
the determinations.
7.1.1.3 Differential Sensor, to detect heat flow difference
10.2 Liquid specimens may be sampled directly after stir-
between the specimen and reference equivalent to 1 µW.
ring. Make sure the crucible is as full as possible if the sample
7.1.1.4 A means of sustaining a test chamber environment
is water or aqueous. Do not exceed the pressure limit for the
of inert purge gas at a purge flow rate of 10 to 50 mL/min 6
crucible.
5 mL/min.
10.3 Solid specimens may be sampled by cutting or slicing
NOTE 2—Typically, 99+% pure nitrogen, argon, or helium are em-
with a clean knife or razor blade. Sample uniformity should be
ployed when oxidation in air is a concern. Use of dry purge gas is
ascertained, since segregation within the solid is possible.
recommended and is essential for operation at subambient temperatures.
NOTE4—Solidspecimensshouldbesosampledastomaximizecontact
7.1.2 Temperature Controller, capable of executing a spe-
with the surface of the specimen holder.
cific temperature program by operating the furnace(s) between
10.4 Samplesareusuallyanalyzedasreceived.Ifsomeheat
selected temperature limits at a rate of temperature change of
or mechanical treatment is applied to the specimen prior to
10 to 20°C/min constant to 60.1°C/min or at an isothermal
analysis, this treatment should be noted in the report.
temperature constant to 60.1°C.
7.1.3 Data Collection Device, to provide a means of
11. Calibration
acquiring, storing, and displaying measured and calculated
signals. The minimum output signals required for the DSC are 11.1 Specific heat capacity is a quantitative measurement of
heat flow, temperature and time.
energymadeasafunctionoftemperature.Thus,theinstrument
used in its measurement must be calibrated in both the
7.1.4 While not required, the user may find useful software
temperature and heat flow modes. Since specific heat capacity
to perform the mathematical treatments described in this test
is not a rapidly changing function of temperature, the instru-
method.
ment’s temperature mode is ordinarily calibrated and checked
7.1.5 Containers (pans, crucibles, vials, etc., and lids) that
only occasionally. The heat flow information, however, is
areinerttothespecimenandreferencematerialsandwhichare
muchmorecriticalandbecomesanintegralpartofthespecific
of suitable structural shape and integrity to contain the speci-
heat capacity measurement through the use of a reference
menandreferenceinaccordancewiththespecificrequirements
material.
of this test method.
11.2 Perform any calibration procedures described by the
7.1.6 Cooling capability to hasten cool down from elevated
manufacturer in the operations manual.
temperatures, to provide constant cooling rates of up to
10°C/min, to achieve subambient operation, or to sustain an
11.3 Perform a temperature calibration for the apparatus
isothermal subambient temperature, or a combination thereof.
using Test Method E967.
7.2 Balance, with a capacity of 100 mg or greater to weigh 11.4 Perform a heat flow calibration for the apparatus using
specimens or containers, or both, to 610 µg. Practice E968.
E1269−11 (2018)
11.5 Heat Flow Calibration: program. An equilibrium time of four minutes is suggested.
11.5.1 Syntheticsapphiredisk(α-aluminumoxide;alumina) However, other equilibrium times may be used but shall be
isrecommendedasaheatflowcalibrationstandardforspecific reported.
heat capacity measurements for both heating and cooling
experiments. Specific heat capacity values for synthetic sap-
13. Procedure
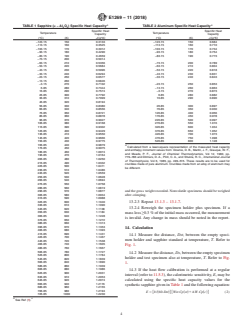
phire are given in Table 1.
13.1 Reference Material—Synthetic sapphire.
NOTE 5—It is possible to use other standard materials or other physical 13.1.1 Purge the DSC apparatus with dry nitrogen (or other
forms of synthetic sapphire, but their use should be noted in the report.
inertgas)ataflowrateof10to50 65mLperminthroughout
The potential adverse impact of increased interfacial resistance encoun-
the experiment.
tered with granular/textured samples may be minimized with the use of a
13.1.2 Weigh a clean, empty specimen holder plus lid to a
powdered synthetic sapphire standard. It is preferred that the physical
precision of 60.01 mg. Record as the tare weight.
form of the sample be similar to that of the standard. Synthetic sapphire
is usually available from your DSC supplier.
13.1.3 Position the empty specimen holder plus lid and a
reference specimen holder plus lid (weight-matched, if pos-
11.5.2 The heat flow calibration may be performed at some
sible) in the DSC apparatus.
regular interval or prior to every specific heat capacity deter-
mination or test specimens.
NOTE 7—The same reference specimen holder+lid should be used for
the sapphire standard run and for the test specimen run.
NOTE 6—A frequency of calibration of at least once a day is recom-
mended.Othertimeintervalsmaybeselectedforheatflowcalibrationbut
13.1.4 Heat or cool the DSC test chamber to the initial
should be noted in the report.
temperature for the experiment at 20°C/min.
11.5.3 If the heat flow calibration is performed at a regular
13.1.5 HoldtheDSCtestchamberisothermallyattheinitial
interval,thecalorimetricsensitivity, E,maybecalculatedusing
temperature for at least 4 min to establish equilibrium. Record
thespecificheatcapacityvaluesforsyntheticsapphiregivenin
this thermal curve (refer to 12.4).
Table 1 and the following equation:
13.1.6 Heat the test specimen from the initial to final
temperature at a rate of 20°C/min. Continue to record the
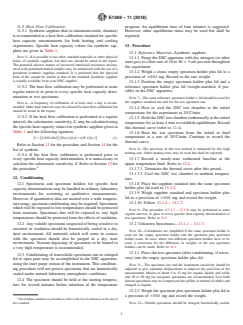
E 5 @b/ 60·Dst #@Wst·Cp st 1∆W·Cp c # (1)
~ ! ~ ! ~ !
thermal curve.
Refer to Section 13 for the procedure and Section 14 for the
NOTE 8—The precision of this test method is enhanced by this high
list of symbols.
heating rate. Other heating rates may be used but shall be reported.
11.5.4 If the heat flow calibration is performed prior to
every specific heat capacity determination, it is unnecessary to 13.1.7 Record a steady-state isothermal baseline at the
calculatethecalorimetricsensitivity, E.RefertoSection13for upper temperature limit. Refer to 12.4.
the procedure. 13.1.7.1 Terminate the thermal curve after this period.
13.1.7.2 Cool the DSC test chamber to ambient tempera-
12. Conditioning
ture.
13.1.8 Place the sapphire standard into the same specimen
12.1 Specimens and specimen holders for specific heat
holder plus lid used in 13.1.2.
capacitydeterminationsmaybehandledinordinarylaboratory
13.1.9 Weigh sapphire standard and specimen holder plus
environments for screening or qualitative measurements.
lid to a precision of 60.01 mg and record the weight.
However, if quantitative data are needed over a wide tempera-
13.1.10 Follow 13.1.4 – 13.1.7.
turerange,spe
...


Questions, Comments and Discussion
Ask us and Technical Secretary will try to provide an answer. You can facilitate discussion about the standard in here.
Loading comments...