ASTM D2596-14
(Test Method)Standard Test Method for Measurement of Extreme-Pressure Properties of Lubricating Grease (Four-Ball Method)
Standard Test Method for Measurement of Extreme-Pressure Properties of Lubricating Grease (Four-Ball Method)
SIGNIFICANCE AND USE
5.1 This test method, used for specification purposes, differentiates between lubricating greases having low, medium, and high level of extreme-pressure properties. The results do not necessarily correlate with results from service.3
5.2 It is noted that lubricating greases that have as their fluid component a silicone, halogenated silicone, or a mixture comprising silicone fluid and petroleum oil, are not applicable to this method of test.
SCOPE
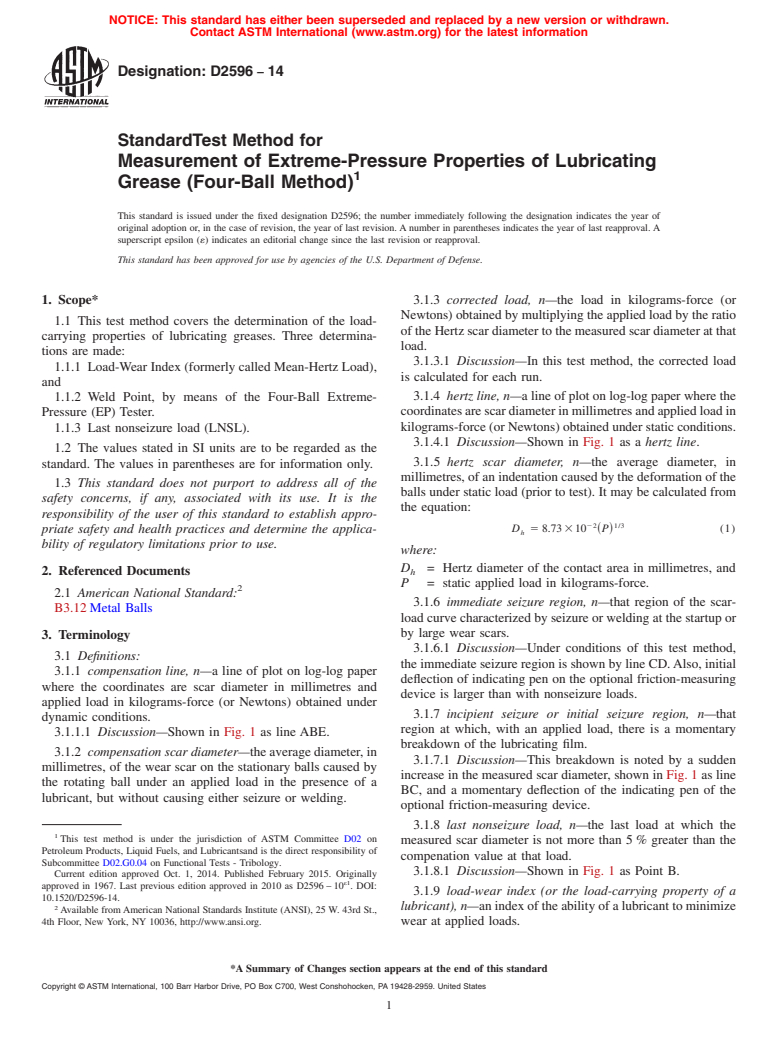
1.1 This test method covers the determination of the load-carrying properties of lubricating greases. Three determinations are made:
1.1.1 Load-Wear Index (formerly called Mean-Hertz Load), and
1.1.2 Weld Point, by means of the Four-Ball Extreme-Pressure (EP) Tester.
1.1.3 Last nonseizure load (LNSL).
1.2 The values stated in SI units are to be regarded as the standard. The values in parentheses are for information only.
1.3 This standard does not purport to address all of the safety concerns, if any, associated with its use. It is the responsibility of the user of this standard to establish appropriate safety and health practices and determine the applicability of regulatory limitations prior to use.
General Information
Relations
Buy Standard
Standards Content (Sample)
NOTICE: This standard has either been superseded and replaced by a new version or withdrawn.
Contact ASTM International (www.astm.org) for the latest information
Designation: D2596 − 14
StandardTest Method for
Measurement of Extreme-Pressure Properties of Lubricating
1
Grease (Four-Ball Method)
This standard is issued under the fixed designation D2596; the number immediately following the designation indicates the year of
original adoption or, in the case of revision, the year of last revision. A number in parentheses indicates the year of last reapproval. A
superscript epsilon (´) indicates an editorial change since the last revision or reapproval.
This standard has been approved for use by agencies of the U.S. Department of Defense.
1. Scope* 3.1.3 corrected load, n—the load in kilograms-force (or
Newtons) obtained by multiplying the applied load by the ratio
1.1 This test method covers the determination of the load-
of the Hertz scar diameter to the measured scar diameter at that
carrying properties of lubricating greases. Three determina-
load.
tions are made:
3.1.3.1 Discussion—In this test method, the corrected load
1.1.1 Load-Wear Index (formerly called Mean-Hertz Load),
is calculated for each run.
and
3.1.4 hertz line, n—a line of plot on log-log paper where the
1.1.2 Weld Point, by means of the Four-Ball Extreme-
coordinatesarescardiameterinmillimetresandappliedloadin
Pressure (EP) Tester.
kilograms-force (or Newtons) obtained under static conditions.
1.1.3 Last nonseizure load (LNSL).
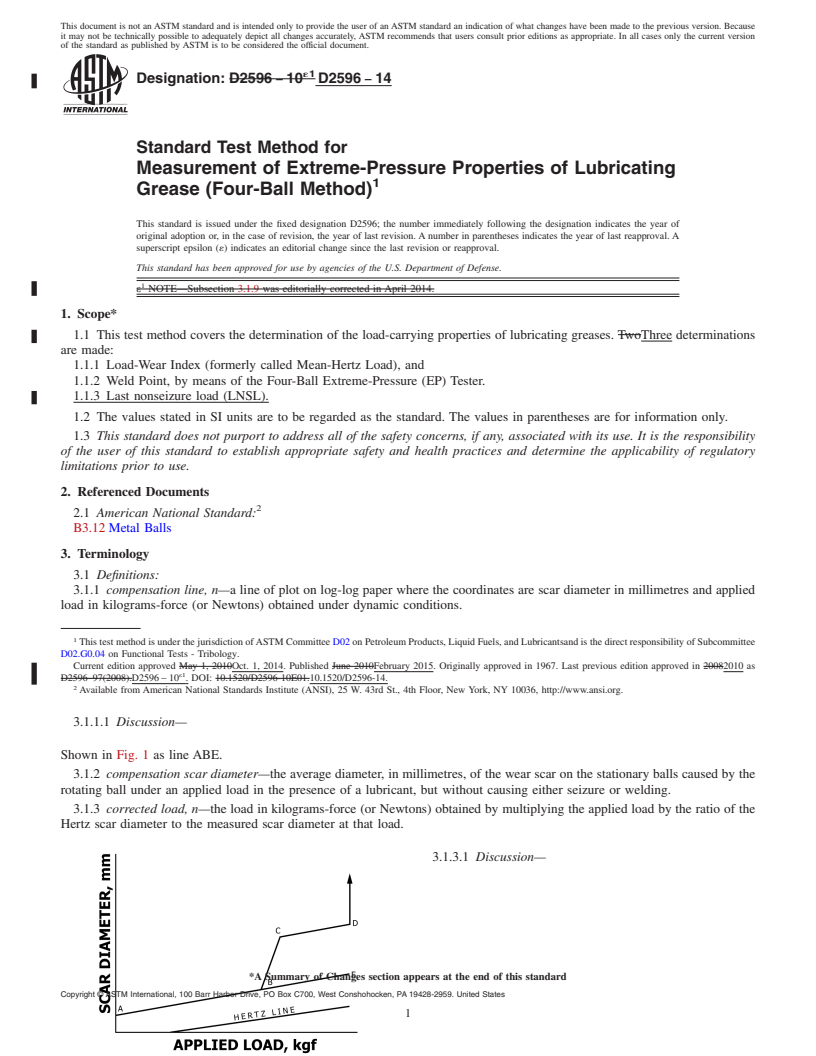
3.1.4.1 Discussion—Shown in Fig. 1 as a hertz line.
1.2 The values stated in SI units are to be regarded as the
3.1.5 hertz scar diameter, n—the average diameter, in
standard. The values in parentheses are for information only.
millimetres, of an indentation caused by the deformation of the
1.3 This standard does not purport to address all of the
balls under static load (prior to test). It may be calculated from
safety concerns, if any, associated with its use. It is the
the equation:
responsibility of the user of this standard to establish appro-
22 1/3
D 5 8.73 310 ~P! (1)
priate safety and health practices and determine the applica-
h
bility of regulatory limitations prior to use.
where:
D = Hertz diameter of the contact area in millimetres, and
2. Referenced Documents h
P = static applied load in kilograms-force.
2
2.1 American National Standard:
3.1.6 immediate seizure region, n—that region of the scar-
B3.12 Metal Balls
load curve characterized by seizure or welding at the startup or
by large wear scars.
3. Terminology
3.1.6.1 Discussion—Under conditions of this test method,
3.1 Definitions:
the immediate seizure region is shown by line CD.Also, initial
3.1.1 compensation line, n—a line of plot on log-log paper
deflection of indicating pen on the optional friction-measuring
where the coordinates are scar diameter in millimetres and
device is larger than with nonseizure loads.
applied load in kilograms-force (or Newtons) obtained under
3.1.7 incipient seizure or initial seizure region, n—that
dynamic conditions.
region at which, with an applied load, there is a momentary
3.1.1.1 Discussion—Shown in Fig. 1 as line ABE.
breakdown of the lubricating film.
3.1.2 compensation scar diameter—the average diameter, in
3.1.7.1 Discussion—This breakdown is noted by a sudden
millimetres, of the wear scar on the stationary balls caused by
increase in the measured scar diameter, shown in Fig. 1 as line
the rotating ball under an applied load in the presence of a
BC, and a momentary deflection of the indicating pen of the
lubricant, but without causing either seizure or welding.
optional friction-measuring device.
3.1.8 last nonseizure load, n—the last load at which the
1
This test method is under the jurisdiction of ASTM Committee D02 on
measured scar diameter is not more than 5 % greater than the
Petroleum Products, Liquid Fuels, and Lubricantsand is the direct responsibility of
compenation value at that load.
Subcommittee D02.G0.04 on Functional Tests - Tribology.
3.1.8.1 Discussion—Shown in Fig. 1 as Point B.
Current edition approved Oct. 1, 2014. Published February 2015. Originally
ε1
approved in 1967. Last previous edition approved in 2010 as D2596 – 10 . DOI:
3.1.9 load-wear index (or the load-carrying property of a
10.1520/D2596-14.
2
lubricant), n—an index of the ability of a lubricant to minimize
Available from American National Standards Institute (ANSI), 25 W. 43rd St.,
4th Floor, New York, NY 10036, http://www.ansi.org. wear at applied loads.
*A Summary of Changes section appears at the end of this standard
Copyright © ASTM International, 100 Barr Harbor Drive, PO Box C700, West Conshohocken, PA 19428-2959. United States
1
---------------------- Page: 1 ----------------------
D2596 − 14
FIG. 1 Schematic Plot of Scar Diameter Versus Applied Load
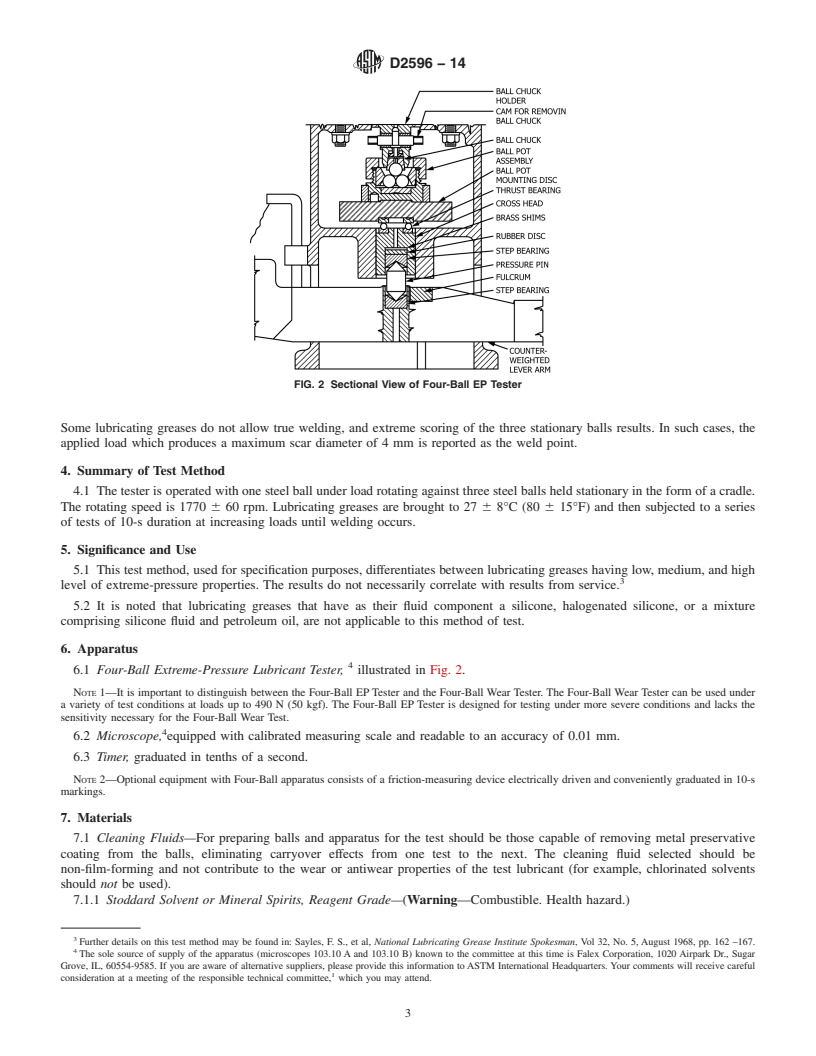
FIG. 2 Sectional View of Four-Ball EP Tester
3.1.9.1 Discussion—Under the conditions of this test, spe-
comprising silicone fluid and petroleum oil, are not applicable
cific
...
This document is not an ASTM standard and is intended only to provide the user of an ASTM standard an indication of what changes have been made to the previous version. Because
it may not be technically possible to adequately depict all changes accurately, ASTM recommends that users consult prior editions as appropriate. In all cases only the current version
of the standard as published by ASTM is to be considered the official document.
´1
Designation: D2596 − 10 D2596 − 14
Standard Test Method for
Measurement of Extreme-Pressure Properties of Lubricating
1
Grease (Four-Ball Method)
This standard is issued under the fixed designation D2596; the number immediately following the designation indicates the year of
original adoption or, in the case of revision, the year of last revision. A number in parentheses indicates the year of last reapproval. A
superscript epsilon (´) indicates an editorial change since the last revision or reapproval.
This standard has been approved for use by agencies of the U.S. Department of Defense.
1
ε NOTE—Subsection 3.1.9 was editorially corrected in April 2014.
1. Scope*
1.1 This test method covers the determination of the load-carrying properties of lubricating greases. TwoThree determinations
are made:
1.1.1 Load-Wear Index (formerly called Mean-Hertz Load), and
1.1.2 Weld Point, by means of the Four-Ball Extreme-Pressure (EP) Tester.
1.1.3 Last nonseizure load (LNSL).
1.2 The values stated in SI units are to be regarded as the standard. The values in parentheses are for information only.
1.3 This standard does not purport to address all of the safety concerns, if any, associated with its use. It is the responsibility
of the user of this standard to establish appropriate safety and health practices and determine the applicability of regulatory
limitations prior to use.
2. Referenced Documents
2
2.1 American National Standard:
B3.12 Metal Balls
3. Terminology
3.1 Definitions:
3.1.1 compensation line, n—a line of plot on log-log paper where the coordinates are scar diameter in millimetres and applied
load in kilograms-force (or Newtons) obtained under dynamic conditions.
1
This test method is under the jurisdiction of ASTM Committee D02 on Petroleum Products, Liquid Fuels, and Lubricantsand is the direct responsibility of Subcommittee
D02.G0.04 on Functional Tests - Tribology.
Current edition approved May 1, 2010Oct. 1, 2014. Published June 2010February 2015. Originally approved in 1967. Last previous edition approved in 20082010 as
ε1
D2596–97(2008).D2596 – 10 . DOI: 10.1520/D2596-10E01.10.1520/D2596-14.
2
Available from American National Standards Institute (ANSI), 25 W. 43rd St., 4th Floor, New York, NY 10036, http://www.ansi.org.
3.1.1.1 Discussion—
Shown in Fig. 1 as line ABE.
3.1.2 compensation scar diameter—the average diameter, in millimetres, of the wear scar on the stationary balls caused by the
rotating ball under an applied load in the presence of a lubricant, but without causing either seizure or welding.
3.1.3 corrected load, n—the load in kilograms-force (or Newtons) obtained by multiplying the applied load by the ratio of the
Hertz scar diameter to the measured scar diameter at that load.
3.1.3.1 Discussion—
*A Summary of Changes section appears at the end of this standard
Copyright © ASTM International, 100 Barr Harbor Drive, PO Box C700, West Conshohocken, PA 19428-2959. United States
1
---------------------- Page: 1 ----------------------
D2596 − 14
FIG. 1 Schematic Plot of Scar Diameter Versus Applied Load
In this test method, the corrected load is calculated for each run.
3.1.4 hertz line, n—a line of plot on log-log paper where the coordinates are scar diameter in millimetres and applied load in
kilograms-force (or Newtons) obtained under static conditions.
3.1.4.1 Discussion—
Shown in Fig. 1 as a hertz line.
3.1.5 hertz scar diameter, n—the average diameter, in millimetres, of an indentation caused by the deformation of the balls under
static load (prior to test). It may be calculated from the equation:
22 1/3
D 5 8.73 310 P (1)
~ !
h
where:
D = Hertz diameter of the contact area in millimetres, and
h
P = static applied load in kilograms-force.
3.1.6 immediate seizure region, n—that region of the scar-load curve characterized by seizure or welding at the startup or by
large wear scars.
3.1.6.1 Discussion—
Under conditions of this test method, the immediate seizure region is shown by line CD. Also, initial deflection of indicating pen
on the optional friction-measuring device is larger than with nonseizure loads.
3.1.7 incipient seizure or initial seizure region, n—that region at which, with an applied load, there is a momentary breakdown
of the lubricating film.
3.1.7.1 Discussion—
This breakdown is noted by a sudden increase in the measured scar diameter, shown in Fig. 1 as line BC, and a momentary
deflection of the indicating pen of the optional friction-measuring device.
3.1.8 last nonseizure load, n—the last load at which the measured scar diameter is n
...


Questions, Comments and Discussion
Ask us and Technical Secretary will try to provide an answer. You can facilitate discussion about the standard in here.