ASTM A938-18
(Test Method)Standard Test Method for Torsion Testing of Wire
Standard Test Method for Torsion Testing of Wire
SIGNIFICANCE AND USE
4.1 The complex stress and strain conditions that occur in the sample during the torsion test are sensitive to minor variations in materials, making the torsion test a useful tool in assessing wire ductility under torsional loading.
SCOPE
1.1 This test method describes the torsion (or twist) testing of metallic wire.
1.2 The values stated in U.S. customary units are to be regarded as the standard. The SI equivalents of U.S. customary units may be approximate.
1.3 This standard does not purport to address all of the safety concerns, if any, associated with its use. It is the responsibility of the user of this standard to establish appropriate safety, health, and environmental practices and determine the applicability of regulatory limitations prior to use.
1.4 This international standard was developed in accordance with internationally recognized principles on standardization established in the Decision on Principles for the Development of International Standards, Guides and Recommendations issued by the World Trade Organization Technical Barriers to Trade (TBT) Committee.
General Information
- Status
- Published
- Publication Date
- 31-Aug-2018
- Technical Committee
- A01 - Steel, Stainless Steel and Related Alloys
- Drafting Committee
- A01.03 - Steel Rod and Wire
Relations
- Effective Date
- 01-Sep-2018
- Effective Date
- 15-May-2009
- Effective Date
- 15-May-2009
- Effective Date
- 01-Apr-2009
- Effective Date
- 01-Jan-2009
- Effective Date
- 01-Oct-2008
- Effective Date
- 01-Feb-2008
- Effective Date
- 01-Nov-2007
- Effective Date
- 01-Jun-2007
- Effective Date
- 01-Mar-2007
- Effective Date
- 01-Apr-2006
- Effective Date
- 10-Jun-2003
- Effective Date
- 10-Jun-2003
- Effective Date
- 10-Aug-2002
- Effective Date
- 10-Jul-1999
Overview
ASTM A938-18: Standard Test Method for Torsion Testing of Wire provides a comprehensive method for evaluating the torsional properties of metallic wire materials. Developed by ASTM International, this standard outlines procedures for twisting wire specimens to assess ductility, determine performance under torsional loading, and ensure material consistency. The test is valuable for manufacturers, quality assurance professionals, and end users seeking reliable metrics for wire quality and performance.
Key Topics
- Torsion Test Procedure: The method describes preparation, testing, and reporting steps for torsion (twist) tests on metallic wires.
- Test Apparatus Requirements: Details on wire clamping, revolution counters, and protective shields ensure accurate and safe testing.
- Specimen Preparation: Includes recommendations for straightening wire and preventing surface damage that could affect results.
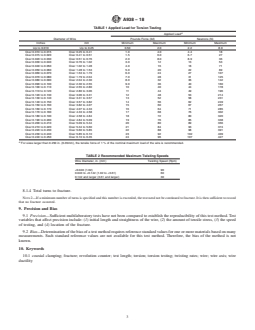
- Test Parameters: Defines appropriate test lengths, tensile forces, and twisting speeds for various wire diameters, supporting precise and repeatable results.
- Significance of Torsion Testing: Torsion testing is highly sensitive to material variations, making it an effective tool for assessing the ductility and integrity of wire products.
- Reporting Requirements: Specifies which data points must be included in test reports, such as specimen identification, diameter, length, and number of turns to fracture.
- Safety Considerations: Highlights the importance of health, safety, and environmental practices when conducting torsion tests.
Applications
Torsion testing of wire is crucial across numerous industries, where the mechanical performance of metallic wire under twisting or rotation is important. Typical applications include:
- Quality Control: Manufacturers use torsion tests to detect inconsistencies and ensure that wire products meet required ductility and mechanical standards.
- Wire and Cable Manufacturing: Ensures wire used in electrical, structural, and specialty cables can withstand operational stress without failure.
- Product Development: Provides engineers and researchers with key data for developing new wire grades or improving existing materials.
- Compliance Testing: Demonstrates conformity to industry and customer specifications for metallic wire.
- Failure Analysis: Helps determine the cause of wire breakage in service, supporting root cause analysis and improvements.
These uses make ASTM A938-18 essential for sectors such as automotive, aerospace, construction, electronics, and any field where wire reliability is paramount.
Related Standards
Several standards complement or reference ASTM A938-18, broadening the context of mechanical properties testing and wire evaluation:
- ASTM E6 – Terminology Relating to Methods of Mechanical Testing: Standardizes terminology for mechanical test methods, applicable to torsion testing terminology.
- Other ASTM Wire Standards: Many ASTM standards specify additional or alternative mechanical tests for wire, such as tensile or fatigue testing.
- International Standards: ASTM A938-18 is developed in line with globally recognized principles, making it relevant for international trade and compliance.
Keywords: torsion test, twist testing, wire ductility, metallic wire, mechanical testing, ASTM A938, wire standards, quality control, wire fracture, material testing, torsional loading, standard test method
Adhering to ASTM A938-18 ensures accurate, repeatable torsion testing of wire, supporting both product quality and regulatory compliance in diverse applications.
Buy Documents
ASTM A938-18 - Standard Test Method for Torsion Testing of Wire
REDLINE ASTM A938-18 - Standard Test Method for Torsion Testing of Wire
Get Certified
Connect with accredited certification bodies for this standard

Element Materials Technology
Materials testing and product certification.

Inštitut za kovinske materiale in tehnologije
Institute of Metals and Technology. Materials testing, metallurgical analysis, NDT.
Sponsored listings
Frequently Asked Questions
ASTM A938-18 is a standard published by ASTM International. Its full title is "Standard Test Method for Torsion Testing of Wire". This standard covers: SIGNIFICANCE AND USE 4.1 The complex stress and strain conditions that occur in the sample during the torsion test are sensitive to minor variations in materials, making the torsion test a useful tool in assessing wire ductility under torsional loading. SCOPE 1.1 This test method describes the torsion (or twist) testing of metallic wire. 1.2 The values stated in U.S. customary units are to be regarded as the standard. The SI equivalents of U.S. customary units may be approximate. 1.3 This standard does not purport to address all of the safety concerns, if any, associated with its use. It is the responsibility of the user of this standard to establish appropriate safety, health, and environmental practices and determine the applicability of regulatory limitations prior to use. 1.4 This international standard was developed in accordance with internationally recognized principles on standardization established in the Decision on Principles for the Development of International Standards, Guides and Recommendations issued by the World Trade Organization Technical Barriers to Trade (TBT) Committee.
SIGNIFICANCE AND USE 4.1 The complex stress and strain conditions that occur in the sample during the torsion test are sensitive to minor variations in materials, making the torsion test a useful tool in assessing wire ductility under torsional loading. SCOPE 1.1 This test method describes the torsion (or twist) testing of metallic wire. 1.2 The values stated in U.S. customary units are to be regarded as the standard. The SI equivalents of U.S. customary units may be approximate. 1.3 This standard does not purport to address all of the safety concerns, if any, associated with its use. It is the responsibility of the user of this standard to establish appropriate safety, health, and environmental practices and determine the applicability of regulatory limitations prior to use. 1.4 This international standard was developed in accordance with internationally recognized principles on standardization established in the Decision on Principles for the Development of International Standards, Guides and Recommendations issued by the World Trade Organization Technical Barriers to Trade (TBT) Committee.
ASTM A938-18 is classified under the following ICS (International Classification for Standards) categories: 77.140.65 - Steel wire, wire ropes and link chains. The ICS classification helps identify the subject area and facilitates finding related standards.
ASTM A938-18 has the following relationships with other standards: It is inter standard links to ASTM A938-07(2013), ASTM E6-09b, ASTM E6-09be1, ASTM E6-09a, ASTM E6-09, ASTM E6-08a, ASTM E6-08, ASTM E6-07b, ASTM E6-07a, ASTM E6-07, ASTM E6-06, ASTM E6-03, ASTM E6-03e1, ASTM E6-02a, ASTM E6-99e1. Understanding these relationships helps ensure you are using the most current and applicable version of the standard.
ASTM A938-18 is available in PDF format for immediate download after purchase. The document can be added to your cart and obtained through the secure checkout process. Digital delivery ensures instant access to the complete standard document.
Standards Content (Sample)
This international standard was developed in accordance with internationally recognized principles on standardization established in the Decision on Principles for the
Development of International Standards, Guides and Recommendations issued by the World Trade Organization Technical Barriers to Trade (TBT) Committee.
Designation: A938 − 18
Standard Test Method for
Torsion Testing of Wire
This standard is issued under the fixed designation A938; the number immediately following the designation indicates the year of
original adoption or, in the case of revision, the year of last revision. A number in parentheses indicates the year of last reapproval. A
superscript epsilon (´) indicates an editorial change since the last revision or reapproval.
1. Scope* 5. Apparatus
1.1 This test method describes the torsion (or twist) testing
5.1 Clamping Heads:
of metallic wire.
5.1.1 The torsion test apparatus must have clamping heads
1.2 The values stated in U.S. customary units are to be that will remain coaxial (within 10°) during the test.
regarded as the standard. The SI equivalents of U.S. customary
5.1.2 One clamping head shall be easily displaceable in the
units may be approximate.
direction of the wire axis. This longitudinally displaceable
clamping head shall be equipped with a device capable of
1.3 This standard does not purport to address all of the
applying the necessary tensile load.
safety concerns, if any, associated with its use. It is the
5.1.3 The clamping heads shall clamp the wire firmly, but
responsibility of the user of this standard to establish appro-
priate safety, health, and environmental practices and deter- should not damage it to the extent that fracture occurs at the
clamping point during twisting. The distance between the
mine the applicability of regulatory limitations prior to use.
1.4 This international standard was developed in accor- clamps is the test length. The wire shall be twisted only along
the test length, and not at the point of clamping. These
dance with internationally recognized principles on standard-
ization established in the Decision on Principles for the requirements can be satisfied by bending a short section at each
end of the specimen to an angle of about 90° to the wire axis,
Development of International Standards, Guides and Recom-
mendations issued by the World Trade Organization Technical as described in 6.3.
Barriers to Trade (TBT) Committee.
5.2 Revolution Counter—Amechanism to count the number
of twists shall be provided.
2. Referenced Documents
5.3 Protective Shield—Aprotective shield shall be provided
2.1 ASTM Standards:
to protect the operator from flying fragments in cases when the
E6 Terminology Relating to Methods of Mechanical Testing
wire breaks into more than two pieces.
3. Terminology
6. Specimen Preparation
3.1 Definitions—The definitions related to torsion testing
6.1 Straightening—The test piece, consisting of a length of
appearing in Terminology E6 shall be considered as applying
wire, should be straight before being tested. If straightening is
to the terms used in this test method.
necessary, it shall, unless otherwise specified, be done by hand.
Other straightening techniques are permitted provided surface
4. Significance and Use
damage is avoided. Since the shear stress is maximum at the
4.1 The complex stress and strain conditions that occur in
surface of the wire during testing, even slight surface damage
the sample during the torsion test are sensitive to minor
such as pits or scratches can cause early fracture, and the
variations in materials, making the torsion test a useful tool in
results may not be indicative of the full capability of the wire.
assessing wire ductility under torsional loading.
6.1.1 During straightening, it is important that the properties
and cross section remain unchanged as far as possible. In
particular, the specimen shall not be subjected to any twisting.
This test method is under the jurisdiction of ASTM Committee A01 on Steel,
Stainless Steel and RelatedAlloysand is the direct responsibility of A01.03 on Steel 6.2 Test Length:
Rod and Wire.
6.2.1 Recommended test length is 8 in. (203 mm) (distance
Current edition approved Sept. 1, 2018. Published September 2018. Originally
between the clamping heads). Sufficient material must also be
approved in 1975. Last previous edition approved in 2013 as A938 – 07 (2013).
DOI: 10.1520/A0938-18. provided to allow for gripping.
For referenced ASTM standards, visit the ASTM website, www.astm.org, or
6.2.2 Other test lengths may be used as agreed upon
contact ASTM Customer Service at service@astm.org. For Annual Book of ASTM
between the producer and purchaser or as specified in the
Standards volume information, refer to the standard’s Document Summary page on
the ASTM website. appropriate product specification.
*A Summary of Changes section appears at the end of this standard
Copyright © ASTM International, 100 Barr Harbor Drive, PO Box C700, West Conshohocken, PA 19428-2959. United States
A938 − 18
6.2.3 When a test length other than 8 in. (203 mm) is used, 7.3.2 If the number of turns is satisfactory, the test specimen
the minimum torsions shall be revised in direct proportion to is considered as having passed the test, regardless of the
the change in the jaw spacing, or as determined by the position of fracture, defined as complete separation of the
following formula: broken ends. If the number of turns does not satisfy the
requirements of the specification, and the initial fracture,
T L
~ !~ !
L x
T 5 (1)
defined as complete separation of the broken ends, location is
x
~L !
L
within two times the wire diameter from the clamps, the test is
where:
considered invalid and shall be repeated.
T = minimum torsions for new length,
x
NOTE 1—Specimens often break into more than two pieces, subsequent
T = minimum torsions for 8 in. (203 mm) length,
L
fractures resulting from the rapid untwisting of the wire following the
L = new length, and
x
initial fracture. In many cases, the initial fracture will have a smooth
L = 8 in. (203 mm).
L
surface perpendicular to the wire axis.The above validity test applies
...
This document is not an ASTM standard and is intended only to provide the user of an ASTM standard an indication of what changes have been made to the previous version. Because
it may not be technically possible to adequately depict all changes accurately, ASTM recommends that users consult prior editions as appropriate. In all cases only the current version
of the standard as published by ASTM is to be considered the official document.
Designation: A938 − 07 (Reapproved 2013) A938 − 18
Standard Test Method for
Torsion Testing of Wire
This standard is issued under the fixed designation A938; the number immediately following the designation indicates the year of
original adoption or, in the case of revision, the year of last revision. A number in parentheses indicates the year of last reapproval. A
superscript epsilon (´) indicates an editorial change since the last revision or reapproval.
1. Scope*
1.1 This test method describes the torsion (or twist) testing of metallic wire.
1.2 The values stated in U.S. customary units are to be regarded as the standard. The SI equivalents of U.S. customary units
may be approximate.
1.3 This standard does not purport to address all of the safety concerns, if any, associated with its use. It is the responsibility
of the user of this standard to establish appropriate safety safety, health, and healthenvironmental practices and determine the
applicability of regulatory limitations prior to use.
1.4 This international standard was developed in accordance with internationally recognized principles on standardization
established in the Decision on Principles for the Development of International Standards, Guides and Recommendations issued
by the World Trade Organization Technical Barriers to Trade (TBT) Committee.
2. Referenced Documents
2.1 ASTM Standards:
E6 Terminology Relating to Methods of Mechanical Testing
3. Terminology
3.1 Definitions—The definitions related to torsion testing appearing in Terminology E6 shall be considered as applying to the
terms used in this test method.
4. Significance and Use
4.1 The complex stress and strain conditions that occur in the sample during the torsion test are sensitive to minor variations
in materials, making the torsion test a useful tool in assessing wire ductility under torsional loading.
5. Apparatus
5.1 Clamping Heads:
5.1.1 The torsion test apparatus must have clamping heads that will remain coaxial (within 10°) during the test.
5.1.2 One clamping head shall be easily displaceable in the direction of the wire axis. This longitudinally displaceable clamping
head shall be equipped with a device capable of applying the necessary tensile load.
5.1.3 The clamping heads shall clamp the wire firmly, but should not damage it to the extent that fracture occurs at the clamping
point during twisting. The distance between the clamps is the test length. The wire shall be twisted only along the test length, and
not at the point of clamping. These requirements can be satisfied by bending a short section at each end of the specimen to an angle
of about 90° to the wire axis, as described in 6.3.
5.2 Revolution Counter—A mechanism to count the number of twists shall be provided.
5.3 Protective Shield—A protective shield shall be provided to protect the operator from flying fragments in cases when the wire
breaks into more than two pieces.
This test method is under the jurisdiction of ASTM Committee A01 on Steel, Stainless Steel and Related Alloysand is the direct responsibility of A01.03 on Steel Rod
and Wire.
Current edition approved April 1, 2013Sept. 1, 2018. Published April 2013September 2018. Originally approved in 1975. Last previous edition approved in 20072013 as
A938 – 07.A938 – 07 (2013). DOI: 10.1520/A0938-07R13.10.1520/A0938-18.
For referenced ASTM standards, visit the ASTM website, www.astm.org, or contact ASTM Customer Service at service@astm.org. For Annual Book of ASTM Standards
volume information, refer to the standard’s Document Summary page on the ASTM website.
*A Summary of Changes section appears at the end of this standard
Copyright © ASTM International, 100 Barr Harbor Drive, PO Box C700, West Conshohocken, PA 19428-2959. United States
A938 − 18
6. Specimen Preparation
6.1 Straightening—The test piece, consisting of a length of wire, should be straight before being tested. If straightening is
necessary, it shall, unless otherwise specified, be done by hand. Other straightening techniques are permitted provided surface
damage is avoided. Since the shear stress is maximum at the surface of the wire during testing, even slight surface damage such
as pits or scratches can cause early fracture, and the results may not be indicative of the full capability of the wire.
NOTE 1—During straightening, it is important that the properties and cross section remain unchanged as far as possible. In particular, the specimen shall
not be subjected to any twisting.
6.1.1 During straightening, it is important that the properties and cross section remain unchanged as far as possible. In particular,
the specimen shall not be subjected to any twisting.
6.2 Test Length:
6.2.1 Recommended test length is 8 in. (203 mm) (distance between the clamping heads). Sufficient material must also be
provided to allow for gripping.
6.2.2 Other test lengths may be used as agreed upon between the producer and purchaser or as specified in the appropriate
product specification.
6.2.3 When a test length other than 8 in. (203 mm) is used, the minimum torsions shall be revised in direct proportion to the
change in the jaw spacing, or as determined by the following formula:
~T ! ~L !
L x
T 5 (1)
x
L
~ !
L
where:
T = minimum torsions for new length,
x
T = minimum torsions for 8 in. (203 mm) length,
L
L = new length, and
x
L = 8 in. (203 mm).
L
6.3 End Preparation—To prevent the gripped ends from slipping tangentially in the clamps, a minimum of ⁄2 in. (12.7 mm)
(12.7 mm) of each end of the wire is often bent approximately 90° to the axis of the test sample. The end sections need not be
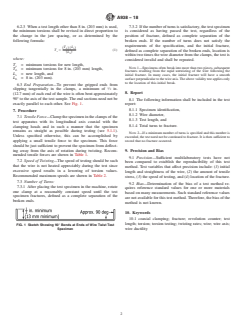
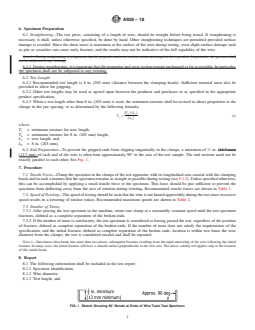
exactly parallel to each other. See Fig. 1.
7. Procedure
7.1 Tensile Force—Clamp the specimen in the clamps of the test apparatus with its longitudinal axis coaxial with the clamping
heads and in such a manner that the specimen remains as straight as possible during testing (see 5.1.1). Unless specified otherwise,
this can be accomplished by applying a small tensile force to the specimen. This force should be just su
...



Questions, Comments and Discussion
Ask us and Technical Secretary will try to provide an answer. You can facilitate discussion about the standard in here.
Loading comments...