ASTM E1345-98(2008)
(Practice)Standard Practice for Reducing the Effect of Variability of Color Measurement by Use of Multiple Measurements
Standard Practice for Reducing the Effect of Variability of Color Measurement by Use of Multiple Measurements
SIGNIFICANCE AND USE
This practice should be used whenever measured color-scale or color-difference-scale values are to be compared to an established tolerance. In this way it can be demonstrated quantitatively that the sampling and measurement procedures are adequate to allow an unambiguous decision as to whether or not the mean results are within tolerance.
This practice is based on portions of SAE Practice J 1545, as it applies to painted or plastic automotive parts. It is generally applicable to object colors in various materials. Textured materials, such as textiles, may require special consideration (see SAE Practice J 1545 and STP 15D Manual on Presentation of Data and Control Chart Analysis ).
While Practice E 178 deals with outliers, it does not include definitions relating to the box and whisker technique. The definition of an outlier is operational and a little vague because there is still considerable disagreement about what constitutes an outlier. In any normally distributed population, there will be members that range from minus to plus infinity. Theoretically, one should include any member of the population in any sample based on estimates of the population parameters. Practically, including a member that is found far from the mean within a small sample, most members of which are found near the mean, will introduce a systematic bias into the estimate of the population parameters (mean, standard deviation, standard error). Such a bias is in direct contrast with the goal of this practice, namely, to reduce the effects of variability of measurement. For the purposes of this practice, no distinction is made between errors of sampling and members of the tails of the distribution. Practice E 178 has several methods and significance tables to attempt to differentiate between these two types of extreme values.
SCOPE
1.1 Reduction of the variability associated with average color or color-difference measurements of object-color specimens is achieved by statistical analysis of the results of multiple measurements on a single specimen, or by measurement of multiple specimens, whichever is appropriate.
1.2 This practice provides a means for the determination of the number of measurements required to reduce the variability to a predetermined fraction of the relevant color or color-difference tolerances.
1.3 This practice is general in scope rather than specific as to instrument or material.
General Information
Relations
Buy Standard
Standards Content (Sample)
NOTICE: This standard has either been superseded and replaced by a new version or withdrawn.
Contact ASTM International (www.astm.org) for the latest information.
Designation:E1345–98(Reapproved2008)
Standard Practice for
Reducing the Effect of Variability of Color Measurement by
Use of Multiple Measurements
This standard is issued under the fixed designation E1345; the number immediately following the designation indicates the year of
original adoption or, in the case of revision, the year of last revision. A number in parentheses indicates the year of last reapproval. A
superscript epsilon (´) indicates an editorial change since the last revision or reapproval.
INTRODUCTION
Recent improvements in the precision and bias of color-measuring instruments have been
accompanied by more widespread use of numerical color tolerances based on instrumental measure-
ments. As tighter tolerances are specified, they begin to approach the limits of visual perception. In
many cases, the instrument user has found it difficult to prepare and measure specimens with adequate
repeatability. This practice provides procedures for reducing variability in the mean results of color
measurement by the use of multiple measurements, and it indicates how many measurements are
required for a specific reduction.
1. Scope E308 Practice for Computing the Colors of Objects by
Using the CIE System
1.1 Reduction of the variability associated with average
E456 Terminology Relating to Quality and Statistics
color or color-difference measurements of object-color speci-
E1164 Practice for Obtaining Spectrometric Data for
mens is achieved by statistical analysis of the results of
Object-Color Evaluation
multiple measurements on a single specimen, or by measure-
2.2 Other Standard:
ment of multiple specimens, whichever is appropriate.
SAE J 1545 Recommended Practice for Instrumental Color
1.2 This practice provides a means for the determination of
Difference Measurement for Exterior Finishes, Textiles
the number of measurements required to reduce the variability
and Colored Trim
to a predetermined fraction of the relevant color or color-
difference tolerances.
3. Terminology
1.3 This practice is general in scope rather than specific as
3.1 DefinitionsofappearancetermsinTerminologyE284or
to instrument or material.
statistical terms in Terminology E456 are applicable to this
2. Referenced Documents practice.
3.2 Definitions of Terms Specific to This Standard:
2.1 ASTM Standards:
3.2.1 box and whisker plot, n—a nonparmetric data analysis
D2244 Practice for Calculation of Color Tolerances and
diagram that illustrates the 25, 50, and 75 % cumulative
Color Differences from Instrumentally Measured Color
distribution of values in a data set (the box) and the expected
Coordinates
range of values, defined by distance outside the box ends; see
D3134 PracticeforEstablishingColorandGlossTolerances
whiskers, see Fig. 1.
E178 Practice for Dealing With Outlying Observations
3.2.2 extreme value, n—a single reading, selected from a
E284 Terminology of Appearance
series of readings, whose value is farther from the nearer box
end than 3.0 times the hinge length.
This practice is under the jurisdiction of ASTM Committee E12 on Color and
3.2.2.1 Discussion—A box and whiskers plot is normally
Appearance and is the direct responsibility of Subcommittee E12.04 on Color and
usedtofindoutliersandextremevalues.Suchvaluesshouldbe
Appearance Analysis.
eliminated from a series before calculating the series mean,
Current edition approved June 1, 2008. Published June 2008. Originally
approved in 1990. Last previous edition approved in 2003 as E1345 - 98 (2003).
standard deviation, and confidence intervals.
DOI: 10.1520/E1345-98R08.
For referenced ASTM standards, visit the ASTM website, www.astm.org, or
contact ASTM Customer Service at service@astm.org. For Annual Book of ASTM
Standards volume information, refer to the standard’s Document Summary page on Available from Society of Automotive Engineers (SAE), 400 Commonwealth
the ASTM website. Dr., Warrendale, PA 15096-0001, http://www.sae.org.
Copyright ©ASTM International, 100 Barr Harbor Drive, PO Box C700, West Conshohocken, PA19428-2959, United States.
E1345–98 (2008)
0.5
s 5 s/~N ! (3)
e
3.2.10 standard error goal, s , n—level to which the
e,g
standard error of the estimated mean is to be reduced.
3.2.11 tolerance, n—the upper tolerance limit minus the
lower tolerance limit; the total allowable range of the color-
scale or color-difference-scale value considered.
3.2.12 whiskers, n—lines extending out from the box ends
to the largest and smallest observations lying within 1.5 times
the hinge length, measured from the box ends.
4. Summary of Practice
4.1 This practice assumes that, for the material under
consideration and a specified set of color scales, relevant color
or color-difference tolerances have been established (see Prac-
tice D3134).
4.2 For convenience, the numerical example in the Appen-
dix uses CIELAB LCH (lightness, chroma, hue) color differ-
ence scales DL*, DC* , and DH* (see Practice D2244 and
ab ab
Practice E308), but this is not meant to be restrictive.
NOTE 1—Some coordinates, such as CIE x, y, Y, do not follow the
theoriesofthisstandardduetoexcessivecolinearity.Whileithasnotbeen
tested, this same colinearity problem may also be observed in 1960 u, v
FIG. 1 Schematic Description of a Box and Whisker Plot
and 1976 u8,v8 coordinates. Table 1 provides a listing of the appropriate
and inappropriate color coordinates for use with this practice.
3.2.3 hinges, n—the 25 and 75 % cumulative distribution
points in a set of readings taken during a measurement.
3.2.3.1 Discussion—Hinges represent the values in which
TABLE 1 Appropriate and Inappropriate Color Coordinates for
25 % of the readings are less than the lower hinge and 75 % of
Use in This Practice
the readings are less than the upper hinge. See also hinge
Color Coordinates Appropriate Inappropriate
length.
CIE Yxy =
3.2.3.2 Discussion—Hinges are sometimes called the lower
CIE LCH =
(Q ) and upper (Q ) quartile values.
1 1
CIE LAB =
3.2.4 hinge length, H, n—the range of values between the
CIE LUV =
CIE Lu8v8 =
lower and upper hinges.
3.2.4.1 Discussion—The hinge length is sometimes called
the box width or the interquartile range Q to Q .
3 1
3.2.5 outlier, n—a single reading, selected from a series of
4.3 The successive steps in the procedure are as follows:
readings, whose value is further from the nearer box end then
1.5 times the hinge length; see 3.2.2.1. 4.3.1 Determine the standard deviation of instrument.
3.2.6 sampling number, N, n—number of multiple measure-
4.3.1.1 Screen the measurement data for outliers and ex-
ments,ornumberofmultiplespecimens,requiredtoreducethe
treme values.
variability of color or color-difference measurement to a
4.3.2 Determine the standard deviation of color or color-
desired level.
difference measurement.
3.2.7 standard deviation of color or color-difference mea-
4.3.2.1 Screen the measurement data for outliers and ex-
surement, s—standard deviation of the color scale or color-
treme values.
difference-scale value, x, being considered:
4.3.3 Determinethestandarderroroftheestimatedmeanfor
i
2 0.5
a sampling number of one.
s 5 @$(~x 2 x ! %/~n 2 1!# (1)
i avg
4.3.4 Determine the final sampling number that reduces the
where:
standard error of the estimated mean to less than the standard
x =(( x)/n, and
avg i error goal for each scale value.
n = the number of replicate measurements made.
4.3.5 Determine the final standard error goal values.
3.2.8 standard deviation of instrument, s, n—standard de-
i
NOTE 2—Whenthestandarderroroftheestimatedmeanforasampling
viation of a color-scale or color-difference-scale value due to
number of one is larger than a specified fraction of the tolerance or a
instrument variability alone:
specified multiple of the standard deviation of instrument for any of the
2 0.5
s 5 @ (~x 2 x ! /~n 2 1!# (2) three color-difference-scale values, a sampling number greater than one is
$ %
i i avg
required.
3.2.9 standard error of the estimated mean, s , n—standard
e
deviation of color or color-difference measurement divided by 4.4 Screening for and Elimination of Outliers and Extreme
the square root of the sampling number: Values in Measured Data:
E1345–98 (2008)
TABLE 2 Official Values for T (One-Sided Test) for Outliers
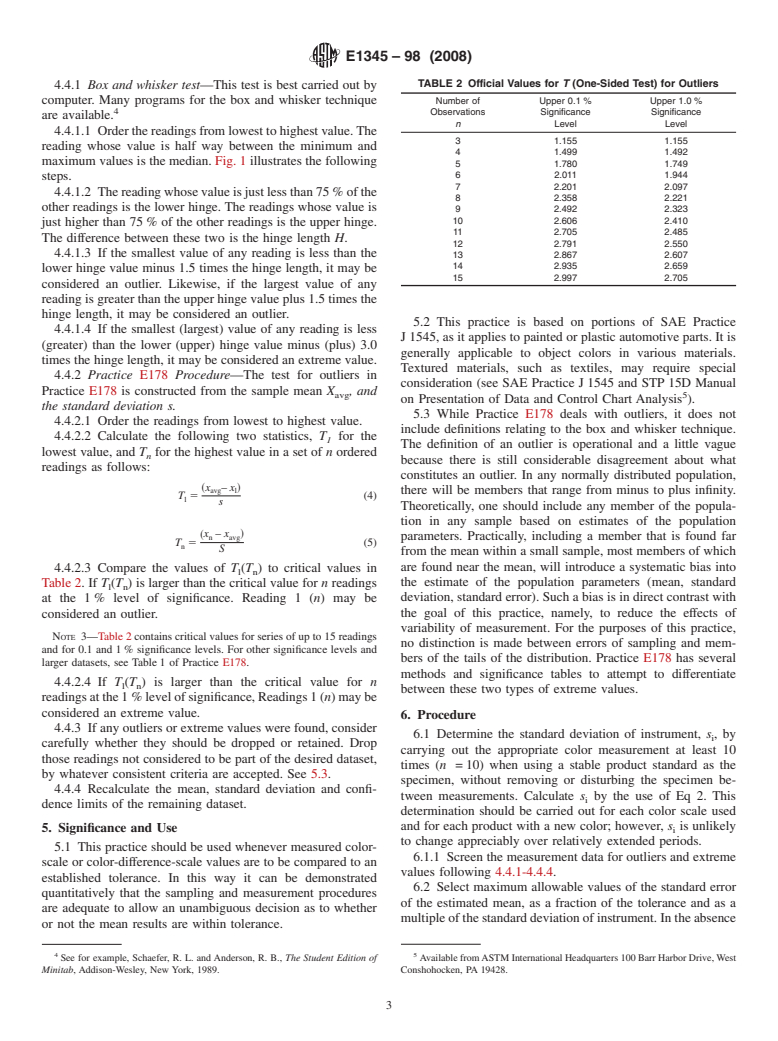
4.4.1 Box and whisker test—This test is best carried out by
computer. Many programs for the box and whisker technique Number of Upper 0.1% Upper 1.0%
4 Observations Significance Significance
are available.
n Level Level
4.4.1.1 Orderthereadingsfromlowesttohighestvalue.The
3 1.155 1.155
reading whose value is half way between the minimum and
4 1.499 1.492
maximum values is the median. Fig. 1 illustrates the following
5 1.780 1.749
6 2.011 1.944
steps.
7 2.201 2.097
4.4.1.2 Thereadingwhosevalueisjustlessthan75 %ofthe
8 2.358 2.221
other readings is the lower hinge. The readings whose value is
9 2.492 2.323
10 2.606 2.410
just higher than 75 % of the other readings is the upper hinge.
11 2.705 2.485
The difference between these two is the hinge length H.
12 2.791 2.550
4.4.1.3 If the smallest value of any reading is less than the 13 2.867 2.607
14 2.935 2.659
lower hinge value minus 1.5 times the hinge length, it may be
15 2.997 2.705
considered an outlier. Likewise, if the largest value of any
reading is greater than the upper hinge value plus 1.5 times the
hinge length, it may be considered an outlier.
5.2 This practice is based on portions of SAE Practice
4.4.1.4 If the smallest (largest) value of any reading is less
J 1545, as it applies to painted or plastic automotive parts. It is
(greater) than the lower (upper) hinge value minus (plus) 3.0
generally applicable to object colors in various materials.
times the hinge length, it may be considered an extreme value.
Textured materials, such as textiles, may
...
This document is not anASTM standard and is intended only to provide the user of anASTM standard an indication of what changes have been made to the previous version. Because
it may not be technically possible to adequately depict all changes accurately, ASTM recommends that users consult prior editions as appropriate. In all cases only the current version
of the standard as published by ASTM is to be considered the official document.
Designation:E 1345–98(Reapproved2003) Designation:E1345–98(Reapproved2008)
Standard Practice for
Reducing the Effect of Variability of Color Measurement by
Use of Multiple Measurements
This standard is issued under the fixed designation E1345; the number immediately following the designation indicates the year of
original adoption or, in the case of revision, the year of last revision. A number in parentheses indicates the year of last reapproval. A
superscript epsilon (´) indicates an editorial change since the last revision or reapproval.
INTRODUCTION
Recent improvements in the precision and bias of color-measuring instruments have been
accompanied by more widespread use of numerical color tolerances based on instrumental measure-
ments. As tighter tolerances are specified, they begin to approach the limits of visual perception. In
many cases, the instrument user has found it difficult to prepare and measure specimens with adequate
repeatability. This practice provides procedures for reducing variability in the mean results of color
measurement by the use of multiple measurements, and it indicates how many measurements are
required for a specific reduction.
1. Scope
1.1 Reduction of the variability associated with average color or color-difference measurements of object-color specimens is
achieved by statistical analysis of the results of multiple measurements on a single specimen, or by measurement of multiple
specimens, whichever is appropriate.
1.2 This practice provides a means for the determination of the number of measurements required to reduce the variability to
a predetermined fraction of the relevant color or color-difference tolerances.
1.3 This practice is general in scope rather than specific as to instrument or material.
2. Referenced Documents
2.1 ASTM Standards:
D2244 Practice for Calculation of Color Tolerances and Color Differences from Instrumentally Measured Color Coordinates
D3134 Practice for Establishing Retroreflectance Color and Gloss Tolerances
E178 Practice for Dealing With Outlying Observations
E284 Terminology of Appearance
E308 Practice for Computing the Colors of Objects by Using the CIE System
E456 Terminology Relating to Quality and Statistics
E1164 Practice for Obtaining SpectrophotometricSpectrometric Data for Object-Color Evaluation
2.2 Other Standard:
SAEJ 1545 RecommendedPracticeforInstrumentalColorDifferenceMeasurementforExteriorFinishes,TextilesandColored
Trim
3. Terminology
3.1 Definitions of appearance terms in Terminology E 284E284 or statistical terms in Terminology E 456E456 are applicable
to this practice.
3.2 Definitions of Terms Specific to This Standard:
3.2.1 boxandwhiskerplot,n—anonparmetricdataanalysisdiagramthatillustratesthe25,50,and75 %cumulativedistribution
This practice is under the jurisdiction of ASTM Committee E12 on Color and Appearance and is the direct responsibility of Subcommittee E12.04 on Color and
Appearance Analysis.
Current edition approved Dec. 1, 2003. Published December 2003. Originally approved in 1990. Last previous edition approved in 1998 as E 1345-98.
Current edition approved June 1, 2008. Published June 2008. Originally approved in 1990. Last previous edition approved in 2003 as E1345 - 98 (2003). DOI:
10.1520/E1345-98R08.
For referencedASTM standards, visit theASTM website, www.astm.org, or contactASTM Customer Service at service@astm.org. For Annual Book of ASTM Standards
volume information, refer to the standard’s Document Summary page on the ASTM website.
Available from Society of Automotive Engineers (SAE), 400 Commonwealth Dr., Warrendale, PA 15096-0001, http://www.sae.org.
Copyright ©ASTM International, 100 Barr Harbor Drive, PO Box C700, West Conshohocken, PA19428-2959, United States.
E1345–98 (2008)
of values in a data set (the box) and the expected range of values, defined by distance outside the box ends; see whiskers, see Fig.
1.
3.2.2 extreme value, n—a single reading, selected from a series of readings, whose value is farther from the nearer box end than
3.0 times the hinge length.
3.2.2.1 Discussion—A box and whiskers plot is normally used to find outliers and extreme values. Such values should be
eliminated from a series before calculating the series mean, standard deviation, and confidence intervals.
3.2.3 hinges, n—the 25 and 75 % cumulative distribution points in a set of readings taken during a measurement.
3.2.3.1 Discussion—Hinges represent the values in which 25 % of the readings are less than the lower hinge and 75 % of the
readings are less than the upper hinge. See also hinge length.
3.2.3.2 Discussion—Hinges are sometimes called the lower (Q ) and upper (Q ) quartile values.
1 1
3.2.4 hinge length, H, n—the range of values between the lower and upper hinges.
3.2.4.1 Discussion—The hinge length is sometimes called the box width or the interquartile range Q to Q .
3 1
3.2.5 outlier, n—a single reading, selected from a series of readings, whose value is further from the nearer box end then 1.5
times the hinge length; see 3.2.2.1.
3.2.6 sampling number, N, n—number of multiple measurements, or number of multiple specimens, required to reduce the
variability of color or color-difference measurement to a desired level.
3.2.7 standard deviation of color or color-difference measurement, s—standard deviation of the color scale or color-difference-
scale value, x, being considered:
i
2 0.5
s 5 @$(~x 2 x ! %/~n 2 1!# (1)
i avg
where:
x =(( x)/n, and
avg i
n = the number of replicate measurements made.
3.2.8 standard deviation of instrument, s, n—standard deviation of a color-scale or color-difference-scale value due to
i
instrument variability alone:
2 0.5
s 5 ( x 2 x ! / n 2 1! (2)
@$ ~ % ~ #
i i avg
3.2.9 standard error of the estimated mean, s , n—standard deviation of color or color-difference measurement divided by the
e
square root of the sampling number:
0.5
s 5 s/ N (3)
~ !
e
3.2.10 standard error goal, s , n—level to which the standard error of the estimated mean is to be reduced.
e,g
3.2.11 tolerance, n—the upper tolerance limit minus the lower tolerance limit; the total allowable range of the color-scale or
color-difference-scale value considered.
FIG. 1 Schematic Description of a Box and Whisker Plot
E1345–98 (2008)
3.2.12 whiskers, n—lines extending out from the box ends to the largest and smallest observations lying within 1.5 times the
hinge length, measured from the box ends.
4. Summary of Practice
4.1 This practice assumes that, for the material under consideration and a specified set of color scales, relevant color or
color-difference tolerances have been established (see Practice D 3134D3134).
4.2 For convenience, the numerical example in the Appendix uses CIELAB LCH (lightness, chroma, hue) color difference
scales DL*, DC* , and DH* (see Practice D 2244 and Practice E 308D 2244E 308(see Practice D2244 and Practice E308), but
ab ab
this is not meant to be restrictive.
NOTE 1—Some coordinates, such as CIE x, y, Y, do not follow the theories of this standard due to excessive colinearity. While it has not been tested,
thissamecolinearityproblemmayalsobeobservedin1960u,vand1976u8,v8coordinates.Table1providesalistingoftheappropriateandinappropriate
color coordinates for use with this practice.
TABLE 1 Appropriate and Inappropriate Color Coordinates for
Use in This Practice
Color Coordinates Appropriate Inappropriate
CIE Yxy =
CIE LCH =
CIE LAB =
CIE LUV =
CIE Lu8v8 =
4.3 The successive steps in the procedure are as follows:
4.3.1 Determine the standard deviation of instrument.
4.3.1.1 Screen the measurement data for outliers and extreme values.
4.3.2 Determine the standard deviation of color or color-difference measurement.
4.3.2.1 Screen the measurement data for outliers and extreme values.
4.3.3 Determine the standard error of the estimated mean for a sampling number of one.
4.3.4 Determine the final sampling number that reduces the standard error of the estimated mean to less than the standard error
goal for each scale value.
4.3.5 Determine the final standard error goal values.
NOTE 2—When the standard error of the estimated mean for a sampling number of one is larger than a specified fraction of the tolerance or a specified
multiple of the standard deviation of instrument for any of the three color-difference-scale values, a sampling number greater than one is required.
4.4 Screening for and Elimination of Outliers and Extreme Values in Measured Data:
4.4.1 Box and whisker test—This test is best carried out by computer. Many programs for the box and whisker technique are
available.
4.4.1.1 Order the readings from lowest to highest value. The reading whose value is half way between the minimum and
maximum values is the median. Fig. 1 illustrates the following steps.
4.4.1.2 The reading whose value is just less than 75 % of the other readings is the lower hinge. The readings whose value is
just higher than 75 % of the other readings is the upper hinge. The difference between these two is the hinge length H.
4.4.1.3 If the smallest value of any reading is less than the lower hinge value minus 1.5 times the hinge length, it may be
considered an outlier. Likewise, if the largest value of any reading is greater than the upper hinge value plus 1.5 times the hinge
length, it may be considered an outlier.
4.4.1.4 If the smallest (largest) value of any reading is less (greater) than the lower (upper) hinge value minus (plus) 3.0 times
the hinge length, it may be considered an extreme value.
4.4.2 Practice E 178E 178 Practice E178 Procedure—The test for outliers in Practice E 178E178 is constructed from the
sample mean X , and the standard deviation s.
avg
4.4.2.1 Order the readings from lowest to highest value.
4.4.2.2 Calculate the following two statistics, T for the lowest value, and T for the highest value in a set of n ordered
...


Questions, Comments and Discussion
Ask us and Technical Secretary will try to provide an answer. You can facilitate discussion about the standard in here.