ASTM E805-94
(Practice)Standard Practice for Identification of Instrumental Methods of Color or Color-Difference Measurement of Materials
Standard Practice for Identification of Instrumental Methods of Color or Color-Difference Measurement of Materials
SCOPE
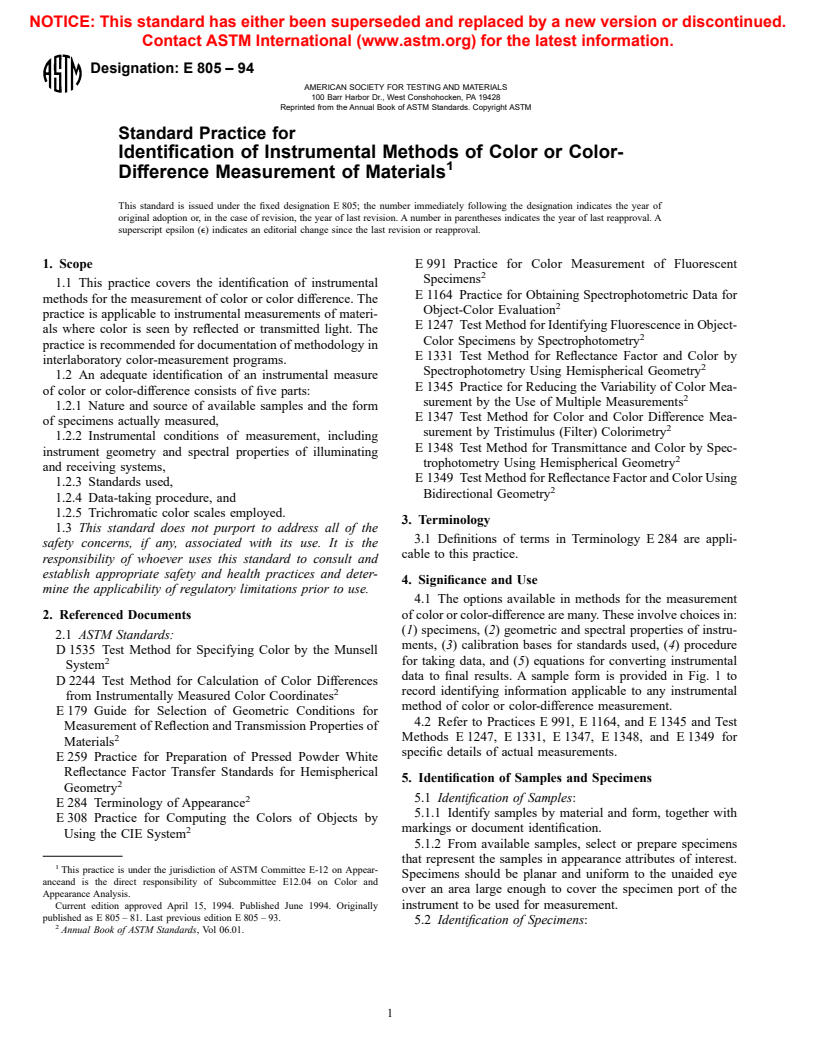
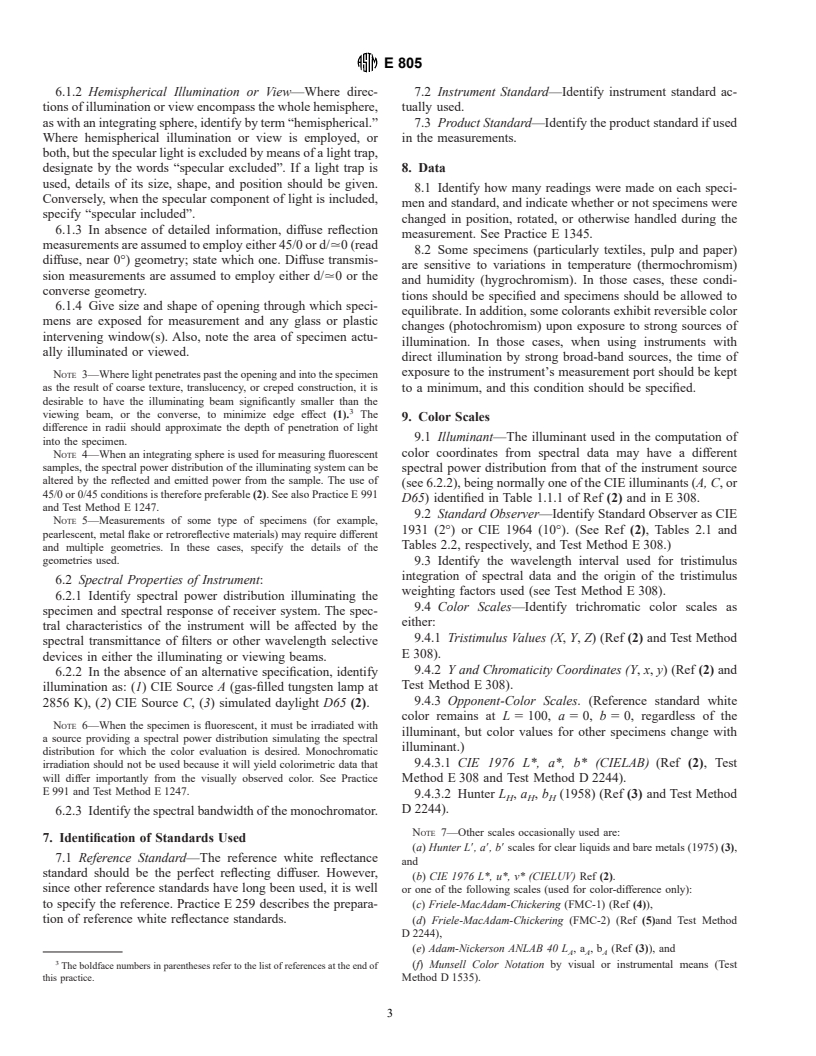
1.1 This practice covers the documentation of instrumental measurement of color or color difference for current communication or for future reference. The practice is applicable to instrumental measurements of materials where color is seen by reflected, transmitted or emitted light and any combinations of one or more of these processes. The practice is recommended for documentation of methodology in interlaboratory color-measurement programs.
1.2 An adequate identification of an instrumental measure of color or color-difference consists of five parts:
1.2.1 Nature and source of available samples and the form of specimens actually measured,
1.2.2 Instrumental conditions of measurement, including instrument geometrical and spectral conditions of measurement,
1.2.3 Standards used,
1.2.4 Data acquisition procedure, and
1.2.5 Color scales employed.
1.3 This standard does not purport to address all of the safety concerns, if any, associated with its use. It is the responsibility of whoever uses this standard to consult and establish appropriate safety and health practices and determine the applicability of regulatory limitations prior to use.
General Information
Relations
Standards Content (Sample)
NOTICE: This standard has either been superseded and replaced by a new version or discontinued.
Contact ASTM International (www.astm.org) for the latest information.
Designation: E 805 – 94
AMERICAN SOCIETY FOR TESTING AND MATERIALS
100 Barr Harbor Dr., West Conshohocken, PA 19428
Reprinted from the Annual Book of ASTM Standards. Copyright ASTM
Standard Practice for
Identification of Instrumental Methods of Color or Color-
Difference Measurement of Materials
This standard is issued under the fixed designation E 805; the number immediately following the designation indicates the year of
original adoption or, in the case of revision, the year of last revision. A number in parentheses indicates the year of last reapproval. A
superscript epsilon (e) indicates an editorial change since the last revision or reapproval.
1. Scope E 991 Practice for Color Measurement of Fluorescent
Specimens
1.1 This practice covers the identification of instrumental
E 1164 Practice for Obtaining Spectrophotometric Data for
methods for the measurement of color or color difference. The
Object-Color Evaluation
practice is applicable to instrumental measurements of materi-
E 1247 Test Method for Identifying Fluorescence in Object-
als where color is seen by reflected or transmitted light. The
Color Specimens by Spectrophotometry
practice is recommended for documentation of methodology in
E 1331 Test Method for Reflectance Factor and Color by
interlaboratory color-measurement programs.
Spectrophotometry Using Hemispherical Geometry
1.2 An adequate identification of an instrumental measure
E 1345 Practice for Reducing the Variability of Color Mea-
of color or color-difference consists of five parts:
surement by the Use of Multiple Measurements
1.2.1 Nature and source of available samples and the form
E 1347 Test Method for Color and Color Difference Mea-
of specimens actually measured,
surement by Tristimulus (Filter) Colorimetry
1.2.2 Instrumental conditions of measurement, including
E 1348 Test Method for Transmittance and Color by Spec-
instrument geometry and spectral properties of illuminating
trophotometry Using Hemispherical Geometry
and receiving systems,
E 1349 Test Method for Reflectance Factor and Color Using
1.2.3 Standards used,
Bidirectional Geometry
1.2.4 Data-taking procedure, and
1.2.5 Trichromatic color scales employed.
3. Terminology
1.3 This standard does not purport to address all of the
3.1 Definitions of terms in Terminology E 284 are appli-
safety concerns, if any, associated with its use. It is the
cable to this practice.
responsibility of whoever uses this standard to consult and
establish appropriate safety and health practices and deter-
4. Significance and Use
mine the applicability of regulatory limitations prior to use.
4.1 The options available in methods for the measurement
2. Referenced Documents of color or color-difference are many. These involve choices in:
(1) specimens, (2) geometric and spectral properties of instru-
2.1 ASTM Standards:
ments, (3) calibration bases for standards used, (4) procedure
D 1535 Test Method for Specifying Color by the Munsell
2 for taking data, and (5) equations for converting instrumental
System
data to final results. A sample form is provided in Fig. 1 to
D 2244 Test Method for Calculation of Color Differences
2 record identifying information applicable to any instrumental
from Instrumentally Measured Color Coordinates
method of color or color-difference measurement.
E 179 Guide for Selection of Geometric Conditions for
4.2 Refer to Practices E 991, E 1164, and E 1345 and Test
Measurement of Reflection and Transmission Properties of
2 Methods E 1247, E 1331, E 1347, E 1348, and E 1349 for
Materials
specific details of actual measurements.
E 259 Practice for Preparation of Pressed Powder White
Reflectance Factor Transfer Standards for Hemispherical
5. Identification of Samples and Specimens
Geometry
2 5.1 Identification of Samples:
E 284 Terminology of Appearance
5.1.1 Identify samples by material and form, together with
E 308 Practice for Computing the Colors of Objects by
2 markings or document identification.
Using the CIE System
5.1.2 From available samples, select or prepare specimens
that represent the samples in appearance attributes of interest.
This practice is under the jurisdiction of ASTM Committee E-12 on Appear-
Specimens should be planar and uniform to the unaided eye
anceand is the direct responsibility of Subcommittee E12.04 on Color and
over an area large enough to cover the specimen port of the
Appearance Analysis.
Current edition approved April 15, 1994. Published June 1994. Originally instrument to be used for measurement.
published as E 805 – 81. Last previous edition E 805 – 93.
5.2 Identification of Specimens:
Annual Book of ASTM Standards, Vol 06.01.
E 805
FIG. 1 Sample Report Form
5.2.1 Mark each specimen with sample identification, a 5.2.4 Identify special specimen characteristics, if any, such
serial number or letter, and any other identifying markings that as:
may be desired. 5.2.4.1 Effect pigment (metal flake or pearlescent),
5.2.2 Identify form of specimens as either: 5.2.4.2 Fluorescent, and
5.2.2.1 Solid sheet or web (specify thickness and backing 5.2.4.3 Retroreflective.
material). 5.2.5 Determine whether the specimen exhibits directional-
5.2.2.2 Powder or granular substance (packed or poured; if ity. If applicable, specify the orientation and any rotation of the
placed behind window, state material and thickness). specimen between measurements. The use of a datum mark
5.2.2.3 Fiber or yarn (describe form, type of transparent may be helpful.
specimen window, pressure on backing plate).
6. Identification of Instrument
5.2.2.4 Paste (if placed behind window, state material and
thickness).
6.1 Geometric Properties of Instrument:
5.2.2.5 Liquid (if observed through window, state window
6.1.1 Directions of Illumination and View—Identify axial
material and thickness).
angles of illumination and view, and aperture angles of
5.2.2.6 Film drawdown (specify film thickness and back-
illumination and view, when known.
ground).
NOTE 2—For more detail on geometric analysis, see Practice E 179.
NOTE 1—When specimens are measured behind glass or other material,
Whenever the extents to which rays deviate from axial angles within
specify thickness and material type. In addition, specify the method used
illuminating and viewing beams are unimportant, aperture angles may be
for data correction.
omitted and a shorthand notation may be used as follows: Designate
bidirectional 45° illumination and 0° viewing as 45/0; designate hemi-
5.2.3 Identify optical character of specimens as either:
spherical illumination and 0° viewing as d/0. Reverse geometries should
5.2.3.1 Opaque, nonmetallic (majority of materials).
be designated 0/45 and 0/d. When more than one beam is used, their
5.2.3.2 Opaque, metallic (bare metal or foil).
number and directions shall be stated. The term circumferential or annular
5.2.3.3 Translucent.
shall be used to indicate that rays are incident at selected or all azimuth
5.2.3.4 Transparent. angles through 360°.
E 805
6.1.2 Hemispherical Illumination or View—Where direc- 7.2 Instrument Standard—Identify instrument standard ac-
tions of illumination or view encompass the whole hemisphere, tually used.
as with an integrating sphere, identify by term “hemispherical.”
7.3 Product Standard—Identify the product standard if used
Where hemispherical illumination or view is employed, or in the measurements.
both, but the specular light is excl
...


Questions, Comments and Discussion
Ask us and Technical Secretary will try to provide an answer. You can facilitate discussion about the standard in here.