ASTM E2903-18
(Test Method)Standard Test Method for Measurement of the Effective Focal Spot Size of Mini and Micro Focus X-ray Tubes
Standard Test Method for Measurement of the Effective Focal Spot Size of Mini and Micro Focus X-ray Tubes
SIGNIFICANCE AND USE
5.1 One of the factors affecting the image quality of a radiographic image is geometric unsharpness. The degree of geometric unsharpness is dependent upon the focal spot size of the radiation source, the distance between the source and the object to be radiographed, the distance between the object to be radiographed and the image plane (film, imaging plate, Digital Detector Array (DDA), or radioscopic detector). This test method allows the user to determine the effective focal spot size (dimensions) of the X-ray source. This result can then be used to establish source to object and object to image detector distances appropriate for maintaining the desired degree of geometric unsharpness or maximum magnification possible, or both, for a given radiographic imaging application. The accuracy of this method is dependent upon the spatial resolution of the imaging system, magnification, and signal-to-noise of the resultant images.
SCOPE
1.1 The image quality and the resolution of X-ray images highly depend on the characteristics of the focal spot. The imaging qualities of the focal spot are based on its two dimensional intensity distribution as seen from the imaging place.
1.2 This test method provides instructions for determining the effecting size (dimensions) of mini and micro focal spots of industrial X-ray tubes. It is based on the European standard, EN 12543–5, Non-destructive testing - Characteristics of focal spots in industrial X-ray systems for use in non-destructive testing - Part 5: Measurement of the effective focal spot size of mini and micro focus X-ray tubes.
1.3 This standard specifies a method for the measurement of effective focal spot dimensions from 5 up to 300 μm of X-ray systems up to and including 225 kV tube voltage, by means of radiographs of edges. Larger focal spots should be measured using Test Method E1165 Standard Test Method for Measurement of Focal Spots of Industrial X-Ray Tubes by Pinhole Imaging.
1.4 The same procedure can be used at higher kilovoltages by agreement, but the accuracy of the measurement may be poorer.
1.5 The values stated in SI units are to be regarded as standard. No other units of measurement are included in this standard.
1.6 This standard does not purport to address all of the safety concerns, if any, associated with its use. It is the responsibility of the user of this standard to establish appropriate safety, health, and environmental practices and determine the applicability of regulatory limitations prior to use.
1.7 This international standard was developed in accordance with internationally recognized principles on standardization established in the Decision on Principles for the Development of International Standards, Guides and Recommendations issued by the World Trade Organization Technical Barriers to Trade (TBT) Committee.
General Information
- Status
- Published
- Publication Date
- 31-Jan-2018
- Technical Committee
- E07 - Nondestructive Testing
- Drafting Committee
- E07.01 - Radiography (X and Gamma) Method
Relations
- Effective Date
- 01-Feb-2018
- Effective Date
- 15-Dec-2023
- Effective Date
- 01-Dec-2023
- Effective Date
- 01-Mar-2018
- Effective Date
- 01-Feb-2018
- Refers
ASTM E2033-99(2013) - Standard Practice for Computed Radiology (Photostimulable Luminescence Method) - Effective Date
- 01-Jun-2013
- Effective Date
- 01-Jun-2013
- Effective Date
- 01-Nov-2012
- Effective Date
- 15-Jun-2012
- Effective Date
- 01-Jan-2011
- Effective Date
- 01-Jun-2010
- Effective Date
- 01-Jun-2010
- Effective Date
- 15-Apr-2010
- Effective Date
- 01-Jul-2009
- Effective Date
- 01-Jun-2009
Overview
ASTM E2903-18 is the internationally recognized standard test method for measuring the effective focal spot size of mini and micro focus X-ray tubes. Accurate determination of the effective focal spot size is essential for ensuring optimal image quality in industrial radiographic and radioscopic applications. Focal spot size directly influences geometric unsharpness, a leading factor impacting X-ray image sharpness and resolution. This standard provides a systematic approach for manufacturers, inspectors, and researchers to quantify focal spot sizes between 5 and 300 micrometers, optimizing X-ray system setup and quality control processes.
Key Topics
- Significance of Focal Spot Size: The focal spot's dimensions, as seen from the image plane, are critical in determining the geometric unsharpness in X-ray imaging. Effective focal spot measurement allows users to maintain desired resolution and control magnification.
- Scope of Application: ASTM E2903-18 applies to industrial X-ray systems with tube voltages up to 225 kV and focal spots from 5 μm to 300 μm. It extends existing methods by including digital imaging technologies such as computed radiography and digital detector arrays.
- Test Methodology: The standard prescribes indirect measurement through edge imaging. Images are taken using high geometric magnification, and the resultant geometric unsharpness is analyzed to determine the effective focal spot size.
- Precision and Accuracy: The method emphasizes the importance of system spatial resolution, signal-to-noise ratio, and correct magnification to achieve precise and repeatable results.
- Safety and Compliance: Users must observe all safety, health, and environmental requirements applicable to X-ray operations, as the standard does not address these directly.
Applications
ASTM E2903-18 is widely used in various contexts, including:
- Quality Assurance: Manufactures of mini and micro-focus X-ray tubes use this test method to assure focal spot size compliance during production.
- System Performance Monitoring: Facilities rely on regular focal spot measurement to track the performance and stability of X-ray tubes over time.
- Radiographic Inspection Optimization: By accurately measuring the focal spot, users can optimize source-to-object and object-to-detector distances, ensuring the required level of geometric sharpness or achieving maximum possible magnification-critical for applications like non-destructive testing (NDT) and high-resolution imaging.
- Regulatory and Standards Compliance: Organizations in sectors requiring documented radiographic quality-such as aerospace, defense, medical device, and electronics-utilize this standard to meet industry or regulatory requirements.
Related Standards
ASTM E2903-18 references and complements several related standards in X-ray focal spot size measurement and radiographic image quality, including:
- ASTM E1165: Test Method for Measurement of Focal Spots of Industrial X-Ray Tubes by Pinhole Imaging (for larger spot sizes).
- EN 12543-5: Non-destructive testing - Characteristics of focal spots in industrial X-ray systems - Measurement of the effective focal spot size of mini and micro focus X-ray tubes.
- ASTM E1255: Practice for Radioscopy.
- ASTM E1742/E1742M: Practice for Radiographic Examination.
- ASTM E1815: Test Method for Classification of Film Systems for Industrial Radiography.
- ASTM E2002: Practice for Determining Total Image Unsharpness and Basic Spatial Resolution.
- ASTM E2033: Practice for Radiographic Examination Using Computed Radiography.
- ASTM E2446: Practice for Manufacturing Characterization of Computed Radiography Systems.
- ASTM E2597/E2597M: Practice for Manufacturing Characterization of Digital Detector Arrays.
- ASTM E2698: Practice for Radiological Examination Using Digital Detector Arrays.
These related standards support a comprehensive approach to industrial X-ray quality assurance and non-destructive evaluation, ensuring consistent, objective measurements and optimal imaging performance.
Keywords: focal spots, microfocus, X-ray imaging, X-ray tube, geometric unsharpness, radiographic quality, computed radiography, digital detector array, ASTM E2903-18.
Buy Documents
ASTM E2903-18 - Standard Test Method for Measurement of the Effective Focal Spot Size of Mini and Micro Focus X-ray Tubes
REDLINE ASTM E2903-18 - Standard Test Method for Measurement of the Effective Focal Spot Size of Mini and Micro Focus X-ray Tubes
Get Certified
Connect with accredited certification bodies for this standard

BSI Group
BSI (British Standards Institution) is the business standards company that helps organizations make excellence a habit.

TÜV Rheinland
TÜV Rheinland is a leading international provider of technical services.

TÜV SÜD
TÜV SÜD is a trusted partner of choice for safety, security and sustainability solutions.
Sponsored listings
Frequently Asked Questions
ASTM E2903-18 is a standard published by ASTM International. Its full title is "Standard Test Method for Measurement of the Effective Focal Spot Size of Mini and Micro Focus X-ray Tubes". This standard covers: SIGNIFICANCE AND USE 5.1 One of the factors affecting the image quality of a radiographic image is geometric unsharpness. The degree of geometric unsharpness is dependent upon the focal spot size of the radiation source, the distance between the source and the object to be radiographed, the distance between the object to be radiographed and the image plane (film, imaging plate, Digital Detector Array (DDA), or radioscopic detector). This test method allows the user to determine the effective focal spot size (dimensions) of the X-ray source. This result can then be used to establish source to object and object to image detector distances appropriate for maintaining the desired degree of geometric unsharpness or maximum magnification possible, or both, for a given radiographic imaging application. The accuracy of this method is dependent upon the spatial resolution of the imaging system, magnification, and signal-to-noise of the resultant images. SCOPE 1.1 The image quality and the resolution of X-ray images highly depend on the characteristics of the focal spot. The imaging qualities of the focal spot are based on its two dimensional intensity distribution as seen from the imaging place. 1.2 This test method provides instructions for determining the effecting size (dimensions) of mini and micro focal spots of industrial X-ray tubes. It is based on the European standard, EN 12543–5, Non-destructive testing - Characteristics of focal spots in industrial X-ray systems for use in non-destructive testing - Part 5: Measurement of the effective focal spot size of mini and micro focus X-ray tubes. 1.3 This standard specifies a method for the measurement of effective focal spot dimensions from 5 up to 300 μm of X-ray systems up to and including 225 kV tube voltage, by means of radiographs of edges. Larger focal spots should be measured using Test Method E1165 Standard Test Method for Measurement of Focal Spots of Industrial X-Ray Tubes by Pinhole Imaging. 1.4 The same procedure can be used at higher kilovoltages by agreement, but the accuracy of the measurement may be poorer. 1.5 The values stated in SI units are to be regarded as standard. No other units of measurement are included in this standard. 1.6 This standard does not purport to address all of the safety concerns, if any, associated with its use. It is the responsibility of the user of this standard to establish appropriate safety, health, and environmental practices and determine the applicability of regulatory limitations prior to use. 1.7 This international standard was developed in accordance with internationally recognized principles on standardization established in the Decision on Principles for the Development of International Standards, Guides and Recommendations issued by the World Trade Organization Technical Barriers to Trade (TBT) Committee.
SIGNIFICANCE AND USE 5.1 One of the factors affecting the image quality of a radiographic image is geometric unsharpness. The degree of geometric unsharpness is dependent upon the focal spot size of the radiation source, the distance between the source and the object to be radiographed, the distance between the object to be radiographed and the image plane (film, imaging plate, Digital Detector Array (DDA), or radioscopic detector). This test method allows the user to determine the effective focal spot size (dimensions) of the X-ray source. This result can then be used to establish source to object and object to image detector distances appropriate for maintaining the desired degree of geometric unsharpness or maximum magnification possible, or both, for a given radiographic imaging application. The accuracy of this method is dependent upon the spatial resolution of the imaging system, magnification, and signal-to-noise of the resultant images. SCOPE 1.1 The image quality and the resolution of X-ray images highly depend on the characteristics of the focal spot. The imaging qualities of the focal spot are based on its two dimensional intensity distribution as seen from the imaging place. 1.2 This test method provides instructions for determining the effecting size (dimensions) of mini and micro focal spots of industrial X-ray tubes. It is based on the European standard, EN 12543–5, Non-destructive testing - Characteristics of focal spots in industrial X-ray systems for use in non-destructive testing - Part 5: Measurement of the effective focal spot size of mini and micro focus X-ray tubes. 1.3 This standard specifies a method for the measurement of effective focal spot dimensions from 5 up to 300 μm of X-ray systems up to and including 225 kV tube voltage, by means of radiographs of edges. Larger focal spots should be measured using Test Method E1165 Standard Test Method for Measurement of Focal Spots of Industrial X-Ray Tubes by Pinhole Imaging. 1.4 The same procedure can be used at higher kilovoltages by agreement, but the accuracy of the measurement may be poorer. 1.5 The values stated in SI units are to be regarded as standard. No other units of measurement are included in this standard. 1.6 This standard does not purport to address all of the safety concerns, if any, associated with its use. It is the responsibility of the user of this standard to establish appropriate safety, health, and environmental practices and determine the applicability of regulatory limitations prior to use. 1.7 This international standard was developed in accordance with internationally recognized principles on standardization established in the Decision on Principles for the Development of International Standards, Guides and Recommendations issued by the World Trade Organization Technical Barriers to Trade (TBT) Committee.
ASTM E2903-18 is classified under the following ICS (International Classification for Standards) categories: 11.040.50 - Radiographic equipment; 19.100 - Non-destructive testing. The ICS classification helps identify the subject area and facilitates finding related standards.
ASTM E2903-18 has the following relationships with other standards: It is inter standard links to ASTM E2903-13, ASTM E1742/E1742M-23, ASTM E1255-23, ASTM E1742/E1742M-18, ASTM E2698-18, ASTM E2033-99(2013), ASTM E1815-08(2013)e1, ASTM E1742/E1742M-12, ASTM E1165-12, ASTM E1742/E1742M-11, ASTM E1165-04(2010), ASTM E2446-05(2010), ASTM E2698-10, ASTM E1255-09, ASTM E2002-98(2009). Understanding these relationships helps ensure you are using the most current and applicable version of the standard.
ASTM E2903-18 is available in PDF format for immediate download after purchase. The document can be added to your cart and obtained through the secure checkout process. Digital delivery ensures instant access to the complete standard document.
Standards Content (Sample)
This international standard was developed in accordance with internationally recognized principles on standardization established in the Decision on Principles for the
Development of International Standards, Guides and Recommendations issued by the World Trade Organization Technical Barriers to Trade (TBT) Committee.
Designation: E2903 −18
Standard Test Method for
Measurement of the Effective Focal Spot Size of Mini and
Micro Focus X-ray Tubes
This standard is issued under the fixed designation E2903; the number immediately following the designation indicates the year of
original adoption or, in the case of revision, the year of last revision. A number in parentheses indicates the year of last reapproval. A
superscript epsilon (´) indicates an editorial change since the last revision or reapproval.
1. Scope* Development of International Standards, Guides and Recom-
mendations issued by the World Trade Organization Technical
1.1 The image quality and the resolution of X-ray images
Barriers to Trade (TBT) Committee.
highly depend on the characteristics of the focal spot. The
imaging qualities of the focal spot are based on its two
2. Referenced Documents
dimensional intensity distribution as seen from the imaging
place. 2.1 ASTM Standards:
E1165 Test Method for Measurement of Focal Spots of
1.2 This test method provides instructions for determining
Industrial X-Ray Tubes by Pinhole Imaging
theeffectingsize(dimensions)ofminiandmicrofocalspotsof
E1255 Practice for Radioscopy
industrial X-ray tubes. It is based on the European standard,
E1742/E1742M Practice for Radiographic Examination
EN 12543–5, Non-destructive testing - Characteristics of focal
E1815 Test Method for Classification of Film Systems for
spots in industrial X-ray systems for use in non-destructive
Industrial Radiography
testing - Part 5: Measurement of the effective focal spot size of
E2002 Practice for Determining Total Image Unsharpness
mini and micro focus X-ray tubes.
and Basic Spatial Resolution in Radiography and Radios-
1.3 Thisstandardspecifiesamethodforthemeasurementof
copy
effective focal spot dimensions from 5 up to 300 µm of X-ray
E2033 Practice for Radiographic Examination Using Com-
systems up to and including 225 kV tube voltage, by means of
puted Radiography (Photostimulable Luminescence
radiographs of edges. Larger focal spots should be measured
Method)
using Test Method E1165 Standard Test Method for Measure-
E2446 Practice for Manufacturing Characterization of Com-
ment of Focal Spots of Industrial X-Ray Tubes by Pinhole
puted Radiography Systems
Imaging.
E2597/E2597M PracticeforManufacturingCharacterization
of Digital Detector Arrays
1.4 The same procedure can be used at higher kilovoltages
E2698 Practice for Radiological Examination Using Digital
by agreement, but the accuracy of the measurement may be
Detector Arrays
poorer.
2.2 European Standards:
1.5 The values stated in SI units are to be regarded as
EN 12543–5 Non-destructive testing—Characteristics of fo-
standard. No other units of measurement are included in this
cal spots in industrial X-ray systems for use in non-
standard.
destructive testing - Part 5: Measurement of the effective
1.6 This standard does not purport to address all of the
focal spot size of mini and micro focus X-ray tubes
safety concerns, if any, associated with its use. It is the
responsibility of the user of this standard to establish appro-
3. Terminology
priate safety, health, and environmental practices and deter-
3.1 Definitions of Terms Specific to This Standard:
mine the applicability of regulatory limitations prior to use.
3.1.1 actual focal spot—the X-ray producing area of the
1.7 This international standard was developed in accor-
target as viewed from a position perpendicular to the target
dance with internationally recognized principles on standard-
surface.
ization established in the Decision on Principles for the
1 2
This test method is under the jurisdiction of ASTM Committee E07 on For referenced ASTM standards, visit the ASTM website, www.astm.org, or
Nondestructive Testing and is the direct responsibility of Subcommittee E07.01 on contact ASTM Customer Service at service@astm.org. For Annual Book of ASTM
Radiology (X and Gamma) Method. Standards volume information, refer to the standard’s Document Summary page on
Current edition approved Feb. 1, 2018. Published February 2018. Originally the ASTM website.
approved in 2013. Last previous edition approved in 2013 as E2903 – 13. DOI: Available fromAmerican National Standards Institute (ANSI), 25 W. 43rd St.,
10.1520/E2903-18. 4th Floor, New York, NY 10036, http://www.ansi.org.
*A Summary of Changes section appears at the end of this standard
Copyright © ASTM International, 100 Barr Harbor Drive, PO Box C700, West Conshohocken, PA 19428-2959. United States
E2903 − 18
3.1.2 effective focal spot—the X-ray producing area of the 6. Apparatus
target as viewed from the image plane.
6.1 The following equipment is required for the measure-
ment if using X-ray film:
4. Summary of Test Method
6.1.1 A test object as described in 6.5.
4.1 This method is based on indirect measurement of the
6.1.2 X-ray films, without screens, of sufficient size to
focal spot size by measuring the geometric unsharpness then
image magnified test object and region around test object to
using a geometric calculation to determine the effective focal
obtain a profile as shown in Fig. 1.
spot dimensions (see Section 8). For this purpose, edges are
6.1.3 Film cassettes made of low absorbing material (for
imaged either on a film or by means of a radioscopic or digital
example polyethylene).
radiographic device using a relatively high geometric magni-
fication. For a full description see reference below. 6.1.4 A film holder.
6.1.5 A film processing unit.
5. Significance and Use
6.1.6 A film scanner capable of reading densities greater
5.1 One of the factors affecting the image quality of a
than 3.0 configured such that the pixel size is appropriate for
radiographic image is geometric unsharpness. The degree of
the measurement (refer to Section 7). The film shall be of
geometric unsharpness is dependent upon the focal spot size of
sufficient size to image the magnified test object and region
the radiation source, the distance between the source and the
around test object to obtain a profile as shown in Fig. 1.
objecttoberadiographed,thedistancebetweentheobjecttobe
6.1.7 The film system shall meet the requirements of Test
radiographed and the image plane (film, imaging plate, Digital
Method E1815 film system class I, II, or Special.
Detector Array (DDA), or radioscopic detector). This test
6.2 The following equipment is required for the measure-
method allows the user to determine the effective focal spot
ment if using computed radiography (CR):
size (dimensions) of the X-ray source. This result can then be
6.2.1 A test object as described in 6.5.
used to establish source to object and object to image detector
distances appropriate for maintaining the desired degree of
6.2.2 A computed radiography system, consisting of an
geometric unsharpness or maximum magnification possible, or
imaging plate and scanner, configured such that the pixel size
both, for a given radiographic imaging application. The accu-
is appropriate for the measurement (refer to Section 7). The
racy of this method is dependent upon the spatial resolution of
imagingplateshallbeofsufficientsizetoimagetestobjectand
the imaging system, magnification, and signal-to-noise of the
region around test object to obtain a profile as shown in Fig. 1.
resultant images.
6.2.3 The computed radiography system shall meet the
requirements of Practice E2446 class I, II, or Special, and
image plates shall be packed in low absorption cassettes using
Fry,Ewert,Gollwitzer,Neuser,andSelling,“Measuringmicrofocalspotsusing
no screens.
digital radiography” Materials Evaluation, Vol 70, No. 8, August 2012, p. 981.
FIG. 1 Profile of Test Object Image (Test Object: Pt wire 1 mm)
E2903 − 18
6.3 The following equipment is required for the measure-
ment if using a radioscopic or digital detector array device:
6.3.1 A test object as described in 6.5.
6.3.2 A radioscopic device, for example any image intensi-
fierwithvideoequipmentorDigitalDetectorArray,configured
such that the pixel size is appropriate for the measurement
(refer to Section 7), or
6.3.3 A Digital Detector Array system meeting the require-
ments of Practice E2597/E2597M. The digital Detector Array
cover should be constructed of low X-ray absorption material
andshouldbefreeofclusterkernelpixelsasdefinedinPractice
E2597/E2597M.
6.3.4 The imaging area shall be of sufficient size to image
FIG. 2 Positioning of Test Object
magnified test object and region around test object to obtain a
profile as shown in Fig. 1.
6.4 Image processing equipment as follows:
6.4.1 An image processing device with the capability of
resultant images (See Footnote 4). If an estimate of the focal
producing linearized intensity profiles (signal is linear with
spot size, s, is available, then an optimal magnification can be
dose),integrationofprofiles,andprofileplotswithinthedigital
computed:
image in two directions perpendicular to each other, and with
M 5 111.1SNR ~P/ s ! (1)
optimal estimated
the capability to measure distances.
where:
6.5 The test object shall be either a set of wires or a sphere
SNR = unattenuated Signal-to-Noise ratio outside the object
consisting of highly absorbing material (for example tungsten,
P = pixel size
tungstenalloy,orplatinum).Thediameterofthewireorsphere
should be greater than 20 times the focal spot dimension if the 7.3.2.1 If the actual magnification is less than or equal to
focal spot is less than 40 µm to minimize edge penetration; M , then the estimated precision is:
optimal
otherwise, the diameter should be 0.8 to 1.0 mm for focal spots
2 2
Precision 5 0.71=1⁄n u1 # 1 1⁄n u2 3100% (2)
@ ~ ! @ ~ !#
estimated
greater than 40 µm. The diameter shall be known to within
61%.
where:
6.5.1 In case of using two single crossed wires they shall
n(u1) = number of pixels across the 50 to 84 % profile on
cross each other at an angle of 90° 6 3°. The wires shall be
one side (E to F in Fig. 1)
mounted across a circular aperture in a stable frame, in such a
n(u2) = numberofpi
...
This document is not an ASTM standard and is intended only to provide the user of an ASTM standard an indication of what changes have been made to the previous version. Because
it may not be technically possible to adequately depict all changes accurately, ASTM recommends that users consult prior editions as appropriate. In all cases only the current version
of the standard as published by ASTM is to be considered the official document.
Designation: E2903 − 13 E2903 − 18
Standard Test Method for
Measurement of the Effective Focal Spot Size of Mini and
Micro Focus X-ray Tubes
This standard is issued under the fixed designation E2903; the number immediately following the designation indicates the year of
original adoption or, in the case of revision, the year of last revision. A number in parentheses indicates the year of last reapproval. A
superscript epsilon (´) indicates an editorial change since the last revision or reapproval.
1. Scope Scope*
1.1 The image quality and the resolution of X-ray images highly depend on the characteristics of the focal spot. The imaging
qualities of the focal spot are based on its two dimensional intensity distribution as seen from the imaging place.
1.2 This test method provides instructions for determining the effecting size (dimensions) of mini and micro focal spots of
industrial X-ray tubes. It is based on the European standard, EN 12543–5, Non-destructive testing - Characteristics of focal spots
in industrial X-ray systems for use in non-destructive testing - Part 5: Measurement of the effective focal spot size of mini and
micro focus X-ray tubes.
1.3 This standard specifies a method for the measurement of effective focal spot dimensions from 5 up to 300 μm of X-ray
systems up to and including 225 kV tube voltage, by means of radiographs of edges. Larger focal spots should be measured using
Test Method E1165 Standard Test Method for Measurement of Focal Spots of Industrial X-Ray Tubes by Pinhole Imaging.
1.4 The same procedure can be used at higher kilovoltages by agreement, but the accuracy of the measurement may be poorer.
1.5 The values stated in SI units are to be regarded as standard. No other units of measurement are included in this standard.
1.6 This standard does not purport to address all of the safety concerns, if any, associated with its use. It is the responsibility
of the user of this standard to establish appropriate safety safety, health, and healthenvironmental practices and determine the
applicability of regulatory limitations prior to use.
1.7 This international standard was developed in accordance with internationally recognized principles on standardization
established in the Decision on Principles for the Development of International Standards, Guides and Recommendations issued
by the World Trade Organization Technical Barriers to Trade (TBT) Committee.
2. Referenced Documents
2.1 ASTM Standards:
E1165 Test Method for Measurement of Focal Spots of Industrial X-Ray Tubes by Pinhole Imaging
E1255 Practice for Radioscopy
E1742E1742/E1742M Practice for Radiographic Examination
E1815 Test Method for Classification of Film Systems for Industrial Radiography
E2002 Practice for Determining Total Image Unsharpness and Basic Spatial Resolution in Radiography and Radioscopy
E2033 Practice for Radiographic Examination Using Computed Radiography (Photostimulable Luminescence Method)
E2446 Practice for Manufacturing Characterization of Computed Radiography Systems
E2597E2597/E2597M Practice for Manufacturing Characterization of Digital Detector Arrays
E2698 Practice for Radiological Examination Using Digital Detector Arrays
2.2 European Standards:
EN 12543–5 Non-destructive testing—Characteristics of focal spots in industrial X-ray systems for use in non-destructive
testing - Part 5: Measurement of the effective focal spot size of mini and micro focus X-ray tubes
This test method is under the jurisdiction of ASTM Committee E07 on Nondestructive Testing and is the direct responsibility of Subcommittee E07.01 on Radiology
(X and Gamma) Method.
Current edition approved June 1, 2013Feb. 1, 2018. Published June 2013February 2018. Originally approved in 2013. Last previous edition approved in 2013 as
E2903 – 13. DOI: 10.1520/E2903–13.10.1520/E2903-18.
For referenced ASTM standards, visit the ASTM website, www.astm.org, or contact ASTM Customer Service at service@astm.org. For Annual Book of ASTM Standards
volume information, refer to the standard’s Document Summary page on the ASTM website.
Available from American National Standards Institute (ANSI), 25 W. 43rd St., 4th Floor, New York, NY 10036, http://www.ansi.org.
*A Summary of Changes section appears at the end of this standard
Copyright © ASTM International, 100 Barr Harbor Drive, PO Box C700, West Conshohocken, PA 19428-2959. United States
E2903 − 18
3. Terminology
3.1 Definitions of Terms Specific to This Standard:
3.1.1 actual focal spot—the X-ray producing area of the target as viewed from a position perpendicular to the target surface.
3.1.2 effective focal spot—the X-ray producing area of the target as viewed from the image plane.
4. Summary of Test Method
4.1 This method is based on indirect measurement of the focal spot size by measuring the geometric unsharpness then using
a geometric calculation to determine the effective focal spot dimensions (see Section 8). For this purpose, edges are imaged either
on a film or by means of a radioscopic or digital radiographic device using a relatively high geometric magnification. For a full
description see reference below.
5. Significance and Use
5.1 One of the factors affecting the image quality of a radiographic image is geometric unsharpness. The degree of geometric
unsharpness is dependent upon the focal spot size of the radiation source, the distance between the source and the object to be
radiographed, the distance between the object to be radiographed and the image plane (film, imaging plate, Digital Detector Array
(DDA), or radioscopic detector). This test method allows the user to determine the effective focal spot size (dimensions) of the
X-ray source. This result can then be used to establish source to object and object to image detector distances appropriate for
maintaining the desired degree of geometric unsharpness or maximum magnification possible, or both, for a given radiographic
imaging application. The accuracy of this method is dependent upon the spatial resolution of the imaging system, magnification,
and signal-to-noise of the resultant images.
6. Apparatus
6.1 The following equipment is required for the measurement if using X-ray film:
6.1.1 A test object as described in 6.5.
6.1.2 X-ray films, without screens, of sufficient size to image magnified test object and region around test object to obtain a
profile as shown in Fig. 1.
6.1.3 Film cassettes made of low absorbing material (for example polyethylene).
6.1.4 A film holder.
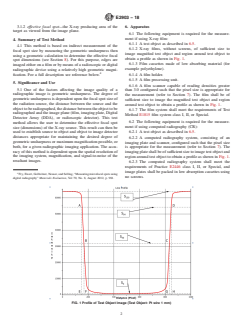
FIG. 1 Profile of Test Object Image (Test Object: Pt wire 1 mm)
Fry, Ewert, Gollwitzer, Neuser, and Selling, “Measuring microfocal spots using digital radiography” Materials Evaluation,Evaluation, Vol 70, No. 8, August 2012, p.
981.
E2903 − 18
6.1.5 A film processing unit.
6.1.6 A film scanner capable of reading densities greater than 3.0 configured such that the pixel size is appropriate for the
measurement (refer to Section 7). The film shall be of sufficient size to image the magnified test object and region around test object
to obtain a profile as shown in Fig. 1.
6.1.7 The film system shall meet the requirements of Test Method E1815 film system class I, II, or Special.
6.2 The following equipment is required for the measurement if using computed radiography (CR):
6.2.1 A test object as described in 6.5.
6.2.2 A computed radiography system, consisting of an imaging plate and scanner, configured such that the pixel size is
appropriate for the measurement (refer to Section 7). The imaging plate shall be of sufficient size to image test object and region
around test object to obtain a profile as shown in Fig. 1.
6.2.3 The computed radiography system shall meet the requirements of Practice E2446 class I, II, or Special, and image plates
shall be packed in low absorption cassettes using no screens.
6.3 The following equipment is required for the measurement if using a radioscopic or digital detector array device:
6.3.1 A test object as described in 6.5.
6.3.2 A radioscopic device, for example any image intensifier with video equipment or Digital Detector Array, configured such
that the pixel size is appropriate for the measurement (refer to Section 7), or
6.3.3 A Digital Detector Array system meeting the requirements of Practice E2597E2597/E2597M. The digital Detector Array
cover should be constructed of low X-ray absorption material and should be free of cluster kernel pixels as defined in Practice
E2597E2597/E2597M.
6.3.4 The imaging area shall be of sufficient size to image magnified test object and region around test object to obtain a profile
as shown in Fig. 1.
6.4 Image processing equipment as follows:
6.4.1 An image processing device with the capability of producing linearized intensity profiles (signal is linear with dose),
integration of profiles, and profile plots within the digital image in two directions perpendicular to each other, and with the
capability to measure distances.
6.5 The test object shall be either a set of wires or a sphere consisting of highly absorbing material (for example tungsten,
tungsten alloy, or platinum). The diameter of the wire or sphere should be greater than 20 times the focal spot dimension if the
focal spot is less than 40 μm to minimize edge penetration; otherwise, the diameter should be 0.8 to 1.0 mm for focal spots greater
than 40 μm. The diameter shall be known to within 61 %.
6.5.1 In case of using two single crossed wires they shall cross each other at an angle of 90° 6 3°. The wires shall be mounted
across a circular aperture in a stable frame, in such a manner that the crossing point is located in the center of the aperture. In case
of using the sphere it shall be mounted on a thin polyethylene support or placed into a thin polyethylene envelope.
6.5.2 The Unsharpness Gauge of Practice E2002 is recommended as a test object of defined accuracy. Two exposures shall be
taken with the wire set in perpendicular directions to obtain the length and width of the focal spot.
6.5.3 The mounting frame shall be of a size that enables the test object to be positioned very close to or on the window of the
X-ray tube.
7. Procedure
7.1 Any use of additional X
...
Questions, Comments and Discussion
Ask us and Technical Secretary will try to provide an answer. You can facilitate discussion about the standard in here.
Loading comments...