SIST EN 10315:2006
(Main)Routine method for analysis of high alloy steel by X-ray Fluorescence Spectrometry (XRF) by using a near by technique
Routine method for analysis of high alloy steel by X-ray Fluorescence Spectrometry (XRF) by using a near by technique
This European Standard specifies a procedure on how to improve the performance of a routine XRF method, already in use for analysis of high alloy steels, by using a ”near by technique”.
The ”near by technique” requires at least one target sample (preferable a CRM) of a similar composition as the unknown sample.
The method is applicable to elements within the concentration ranges according to Table 1:
Table 1 — Concentration ranges
Element Concentration range, % (m/m) a
Si 0,05 to 1,5
Mn 0,05 to 5,0
P 0,005 to 0,035
Cr 10 to 25
Ni 0,1 to 30
Mo 0,1 to 6,5
Cu 0,02 to 1,5
Co 0,015 to 0,30
V 0,015 to 0,15
Ti 0,015 to 0,50
Nb 0,05 to 1,0
a The concentration ranges specified, represents those ranges studied during the precision test. The procedure has the potential to be used outside those ranges but it needs to be validated by each laboratory in every case.
The method is applicable to analysis of either chill-cast or wrought samples having a diameter of at least 25 mm and with a carbon concentration of less than 0,3 % (see NOTE). Other elements should have a concentration below 0,2 %.
NOTE High carbon concentrations, in combination with high Mo and Cr concentrations, could have undesirable structural effects on the sample and could affect the determination of phosphorus and chromium, in particular.
Matrix effects exist between the elements listed. To compensate for those inter-element effects, mathematical corrections shall be applied. A variety of computer programs for corrections is commonly used and included in the software package from the manufacturers.
Standardverfahren zur Analyse von hochlegiertem Stahl mittels Röntgenfluoreszenzspektroskopie (RFA) unter Anwendung eines Vergleichs-Korrekturverfahrens
Méthode de routine pour l´analyse des aciers fortement alliés par spectrométrie de fluorescence de rayons X (SFRX) a l´aide d´une méthode de correction
La présente norme européenne spécifie un mode opératoire permettant d'établir une méthode de routine pour l'analyse des aciers fortement alliés par spectrométrie de fluorescence de rayons X. La justesse de la méthode peut encore etre améliorée en utilisant une "correction". La "correction" nécessite au moins un matériau de référence certifié (MRC) de composition similaire a l'échantillon inconnu.
Rutinska metoda za analiziranje močnolegiranih jekel z rentgensko fluorescenčno spektrometrijo (XRF) ob uporabi primerjalnega korekturnega postopka
General Information
Standards Content (Sample)
2003-01.Slovenski inštitut za standardizacijo. Razmnoževanje celote ali delov tega standarda ni dovoljeno.Routine method for analysis of high alloy steel by X-ray Fluorescence Spectrometry (XRF) by using a near by techniqueNDMéthode de routine pour l´analyse des aciers fortement alliés par spectrométrie de fluorescence de rayons X (SFRX) a l´aide d´une méthode de correctionStandardverfahren zur Analyse von hochlegiertem Stahl mittels Röntgenfluoreszenzspektroskopie (RFA) unter Anwendung eines Vergleichs-KorrekturverfahrensTa slovenski standard je istoveten z:EN 10315:2006SIST EN 10315:2006en77.140.20Visokokakovostna jeklaStainless steels77.040.30Kemijska analiza kovinChemical analysis of metalsICS:SLOVENSKI
STANDARDSIST EN 10315:200601-oktober-2006
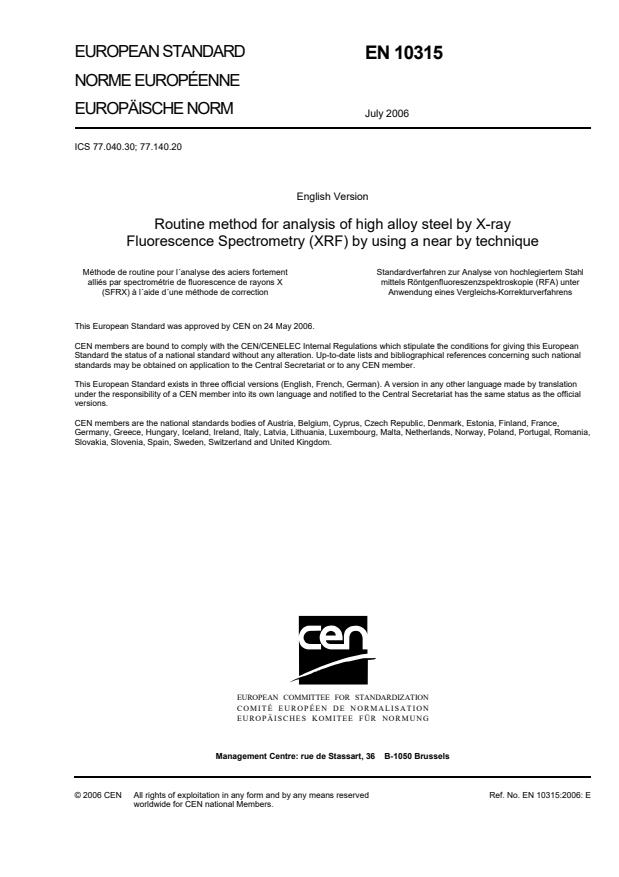
EUROPEAN STANDARDNORME EUROPÉENNEEUROPÄISCHE NORMEN 10315July 2006ICS 77.040.30; 77.140.20 English VersionRoutine method for analysis of high alloy steel by X-rayFluorescence Spectrometry (XRF) by using a near by techniqueMéthode de routine pour l´analyse des aciers fortementalliés par spectrométrie de fluorescence de rayons X(SFRX) à l´aide d´une méthode de correctionStandardverfahren zur Analyse von hochlegiertem Stahlmittels Röntgenfluoreszenzspektroskopie (RFA) unterAnwendung eines Vergleichs-KorrekturverfahrensThis European Standard was approved by CEN on 24 May 2006.CEN members are bound to comply with the CEN/CENELEC Internal Regulations which stipulate the conditions for giving this EuropeanStandard the status of a national standard without any alteration. Up-to-date lists and bibliographical references concerning such nationalstandards may be obtained on application to the Central Secretariat or to any CEN member.This European Standard exists in three official versions (English, French, German). A version in any other language made by translationunder the responsibility of a CEN member into its own language and notified to the Central Secretariat has the same status as the officialversions.CEN members are the national standards bodies of Austria, Belgium, Cyprus, Czech Republic, Denmark, Estonia, Finland, France,Germany, Greece, Hungary, Iceland, Ireland, Italy, Latvia, Lithuania, Luxembourg, Malta, Netherlands, Norway, Poland, Portugal, Romania,Slovakia, Slovenia, Spain, Sweden, Switzerland and United Kingdom.EUROPEAN COMMITTEE FOR STANDARDIZATIONCOMITÉ EUROPÉEN DE NORMALISATIONEUROPÄISCHES KOMITEE FÜR NORMUNGManagement Centre: rue de Stassart, 36
B-1050 Brussels© 2006 CENAll rights of exploitation in any form and by any means reservedworldwide for CEN national Members.Ref. No. EN 10315:2006: E
EN 10315:2006 (E) 2 Contents Page Foreword.3 1 Scope.4 2 Normative references.4 3 Principle.5 4 Reagents.5 5 Apparatus.6 6 Safety precautions.7 7 Sampling.7 8 Final sample preparation.7 9 Procedure.7 10 Calibration.8 11 Standardization.9 12 Statistical Process Control (SPC) parameters.9 13 ”Near by technique” method.10 14 Test report.10 Annex A (normative)
Precision.12 Annex B (normative)
Graphical representation of precision data.17 Bibliography.28
EN 10315:2006 (E) 3 Foreword This document (EN 10315:2006) has been prepared by Technical Committee ECISS/TC 20 “Methods of chemical analysis of ferrous products”, the secretariat of which is held by SIS. This European Standard shall be given the status of a national standard, either by publication of an identical text or by endorsement, at the latest by January 2007, and conflicting national standards shall be withdrawn at the latest by January 2007. According to the CEN/CENELEC Internal Regulations, the national standards organizations of the following countries are bound to implement this European Standard: Austria, Belgium, Cyprus, Czech Republic, Denmark, Estonia, Finland, France, Germany, Greece, Hungary, Iceland, Ireland, Italy, Latvia, Lithuania, Luxembourg, Malta, Netherlands, Norway, Poland, Portugal, Romania, Slovakia, Slovenia, Spain, Sweden, Switzerland and United Kingdom.
EN 10315:2006 (E) 4 1 Scope This European Standard specifies a procedure on how to improve the performance of a routine XRF method, already in use for analysis of high alloy steels, by using a ”near by technique”. The ”near by technique” requires at least one target sample (preferable a CRM) of a similar composition as the unknown sample. The method is applicable to elements within the concentration ranges according to Table 1: Table 1 — Concentration ranges Element Concentration range, % (m/m) a Si 0,05 to 1,5 Mn 0,05 to 5,0 P 0,005 to 0,035 Cr 10 to 25 Ni 0,1 to 30 Mo 0,1 to 6,5 Cu 0,02 to 1,5 Co 0,015 to 0,30 V 0,015 to 0,15 Ti 0,015 to 0,50 Nb 0,05 to 1,0 a The concentration ranges specified, represents those ranges studied during the precision test. The procedure has the potential to be used outside those ranges but it needs to be validated by each laboratory in every case.
The method is applicable to analysis of either chill-cast or wrought samples having a diameter of at least 25 mm and with a carbon concentration of less than 0,3 % (see NOTE). Other elements should have a concentration below 0,2 %. NOTE High carbon concentrations, in combination with high Mo and Cr concentrations, could have undesirable structural effects on the sample and could affect the determination of phosphorus and chromium, in particular. Matrix effects exist between the elements listed. To compensate for those inter-element effects, mathematical corrections shall be applied. A variety of computer programs for corrections is commonly used and included in the software package from the manufacturers. 2 Normative references The following referenced documents are indispensable for the application of this document. For dated references, only the edition cited applies. For undated references, the latest edition of the referenced document (including any amendments) applies. EN ISO 10280, Steel and iron — Determination of titanium content — Diantipyrylmethane spectrophotometric method (ISO 10280:1991)
EN 10315:2006 (E) 5 EN ISO 10700, Steel and iron — Determination of manganese content — Flame atomic spectrometric method (ISO 10700:1994) EN ISO 10714, Steel and iron — Determination of phosphorus content — Phosphovanadomolybdate spectrophotometric method (ISO 10714:1992) EN ISO 14284, Steel and iron — Sampling and preparation of samples for the determination of chemical composition (ISO 14284:1996) CR 10299, Guidelines for the preparation of standard routine methods with wavelength-dispersive X-ray fluorescence spectrometry ISO 4829-1, Steel and cast iron — Determination of total silicon content — Reduced molybdosilicate spectrophotometric method — Part 1: Silicon contents between 0,05 and 1,0 % ISO 4829-2, Steel and iron — Determination of total silicon content — Reduced molybdosilicate spectrophotometric method — Part 2: Silicon contents between 0,01 and 0,05 % ISO 4937, Steel and iron — Determination of chromium content — Potentiometric or visual titration method ISO 4938, Steel and iron — Determination of nickel content — Gravimetric or titrimetric method ISO 4942, Steel and iron — Determination of vanadium content — N-BPHA spectrophotometric method ISO 4946, Steel and cast iron — Determination of copper content — 2,2'-Diquinolyl spectrophotometric method ISO 9441, Steel — Determination of niobium content — PAR spectrophotometric method ISO 11652, Steel and iron — Determination of cobalt content — Flame atomic absorption spectrometric method ISO/TS 13899-1, Steel — Determination of Mo, Nb and W contents in alloyed steel — Inductively coupled plasma atomic emission spectrometric method — Part 1: Determination of Mo content 3 Principle The sample is finished to a clean uniform surface and then irradiated by an X-ray beam of high energy. The secondary X-rays produced are dispersed by means of crystals and the intensities are measured by detectors at selected characteristic wavelengths. The measuring time is set to reach below a specified counting statistical error. Preliminary concentrations of the elements are determined by relating the measured intensities of unknown samples to analytical curves prepared from reference materials, CRM or RM, of known compositions. The final concentrations are calculated by using the results obtained by measuring a CRM of the same grade. The correction is made for the elements of interest by using the difference between the certified value and the value obtained during the measurement of the CRM (the "near by technique"). A fixed channel or a sequential system may be used to provide simultaneous or sequential determinations of element concentrations. 4 Reagents 4.1 P10 gas (90 % argon mixed with 10 % methane) for the gas-flow proportional detector. 4.2 A set of Certified Reference Materials (CRM). All reference material used for calibration or calibration verification shall be certified by internationally recognized bodies (see NOTE).
EN 10315:2006 (E) 6 NOTE A complete set of internationally recognised CRMs to cover all elements at all concentration levels may not be available. Other CRMs could be used if the material is certified by referee procedures based on SI units. 4.3 Reference materials used for standardization or for statistical process control (SPC samples) of the method need not to be certified, but adequate homogeneity data shall be available. Select the standardization samples in such a way that they cover at least the low and top end of the concentration range for each element. 4.4 Pure ethanol. 5 Apparatus 5.1 Sample preparation equipment For the final preparation, use a surface grinder with 180-grit or finer aluminium oxide (see NOTE) belts or discs. Other preparation procedures are also possible (turning, for example). But in each case, the surfaces of CRMs, RMs and samples shall be prepared under the same conditions. NOTE Paper made of silicon carbide will disable Si determinations and paper made of zirconium oxide will disable Zr determinations, and aluminium determinations also sometimes as zirconium oxide is often contaminated by aluminium oxide. 5.2 X-ray fluorescence spectrometer A simultaneous or sequential wavelength dispersive spectrometer. This test method is written for use with commercially available instruments. 5.3 X-ray tube Tube with a high-purity element target. Rhodium is recommended for analysis of steel. 5.4 Analysing crystals To cover all elements specified in this method, flat or curved crystals made of LiF(200) and PE (for light elements, atom no. approximately < 22) are required. Crystals made of LiF(220) and Ge or other crystals optimized for individual elements may also be used. 5.5 Collimators For sequential instruments, a two collimator system is necessary: a coarse collimator for light elements (atom no. approximately < 22) and a fine collimator for heavy elements. 5.6 Detectors One scintillation detector for heavy elements and one gas-flow proportional detector for light elements (atom no. approximately < 22). Sealed proportional detectors may also be used. The combination of detectors and how to use them, in single or dual mode, depends on the equipment used. See the operation manual for the equipment in question. 5.7 Vacuum system A vacuum system capable of keeping the pressure at a constant level below at least 40 Pa during the measurement.
EN 10315:2006 (E) 7 5.8 Measuring system An electronic circuit capable of amplifying and integrating pulses received from the detectors. A computer system with an adequate software package for the calculation of concentrations based on the measured intensities. 6 Safety precautions They shall be in accordance with national regulations for X-ray equipment. X-ray equipment shall be used only under the guidance and supervision of a responsible, qualified person. 7 Sampling Carry out sampling in accordance with EN ISO 14284 or appropriate national standards for iron and steel. 8 Final sample preparation 8.1 Preparation of CRM’s and test samples Grind the samples on a surface grinder (see 5.1) or turn them until the surface is flat and has a uniform finish. The minimum sample size is approximately 25 mm in diameter and with a thickness of at least 5 mm. Before measurement, clean the surface with pure ethanol to avoid dust on the exposed sample surface. If the samples have been stored in air for more than a day, always prepare the surface before the measurement. 8.2 Preparation of standardization samples and check samples Samples used as standardization samples or used for checking the instrument performance should be prepared in the same way as were done during the calibration of the routine method. It is recommended that those samples should have a mirror like surface in order to avoid any influence from the sample preparation. The samples should be stored in a desiccator between measurements. Clean the surface before measurement with pure ethanol. 9 Procedure 9.1 Preparation of apparatus Prepare the instrument for operation according to the manufacturer's instructions. Since most of the instruments are used for routine analyses, it is assumed that they are running and in most cases also already are calibrated for steel. If the instrument has been turned off for a long period (several hours), ensure that the conditions have stabilized before starting the measurements, e.g. temperature and vacuum. Verify the calibration status by analysing the SPC samples or CRMs
...
Questions, Comments and Discussion
Ask us and Technical Secretary will try to provide an answer. You can facilitate discussion about the standard in here.